I remember the first time I ignored a small drip during a dishwasher installation. I thought, “It’s just a tiny leak; it’ll seal itself eventually.” Fast forward a few months, and I was knee-deep in water damage, dealing with mold, costly repairs, and a headache I didn’t see coming. That lightbulb moment made me realize something critical: skipping essential installation steps can turn a small leak into a major disaster. It was a tough lesson, but one that transformed how I approach every appliance installation.
Why skipping proper installation is a gamble you can’t afford
In my experience, many homeowners and even some professionals underestimate the importance of the right installation procedures. They assume that appliances like dishwashers are plug-and-play, but that’s a myth. Ignoring key steps, especially regarding parts and sealing techniques, can lead to slow leaks—those sneaky water drips that cause extensive damage over time. According to the National Fire Protection Association, water damage from leaks costs homeowners billions annually, often due to preventable installation mistakes. Noticing these issues early isn’t just about saving money; it’s about protecting your home from unseen threats.
Is it really worth the fuss to follow every step?
Early in my career, I made a mistake that cost me a warranty claim. I overlooked a simple check on the inlet valve, assuming it was fine because I saw no visible leaks. That small oversight caused a slow leak that eventually was caught too late, invalidating the warranty. Now, I always double-check all connection points, especially the less obvious ones, before completing an installation. Trust me, paying attention to these details makes all the difference—not just for peace of mind but also for ensuring your warranty remains intact. For more insights on protecting your warranty, visit maximizing your dishwasher’s warranty.
So, if you’ve ever wondered whether your installation practices could be risking a slow leak, you’re not alone. The next sections will walk you through the three key steps professionals execute to keep leaks at bay. Implementing these will save you time, money, and a whole lot of stress down the line. Ready to become the neighbor who always gets it right?
.
Secure the Water Supply with Proper Connection Techniques
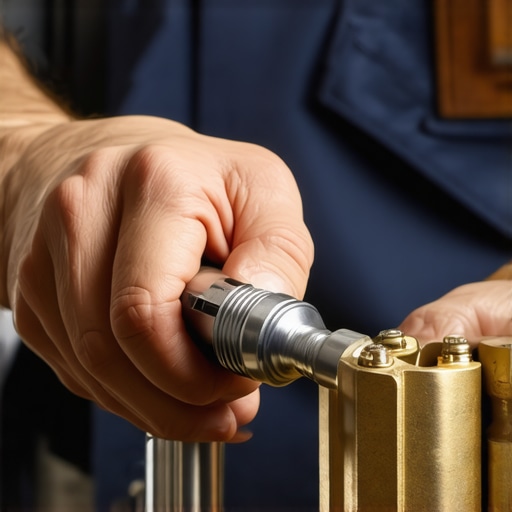
Before attaching the inlet valve, ensure the water supply line is free of damage and appropriate for your dishwasher model. I once rushed this step, using a cheap plastic connector, which led to a slow leak. To avoid this, select high-quality stainless-steel braided hoses from trusted sources, as they last longer and handle pressure better. Use a torque wrench to tighten the compression fittings to the manufacturer-specified settings—over-tightening can damage threads, while under-tightening risks leaks. Remember, this part is crucial for your warranty because any leak from improper connections can void coverage. For detailed guidance on selecting the right parts, check tips for selecting the right parts.
Check and Seal Drainage Correctly
When installing the drain hose, pay attention to its loop height—an inadequate high loop can cause siphoning and odors, while an excessively high loop might restrict drainage. I once neglected this, and rotting water began backing up into my dishwasher. To fix it, I installed a proper high loop approximately 32 inches above the floor, using a clip to secure it under the countertop. Additionally, ensure the drain hose is securely attached using the appropriate clamp—avoid hand-tightened plastic ones; opt instead for constant tension clamps that prevent disconnection over time. Proper drainage isn’t only about functionality but also about preventing warranty issues related to water damage. For more details, see drain hose high-loop requirements.
Position and Secure the Dishwasher for Long-Term Performance
Leveling your dishwasher ensures the door seal contacts uniformly, preventing leaks. I once skipped this step in a hurried install, leading to water pooling and mold growth. Use a bubble level to check side-to-side and front-to-back alignment, then adjust the leveling feet accordingly. Secure the dishwasher under the countertop using mounting brackets, as improper mounting can cause movement, damaging seals and voiding warranties. When tightening brackets, don’t overdo it; instead, follow the manufacturer’s torque specifications—over-tightening can crack the frame or warp the unit. For best results, review installation tips for secure mounting.
Verify Seal Integrity and Conduct Final Checks
Once all connections are in place, inspect each seal—doors, inlet, drain, and the base gasket. Run a short cycle without dishes to monitor for leaks. I once ignored a small water droplet during testing, only to find a major leak days later. To prevent this, use a paper towel to detect early drips and tighten fittings as needed. Also, double-check the electrical connections and the grounding wire—poor grounding can cause electrical failures that void warranties. Proper testing and documentation, such as timestamped photos, are critical for warranty claims, as detailed in warranty documentation guidelines.

Many homeowners believe that installing a dishwasher is a straightforward task—simply connect the water, drain, and power, and you’re done. However, this oversimplification masks nuanced pitfalls that can lead to costly repairs and warranty denials. One overlooked aspect is the significance of choosing the right parts; for example, many assume that generic or low-quality components are sufficient, but in reality, OEM or high-grade aftermarket parts are essential for longevity and warranty compliance. Moreover, a common myth is that tightening fittings by hand is enough—yet, improper torque can cause slow leaks that silently damage cabinetry and floors over time.
Why do so many get the installation process wrong even after years of experience?
The core mistake is underestimating the complexity of effective sealing and connection techniques. For instance, installing the inlet valve with low-quality hoses or neglecting to use proper clamps can void warranty coverage, as detailed in dishwasher parts and warranty guides. It’s also a trap to assume that all parts are interchangeable; compatibility issues often lead to premature failure or warranty claims being denied. Advanced installers understand that small details—like proper grounding, correct high-loop drain positioning, and secure mounting—are the difference between a leak-proof install and a warranty nightmare.
Another misconception is that the warranty covers all repair costs regardless of installation quality. In reality, manufacturers scrutinize installation procedures during claims, especially for leaky or faulty components. According to parts checklists for long-term performance, proper sealing and correct part selection are critical to ensure warranty protection remains valid.
Have you ever fallen into this trap? Let’s dig deeper into how you can avoid these pitfalls. Using the correct tools and understanding the nuances—such as the importance of using stainless-steel braided hoses instead of plastic—are crucial. For example, plastic connectors are more prone to cracking and leaking under pressure, especially over time. This is why many experts advocate for solid brass fittings and high-quality compression nuts, which you can learn more about in brass fittings and leak prevention.
Moreover, understanding the role of certain parts, such as the float switch or the thermal fuse, helps in diagnosing issues during installation and warranty repairs. Neglecting these components or installing them improperly can lead to false alarms or complete failure, risking warranty denial. Dive into effective maintenance through proper parts understanding to demystify these elements.
In summary, the hidden nuance lies in meticulous part selection, precise connection techniques, and a thorough understanding of warranty terms. Skipping these steps might save time initially but can cause long-term headaches and denied claims. Always follow manufacturer guidelines and consider consulting professional resources or expert advice to ensure your installation is airtight. Remember, a small investment in correct parts and proper procedures now can save you thousands in repairs and warranty disputes later. Want to ensure your next dishwasher installation is foolproof? Take the time to get it right—your home and warranty will thank you.
How Do I Keep My Dishwasher Running Smoothly Over the Years?
Maintaining your dishwasher isn’t just about fixing problems when they arise—it’s about proactive care with the right tools and routines. I personally rely on a digital multimeter to verify electrical components such as heating elements and thermistors, ensuring they’re within optimal resistance ranges as outlined in testing your heating elements. This simple yet effective tool helps me catch issues early, preventing costly repairs and warranty claims. Additionally, a high-quality ultrasound leak detector can pinpoint tiny leaks before they escalate, saving thousands in water damage. Tools like these are vital for technicians who aim for thoroughness and longevity in appliance care.
Leveraging software, such as appliance diagnostic apps available on professional technician platforms, can streamline troubleshooting and maintenance schedules. These apps often contain detailed wiring diagrams and part specifications, making diagnostics faster and more accurate, ultimately extending your dishwasher’s lifespan. As technology advances, I foresee integrated IoT sensors inside dishwashers communicating with mobile apps to alert homeowners of potential issues proactively. This trend will further reduce surprise breakdowns and enhance warranty compliance.
Ever Wonder How to Keep Your Dishwasher Components in Top Shape?
Regularly inspecting key parts like door gaskets, spray arms, and filters is crucial. I suggest setting a monthly reminder to disassemble and clean these parts. For example, using a toothbrush and gentle lubricant on door seals prevents cracking and leaks—an action that keeps your warranty valid, according to knowing when to replace parts. Additionally, applying a silicone-based gasket lubricant enhances flexibility and longevity. Keep a record of these maintenance activities with timestamps; doing so can be invaluable if warranty claims surface later.

Another tip is to refresh the water inlet filters regularly—clogged filters can cause poor performance and strain components like the inlet valve, which could lead to leaks and warranty issues. Use a soft brush and vinegar solution to clear mineral deposits. For all these procedures, having a specialized set of tools, such as precision screwdrivers, hose clamp pliers, and inspection mirror, makes maintenance more effective and less time-consuming. Investing in quality tools now ensures you’re prepared for whatever your dishwasher throws at you. For help choosing the right parts and tools, see parts to check for long-term performance.
What Future Trends Will Elevate Your Dishwasher Maintenance Routine?
As smart home integration becomes mainstream, future maintenance will likely involve AI-driven diagnostics that predict failures before occurring. Enhanced sensors could monitor water pressure, temperature, and leak detection in real-time, alerting homeowners via smartphone apps. This shift promises to reduce emergency repairs and warranty denials caused by overlooked early signs. By staying updated with these technological advancements, you can maintain peak performance longer and protect your investment.
The Subtle Lessons that Elevated My Installation Game
One of the most profound lessons I learned was that even the smallest oversight, like ignoring the torque specifications on fittings, can lead to silent leaks that damage cabinets months later. Another insight was that trusting cheap, plastic connectors might save a few bucks initially but can cost me thousands in repairs—and voided warranties—down the line. I also discovered that meticulous part selection, like choosing stainless-steel braided hoses, makes a dramatic difference in the longevity of your setup. These personal lightbulb moments transformed my approach from rushed DIY to professional-grade craftsmanship, proving that attention to detail is the true secret to resilient installations.
My Go-To Tools and Resources for Flawless Dishwashers
Over the years, I’ve come to rely on a few key resources that make installation seamless and warranty-proof. First, Top Tips for Selecting the Right Parts has been invaluable in helping me choose durable, compatible components. Second, I trust this comprehensive guide on warranties and parts for understanding what documentation to keep and how to proceed if issues arise. Lastly, I often consult this troubleshooting toolkit for quick diagnostics, ensuring I catch problems early before warranty claims get complicated.
Sealing Your Success: Take Action Today
Embarking on your dishwasher installation journey with these insights empowers you to protect your home and your warranty. Remember, small steps—like proper part selection, correct connection torque, and thorough seal checks—create a fortress against leaks and breakdowns. The future of your appliance’s performance depends on the care you give now. So, why settle for a subpar setup when mastering these details can save you thousands and stress-free maintenance? Take control today and build a reliably sealed, efficiently running dishwasher that stands the test of time.
What has been your biggest challenge during dishwasher installation, and how did you overcome it? Share your story below—I’d love to hear your experience and tips!
–>
Related Posts
Why Professional Installation is Often Required for Extended Coverage
I vividly remember the moment I realized I had made…
Why You Should Always Keep Your Original Installation Manual
I remember the exact moment I realized I’d fallen into…
The Specific Torque Needed for Leak-Free Water Connections
I'll never forget the day I spent hours troubleshooting a…