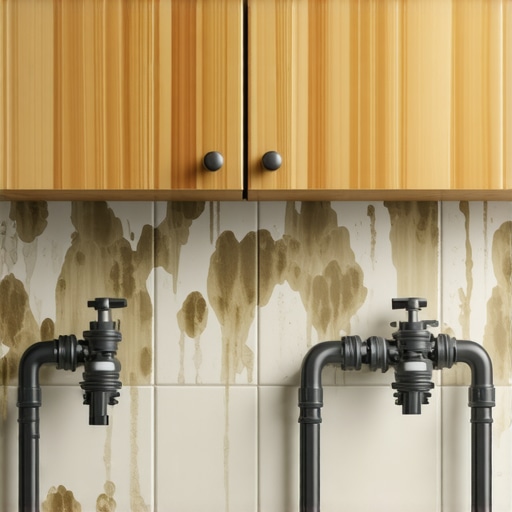
I remember the first time my dishwasher backed up entirely—water spilling onto the kitchen floor, a frantic scramble to stop the flood. It was a lightbulb moment that made me realize just how crucial proper drain setup is. That messy mishap wasn’t just inconvenient; it highlighted a critical oversight I’d made early on: neglecting the high-loop drain hose requirement. Since then, I’ve become quite the advocate for installing the right brackets to prevent such disasters.
Keeping Water Where It Belongs: The Power of a High-Loop Bracket
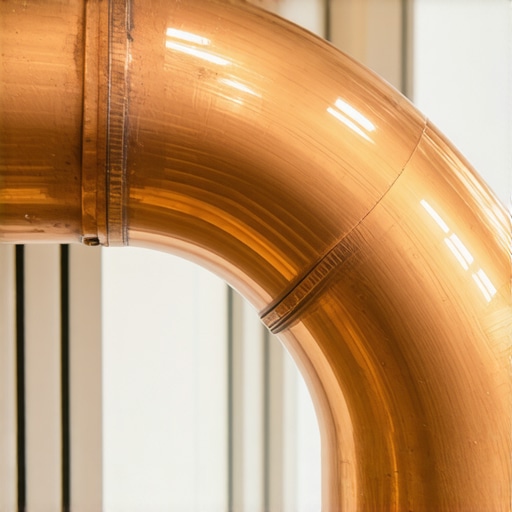
In my journey to become a more informed homeowner, I discovered that many issues with dishwasher drainage—clogs, overflows, or funky smells—often stem from simple mistakes in the drain setup. One of the most overlooked, yet vital components, is the high-loop bracket. This tiny device ensures the drain hose is looped at the correct height, creating a natural siphon break that prevents backflow and sewer gases from entering your machine.
Many folks, including myself in the beginning, assume that just pushing the hose into the drain pipe or under the sink is enough. Spoiler alert: it’s not. Proper installation involves securing that hose with a high-loop bracket at the manufacturer’s recommended height. This simple step enhances your dishwasher’s hygiene, longevity, and even warranty coverage. Want to see how a high-loop bracket can make a difference? Check out this guide on [common dishwasher parts and their role in proper installation](https://appliancedoctorz.com/common-dishwasher-parts-and-their-role-in-proper-installation).
Have you ever faced drainage issues that baffled you? If so, you’re not alone. Properly securing your drain hose with these brackets isn’t just best practice—it’s essential for preventing costly repairs and maintaining your appliance’s warranty. Early in my DIY days, I underestimated this part, leading to a minor flood and a big lesson. Trust me, skipping the high-loop bracket is a shortcut to trouble.
Next, let’s explore why this tiny component might be the most important part you’re neglecting and how to ensure your system is set up for long-term performance.
Secure the Drain Hose Correctly
First, disconnect your dishwasher from power and water sources. Locate the drain hose and inspect its condition—replace if cracked or kinked. Attach the hose to the dishwasher’s drain outlet following the manufacturer’s guidelines, ensuring a snug fit to prevent leaks. Use a high-quality clamp to secure it, avoiding over-tightening which can damage the hose.
Position the High-Loop Properly
Next, elevate the drain hose to meet the recommended height—typically 30 inches from the floor to the bottom of the loop. Use a dedicated high-loop bracket to hold the hose in place at this height. Think of this as training your drain line to stay disciplined; it prevents sewer gases from sneaking back into your dishwasher—a common cause of unpleasant odors and warranty issues. During my own install, I secured the hose using an adjustable bracket, which kept it steady despite the vibration of the cycle, preventing accidental dislodging.
Install the Bracket at the Correct Height
Ensure the bracket is fastened securely to the cabinet or wall, not just the cabinet base. Use appropriate screws and tools—like a drill and screwdriver—to get a tight hold. A loose bracket can cause the hose to sag, defeating the purpose of the high loop and risking backflow. Remember, this tiny bracket acts like a gatekeeper between your clean dishes and your home’s sewer system, ensuring hygiene and compliance.
Connect to the Drain or Waste Line
Connect the other end of the drain hose to the household drain or air gap. If installing into a standpipe or laundry tub, ensure it’s clear of debris and long enough to accommodate the hose’s height, maintaining a proper bend. Avoid using silicone or zip ties alone—secured with a clamp, the hose can withstand pressure and vibrations. I once overlooked this step, and water slowly leaked, reminding me why tight connections matter.
Verify and Test the Setup
After installation, run a test cycle. Check for leaks, unusual noises, or water backing up—any of which indicates improper setup. Inspect the high-loop to confirm it remains at the correct height and is secured firmly. This step is akin to an insurance policy; catching issues early prevents costly repairs and preserves your warranty coverage, which often emphasizes proper drain setup in its fine print. For reference, see [the guide on maximizing warranty benefits](https://appliancedoctorz.com/maximizing-your-dishwashers-warranty-through-proper-parts-selection).
Many homeowners believe that following the basic installation steps secures their dishwasher’s warranty and proper performance. However, what most people overlook are the intricate details and common myths that can silently void your warranty or cause long-term issues. For instance, a widespread misconception is that using generic parts or improvising with aftermarket accessories will not impact your warranty—this isn’t always true. Manufacturers often specify certain parts and installation procedures, and deviations can lead to denial of coverage. To ensure your warranty remains valid, consult resources like [the comprehensive list of dishwasher parts covered by warranty](https://appliancedoctorz.com/the-complete-list-of-dishwasher-parts-covered-by-warranty), which highlights essential components and their compatibility.
A frequent pitfall many fall into is neglecting proper securing of critical connections, such as the inlet valve or drain hose. Over-loosening compression fittings or using improper clamps might seem trivial but can result in leaks or backflow that not only damage your appliance but also void warranties. Remember, manufacturers often specify specific tools and tightening torques—using the wrong ones can lead to over-tightening or incomplete sealing, jeopardizing your coverage. Check out [guides on proper compression fitting techniques](https://appliancedoctorz.com/the-proper-tool-for-tightening-compression-fittings) for expert advice.
Another nuanced aspect is the installation of high-loop drains. The common myth is that dangling the drain hose into the standpipe suffices; in reality, the height and securement are critical. An improperly installed high-loop or a loosely attached hose can cause siphoning issues or backflow, risking your warranty coverage. Ensuring the hose is correctly secured at manufacturer-recommended heights not only prevents water back-up but maintains warranty validity—more info can be found at [the guide to drain hose loops and their importance](https://appliancedoctorz.com/the-dishwasher-drain-loop-mistake-that-causes-quiet-rot-under-your-kitchen-floor).
For advanced DIY enthusiasts, a key question often arises:
Why does improper installation of seemingly minor parts threaten my entire warranty?
The answer lies in the manufacturer’s fine print, which often stipulates adherence to specific procedures for parts like the float switch or water inlet valves. Faulty installation of these parts not only causes malfunction but also opens the door for warranty denial, despite the part itself being covered. Studies have shown that installations deviating from manufacturer’s instructions significantly increase the risk of early failure, emphasizing the importance of detailed adherence for warranty protection.
Remember, a meticulous installation isn’t just about following steps—it’s about understanding the critical nuances. Use quality tools, secure all connections properly, and adhere to height and positioning guidelines. Neglecting these details can be the difference between a long-lasting, warrantied appliance and unexpected expenses. For further insights on parts and warranty coverage, explore [the complete guide to dishwasher parts warranty](https://appliancedoctorz.com/guide-to-dishwasher-parts-warranty-what-you-need-to-know).
Have you ever fallen into this trap? Let me know in the comments.Maintaining your dishwasher over time requires more than just occasional cleaning; it involves investing in the right tools and adopting specific methods that prolong its lifespan and ensure warranty coverage. One invaluable tool I recommend is a high-quality digital multimeter. I use a Fluke 117 because its precision allows me to troubleshoot electrical components like thermostats, circuit boards, or heating elements with confidence. Using a multimeter helps identify failing parts early, preventing costly repairs and avoiding warranty denials due to improper diagnosis.
Another essential piece of equipment is a set of dedicated compression fitting tools, specifically a correct-torque wrench designed for appliance fittings. Properly tightening compression nuts, such as the ones used on water supply lines, is critical to prevent leaks and ensure long-term integrity. I rely on the proper tool for tightening compression fittings to achieve the manufacturer’s recommended torque settings, minimizing damage and voiding warranties.
Additionally, maintaining your dishwasher’s performance entails regularly inspecting key parts like the float switch, circulation pump, and spray arms. I utilize a digital inspection mirror combined with a flashlight to access hard-to-see areas, especially when checking for debris or scale buildup. Familiarity with these components, as detailed in understanding dishwasher parts, empowers me to replace or service them proactively.
Looking ahead, I believe that as smart appliances become more prevalent, diagnostic tools will evolve to include Bluetooth-enabled sensors and apps for real-time performance monitoring. This trend will enhance our ability to perform predictive maintenance, reducing breakdowns and preserving warranty validity.
How do I keep my dishwasher running smoothly? I perform regular visual inspections and use a multimeter to check electrical components every six months. I also replace worn hoses and seals before they fail, guided by insights from when to replace dishwasher parts. Taking these steps helps maintain optimal performance, keeps repairs at bay, and ensures that my warranty remains in effect.
If you haven’t yet, I highly recommend investing in a quality multimeter and a set of torque wrenches designed for appliance fittings. These tools have saved me time and money, and they give me confidence that my dishwasher remains in top shape for years to come. Remember, regular maintenance isn’t just about fixing problems; it’s about preventing them. Start with one tool today, and see the difference it makes in your appliance’s performance.
The Hidden Traps That Cost Me Big Time
One of the toughest lessons I learned was that even small oversights, like a loose clamp or a crooked high-loop, can lead to warranty voiding issues or costly repairs. I used to think that once I followed the basic steps, I was set. But I discovered that manufacturers’ warranties often hinge on the tiniest details—things I thought weren’t that important, like securing the drain hose at precisely 30 inches, can make a huge difference. Going back and double-checking those connections saved me from future headaches and money. Trust me, embracing attention to detail in every step is a game-changer.
Tools and Tips That Changed My Approach
Over time, I found that having the right tools—especially a good torque wrench for compression fittings and a reliable multimeter—transformed my DIY projects. These tools helped me ensure my connections were tight but not over-tightened, preserving warranty coverage. I’ve also leaned heavily on trusted resources like detailed warranty guides to verify that every part and step complies with manufacturer requirements. Investing in proper tools and knowledge made every repair smoother and more predictable, giving me peace of mind that my dishwasher’s warranty stays intact.
Embrace the Power of Proactive Care
My biggest realization is that maintenance isn’t just fixing problems—it’s about preventing them from happening in the first place. Regularly inspecting the high-loop height, tightening clamps to manufacturer-recommended torque, and replacing worn hoses before leaks occur have saved me from emergencies. When I catch issues early, I keep my warranty valid and my dishwasher running efficiently. If you’re serious about your appliance’s longevity, start adopting these proactive habits today. Remember, small daily attentions add up to big savings and peace of mind in the long run.
What’s Your Dishwasher Wisdom? Be Bold!
Have you ever overlooked a simple step that turned into a major headache? Share your experiences or ask your questions below—your insights could help others avoid the same pitfalls. Let’s build a community where we learn from each other’s DIY triumphs and missteps!
Related Posts
The $12 Copper Coupler That Stops Kitchen Floor Rot
I remember the moment I first noticed that unmistakable smell…
Why Reusing Water Supply Lines Often Leads to Moldy Cabinets
It was a quiet Sunday afternoon when I finally decided…
The Critical $7 Grounding Nut Most DIY Installers Forget
It was late Saturday afternoon when I finally finished installing…