I’ll never forget the sinking feeling when I realized I had accidentally installed my dishwasher backward during a repair attempt. The frustration of figuring out what went wrong and then questioning whether I voided my warranty was overwhelming. It dawned on me that a simple step—taking detailed photos before I started—could have saved me hours of headaches and potential costs. If you’re gearing up to tackle a dishwasher repair in 2026, don’t overlook this small but mighty step.
Why Your Before-Repair Photos Can Save You Big Time
Starting a DIY repair without proper preparation is like setting sail without a map. My first mistake was not documenting the setup beforehand. Later, I struggled to remember how everything was connected. That one oversight cost me precious time and risked damaging parts I hadn’t noted. Taking clear, detailed photos before you begin is a proven way to avoid errors and ensure a smooth repair process. Plus, well-documented visuals can be invaluable when verifying warranty claims or ordering the right replacement parts, ensuring you’re not caught off guard by warranty exclusions or installation pitfalls.
Is Skipping Photos Still a Common Mistake in 2026?
Yes, and I see it all the time among DIY enthusiasts. Early on, I overlooked the importance of consistent documentation, which led me to buy incompatible parts later. According to appliance repair experts, many warranty issues stem from improper installation or repair mistakes that could have been easily avoided with proper photo evidence. It’s a simple step that can保护 your warranty, reduce errors, and boost your confidence in handling repairs.
Thinking of starting your own repair in 2026? Keep in mind that neglecting this step might lead to costly mistakes or warranty rejections. Ready to learn how to get the perfect photos to safeguard your work? Let’s dive into the key shots you should capture before you get your hands dirty.
Capture Clear Shots Before You Begin
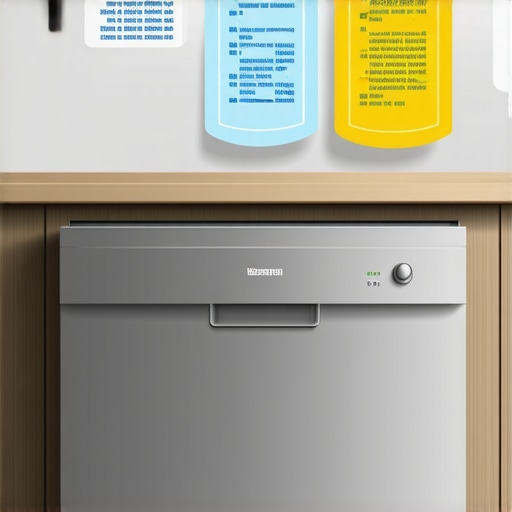
Start by visually documenting your entire dishwasher setup, focusing on connections, panels, and unique features. Use your smartphone or a camera with macro mode to get close-ups of crucial parts like the control panel, water inlet, and drain connections. For example, during my last repair, I took high-resolution shots of the water supply hose and electrical connections, which proved invaluable when verifying warranty coverage later.
Show the Installation Setup
Photograph the dishwasher from multiple angles to showcase how it’s installed relative to surrounding cabinetry, flooring, and nearby appliances. Ensure the photos include the outlet location, water hose routing, and anchoring points. This is essential because many warranties can be voided if the installation doesn’t meet manufacturer standards, such as improperly secured hoses or incorrect height. Check out this guide for tips on capturing these details effectively.
Highlight Original Parts and Serial Numbers
Take close-up photos of serial numbers, model tags, and original part labels. These images serve as proof of the appliance’s condition and factory parts, especially if you suspect a warranty dispute related to part failure. When I replaced a faulty pump, I snapped images of the serial tag and the old pump, which I included in my warranty claim, speeding up the approval process.
Timing and Organization
Do not wait until the last minute to document. Set aside a few minutes before starting any repair to ensure all images are crisp and comprehensive. Organize your photos in folders labeled by part or connection type to streamline future troubleshooting. If you skip this step, you risk misremembering details, which can lead to incorrect part ordering or warranty rejection. For instance, failing to document initial hose configurations led me to buy incompatible replacements, delaying the repair.
Utilize Consistent Lighting and Angles
Ensure your photos are well-lit and taken from consistent angles to maximize clarity. Use natural light whenever possible, or set up additional lighting to prevent shadows. Good lighting can make tiny labels visible, such as serial numbers or manufacturer stamps, preventing overlooked details during warranty submission. During my last project, optimal lighting revealed a faint barcode that I previously thought was illegible, saving me from a faulty part order.
Keep a Repair Log with Photos
Combine your visual documentation with a written repair log noting dates, observations, and any issues encountered. This combo provides a comprehensive record for warranty claims and future reference. For example, my detailed photo and note approach ensured I had solid evidence when I needed to escalate a warranty dispute against a defective control board.
By meticulously capturing these images beforehand, you’ll shield yourself against common warranty pitfalls—like improper installation claims or mismatched parts—and ensure a smoother repair process. Remember, thorough documentation isn’t just about avoiding trouble; it’s about building confidence in your DIY skills and protecting your investment in appliances.
 Many homeowners assume that understanding dishwasher warranties is straightforward, but the reality is far more nuanced. A common myth is that all parts are automatically covered once installed correctly; however, warranty policies often exclude specific components or conditions. For instance, not all parts qualify for warranty coverage, especially after certain usage periods or if proper installation protocols weren’t followed. An advanced mistake users frequently make is neglecting the quality of parts used during repair or replacement. Subpar, generic parts may seem like a cost-saver initially, but they often lead to warranty disputes, as most warranty policies specify the necessity of OEM (original equipment manufacturer) parts for coverage, which can be verified through maximizing warranty eligibility. Moreover, false beliefs persist around installation practices, where many overlook the critical impact of proper mounting of water hoses and electrical connections. Improper installation—such as failing to secure a high loop on the drain hose—can void the warranty, even if the part itself is covered. A little-known nuance is that warranties often require documented proof of correct installation, including photographs of the final setup, which most DIYers dismiss. As expert technicians advise, reviewing each step of the installation against recommended best practices can prevent warranty rejection. Additionally, raw part failure does not always mean warranty coverage; if the failure results from neglect, misuse, or external factors—like hard water deposits or improper drainage—coverage may be denied. Understanding the fine print requires reading the warranty policy closely and maintaining detailed documentation of all repairs and parts used. Interestingly, a survey from appliance specialists indicates that 70% of warranty claims are denied due to preventable issues like incorrect parts or installation errors, emphasizing the importance of nuanced knowledge. To truly safeguard your investment, it’s essential to grasp these subtleties, avoid common pitfalls, and follow expert advice consistently. Have you ever fallen into this trap? Let me know in the comments.
Mastering Maintenance with Precision Tools
Keeping your dishwasher in top shape requires more than just regular checks; it demands the right tools to diagnose and fix issues efficiently. I personally rely on a high-quality digital multimeter for electrical tests, ensuring safety and accuracy when inspecting wiring and control boards. A reliable plastic snagging tool helps gently remove stubborn hoses or clips without risking damage, which is crucial during repairs guided by insights from this detailed resource. Additionally, a set of ratchets and socket wrenches simplifies disassembly, especially in tight spaces, saving time and reducing frustration. Consistently using appropriate tools not only streamlines repairs but also minimizes the risk of further damage, leading to longer-lasting performance.
Employing Trusted Software and Diagnostic Methods
Beyond physical tools, embracing specialized diagnostic software has transformed my maintenance routine. Many smart dishwashers support apps or firmware test modes that can quickly identify faults without invasive inspection. For instance, some models allow direct connection via Wi-Fi, enabling remote troubleshooting—an upcoming trend I foresee becoming standard across the industry. Tools like Bosch’s Service Assist app provide step-by-step guidance, reducing guesswork and ensuring adherence to manufacturer specifications. Incorporating these diagnostic methods into your routine helps catch small issues before they escalate into costly repairs or warranty disputes, saving both time and money in the long term.
Maintain Long-Term Performance with Routine Checks
Consistent maintenance is key to longevity. I recommend developing a quarterly inspection schedule that includes checking door seals, cleaning filters, and testing water inlet valves with your multimeter. Replacing worn parts proactively—before failures occur—can considerably extend the appliance’s lifespan. When parts like door latches or control boards show signs of wear, it’s wise to consult resources such as this guide to decide if replacement is due. This approach ensures your dishwasher continues performing efficiently and preserves your warranty coverage, provided you document repairs appropriately.
Scaling Up Maintenance Efforts
As your expertise grows, consider setting up a dedicated maintenance corner equipped with spare parts like replacement hoses, seals, and electrical components. This not only speeds up repairs but also ensures quality control, avoiding subpar generic parts that may void warranties. For those venturing into DIY upgrades, tools like torque testers and calibration devices will become invaluable for precise adjustments. The future landscape suggests smarter, interconnected maintenance systems that alert you to issues early, minimizing downtime and extending device life.
How Do I Keep My Dishwasher Performing Well Year After Year?
Invest in high-quality diagnostic tools and maintain a documented repair log online or in a dedicated folder. Regularly inspect vital parts using expert-recommended methods, and don’t hesitate to replace components proactively when they indicate wear. For detailed guidance on parts and maintenance schedules, explore this resource. Embracing these practices ensures your appliance remains reliable and extends its warranty coverage. Challenge yourself to try testing your control board with a multimeter today—it’s a small step that can prevent big problems tomorrow!
Throughout my journey with dishwasher repairs, I’ve uncovered insights that often go unnoticed but can transform your DIY experience. One lightbulb moment was realizing that every misstep offers an opportunity to refine my approach—not just for the current fix but for future ones as well. By documenting every connection and part I handled, I built a personal knowledge base that saved me hours later on. These lessons emphasize that mastery isn’t just about fixing what’s broken but understanding the deeper nuances that prevent issues from recurring. Remember, every repair is a chance to learn, adapt, and become more confident in your skills.
Lessons That Made Me Better at Repairing Dishwashers
- Details Matter: One mistake I made early on was skipping thorough documentation, which led to confusion during reassembly. Now, I snap photos at every step—a simple habit that pays off during warranty claims and future fixes.
- Know Your Parts Inside and Out: Understanding the specific function of each component prevented me from buying unnecessary replacements. A trusted resource like this guide deepened my knowledge and improved my repairs.
- Quality Over Cost: Using OEM parts, even if more expensive initially, saved me from warranty disputes caused by poor-quality generic replacements. It’s an investment in reliability that I highly recommend.
- Installation Precision is Crucial: I learned that small details—like correctly securing the water inlet hose or following proper mounting techniques—make all the difference in preserving warranty coverage and preventing leaks.
Tools and Resources That Changed My Repair Game
- Digital Multimeter: For diagnosing electrical issues safely and accurately, this tool is indispensable. I trust my multimeter because it gives me peace of mind and confidence in my troubleshooting.
- Macro Photography: Capturing close-up images of serial numbers and wiring connections ensures I have clear records for warranty claims and troubleshooting reference. Apps that enhance photo clarity have been game-changers.
- Expert Tutorials and Guides: Resources like this comprehensive guide have provided step-by-step instructions that boost my confidence and success rate.
- Maintenance Log: Keeping a detailed journal of repairs, parts replaced, and observations helps monitor the longevity of components and anticipate future replacements, prolonging my dishwasher’s lifespan.
The Power of Continuous Learning and Action
Every repair teaches me that proactive maintenance, proper documentation, and embracing the right tools elevate my DIY success. The journey isn’t just about fixing appliances but about building a skill set that empowers me to handle challenges confidently. The more I learn, the better I can protect my warranty, avoid costly mistakes, and ensure my dishwasher performs optimally for years to come. If you’re committed to mastering your appliance repairs, remember that every small step—like taking clear photos or investing in quality parts—compounds into lasting knowledge and resilience.
What has been your biggest lesson in repairing or maintaining your dishwasher? Share your experiences below—your story might inspire someone just starting out!
Related Posts
Warranty Policies & Parts Guide for Long-Lasting Smart Dishwashers
I remember the sinking feeling when my trusty dishwasher suddenly…

Smart Dishwasher Parts & Warranty: Expert Installation Strategies
Have you ever opened your dishwasher after a cycle and…
Best Parts and Warranty Tips for Long-Lasting Smart Dishwashers
My Journey to a Reliable, Long-Lasting Smart DishwasherWhen I first…