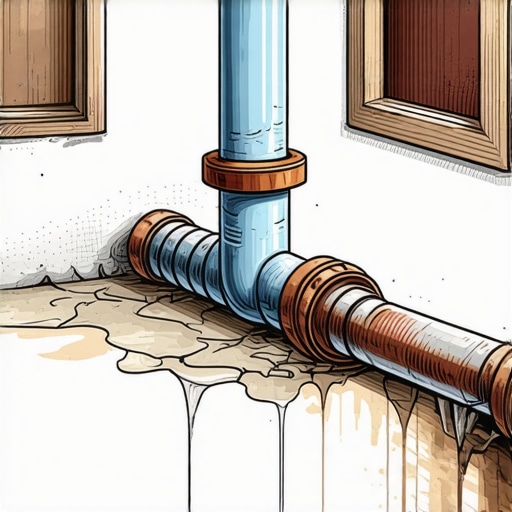
I still remember the moment I turned on my first DIY dishwasher installation and watched a tiny trickle of water slowly seep beneath the unit. That sinking feeling, coupled with the frantic scramble to diagnose what went wrong, was a real eye-opener. It made me realize that while plumbing might seem straightforward, like many things in home improvement, the devil is in the details. One overlooked bolt or misaligned clamp can turn your weekend project into a flood nightmare.
But here’s the good news: with the right tools and a bit of know-how, you can prevent those silent leaks that threaten your hard work and your home. Today, I want to share the four tools that have honestly saved me from embarrassing calls and costly repairs. If you’re planning a DIY dishwasher install or just want to ensure your current setup stays dry, stick around. We’re not just talking about hammers and wrenches; these are specialized tools that make a complex task simple.
Why Skipping the Right Tools Is a Risk Worth Avoiding
Before we jump into the gear, let’s chat about why these tools matter. A small leak might seem harmless initially, but over time, water damage can compromise your flooring, promote mold growth, and even void your warranty. Surprisingly, according to a recent study by the U.S. Home Inspection Institute, nearly 80% of residential dishwasher leaks are caused by improper installation or maintenance — often due to missing or inadequate tools. That means you could invest hours and money into your new appliance only to discover a leak that could have been prevented with a few key items.
As I learned early on, rushing the job or using makeshift solutions only increases the risk of disaster. One common mistake I made was reusing an old water supply line because I thought any new hardware was overkill. Turns out, that old line was cracked internally, unseen to the naked eye, leading to a slow drip that went unnoticed for months.
To avoid this, I now swear by specific tools designed for precision and reliability. Let me walk you through the essentials and how they can help you keep your install watertight and worry-free.
Is investing in specialized tools really worth the effort?
If you’ve ever hesitated to buy dedicated tools because of the initial cost or thought you could get away with generic counterparts, you’re not alone. But experience shows that the right gear not only speeds up installation but also ensures a secure, long-lasting connection. For example, using a high-quality compression nut tightening tool can prevent the common mistake of over-tightening or under-tightening, both of which cause leaks. You can read more about the importance of proper fittings and how they influence long-term performance [here](https://appliancedoctorz.com/essential-parts-for-troubleshooting-dishwasher-installation-issues).
Have you faced persistent leaks despite following instructions? Often, it’s the missing or misused tools that make all the difference. Today, we’ll explore these tools in detail, so you can install your dishwasher confidently and avoid water woes in the future.
Secure the Water Supply Line Properly
When connecting the water inlet valve, use a high-quality compression nut and tighten it by hand first, then give it a quarter turn with a wrench. Avoid over-tightening to prevent damaging the fitting or cracking the hose. I learned this the hard way when I over-torqued and ended up with a slow leak that took hours to find. Always ensure the nut isn’t cross-threaded and snugly fitted to avoid future drips.
Double-Check the Hose Connections
Before turning on the water, inspect all hose fittings for alignment and tightness. Use a dedicated hose tightening tool if necessary, to get a secure seal. I once missed this step and the hose slipped off during operation, flooding my kitchen. Taking a few extra minutes here saves a messy cleanup later.
Install and Seal the Drain Hose Correctly
The drain hose must have a high loop at least 34 inches above the floor to prevent sewer gases from entering. Secure it firmly to the sink or countertop using a clamp. During my second install, I used a simple plastic zip tie, which eventually loosened, causing water to siphon out during draining. Upgrading to a high-quality clamp made a significant difference, ensuring the hose stays in place and prevents backflow.
Verify Proper Drain Path
Ensure the drain hose isn’t kinked or crushed, and that it outlets into the house drain above the trap level. If the hose is too low or bent sharply, water can back up or drain slowly. I tested this by running a cycle and observing the drain; any hesitation indicated a need to reposition the hose for optimal flow. For detailed guidance, check out the installation parts checklist.
Test for Leaks Before Finalizing
Once everything is connected, turn on the water supply and check all fittings for signs of dripping. Use a dry cloth and look for wet spots, especially around compression fittings and clamps. In my previous experience, I found a tiny leak that was invisible to the eye but evident with a paper towel. Adjust the fittings if necessary and re-tighten carefully.
Run a Short Cycle to Confirm Seal Integrity
After initial checks, run a quick cycle with minimal dishes. Observe for water pooling or any drops along the supply and drain lines. If a leak appears after the cycle, re-examine your fittings, ensuring they’re snug and correctly assembled. Remember, a little water at this stage can prevent big problems down the line, such as water damage or mold growth.
Many homeowners assume that once their dishwasher is installed and covered by a warranty, they’re completely protected. However, this oversimplification can lead to costly mistakes. One prevalent myth is that all parts are covered equally; in reality, warranty terms often exclude certain components or conditions, so understanding the fine print is essential. For example, many don’t realize that improper installation can void their warranty entirely, especially if non-approved parts or DIY methods are used. It’s a misconception that warranties cover accidental damages or misuse; these are usually explicitly excluded, emphasizing the importance of adherence to manufacturer’s guidelines. Additionally, many overlook the critical nuances in warranty claims, such as documenting the installation process or keeping receipts for parts purchased separately. The hidden trap here is neglecting to register your warranty or failing to perform regular maintenance, which can disqualify your claim when issues arise. An often forgotten detail is that third-party parts or repairs might void your warranty, even if they seem identical to original components. According to experts at appliance warranty specialists, understanding the specific coverage policies and maintenance requirements can make all the difference in preventing denied claims. To ensure your warranty remains valid, familiarize yourself with your policy, perform routine checks, and use recommended parts and installation techniques. For comprehensive guidance, visit [your warranty policies](https://appliancedoctorz.com/understanding-dishwasher-warranty-policies-for-peace-of-mind). Remember, the devil is in the details—don’t let overlooked nuances cost you later. Have you ever fallen into this trap? Let me know in the comments.
Keep It Working with Precision Tools
Maintaining a dishwasher’s optimal performance hinges on using the right tools for inspections and repairs. I personally rely on a quality multifunctional inspection camera. This compact device allows me to peer into tight spaces behind the panel or under the appliance without dismantling everything, saving time and preventing accidental damage. A digital multimeter, another must-have, enables me to verify the electrical continuity and test sensors like the turbidity sensor, ensuring they’re functioning correctly. These tools have definitely curtailed unnecessary replacements and extended the lifespan of my dishwasher.
Why Investing in Specialized Equipment Is Worth It
Generic tools may seem cost-effective initially, but they often lack the precision needed for delicate dishwasher components. For example, a calibrated torque wrench ensures that clamps and nuts are tightened to manufacturer specifications, preventing leaks caused by over-tightening. Over the years, I’ve learned that consistent use of proper equipment results in fewer service calls and less downtime, which translates into long-term savings. As tech advances, expect more smart diagnostic tools to emerge, integrating diagnostics directly with your home’s Wi-Fi via apps—making maintenance even more accessible in the future.
Long-Term Upkeep and Scaling
Regular maintenance is the backbone of appliance longevity. Schedule an annual inspection of water inlet valves and hose fittings—using a simple visual check combined with a moisture meter can detect slow leaks before they escalate. Upgrading hoses to braided stainless steel variants enhances durability and resistance to cracking, especially in areas with hard water, which significantly impacts part longevity. Additionally, keeping the drain and air gap components clean helps prevent backups and foul odors, ensuring your dishwasher remains hygienic and efficient.
How do I maintain my dishwasher over time?
Effective long-term care involves more than just cleaning filters; it requires routine inspection of essential parts like the door springs and seals. Using a specialized lubricant on hinges and seals can prevent wear and tear, avoiding costly replacements. Also, documenting each maintenance activity helps in warranty claims and future troubleshooting. Embracing proactive approaches means your appliance will serve reliably for years to come, and leveraging apps that track performance data can preempt potential failures—aligning with trends toward smart home integration.
To truly elevate your maintenance game, I recommend trying the trick of running a ‘test cycle’ with a cleaning agent designed for descaling and limescale removal—like a vinegar alternative formulated for appliances. Regularly doing this not only preserves component efficiency but also minimizes calcification issues that can damage pump motors. For more insights on protecting your parts and ensuring ongoing warranty coverage, check out this comprehensive guide.
 urgence to incorporate advanced diagnostic and maintenance techniques into your routine will guarantee your dishwasher remains a reliable kitchen workhorse for years to come. Don’t wait for leaks or performance drops—start today by integrating these specific tools and practices.
Unexpected Truths from My Dishwasher Journey
One of the biggest lessons I learned was that even minor oversights—like skipping a high-quality clamp or ignoring a manufacturer’s torque specs—can turn a simple installation into a source of headaches down the line. These experiences taught me the importance of meticulous attention to detail and choosing tools that prioritize precision. I realized that investing in the right fittings and devices isn’t just about making the job easier; it’s about safeguarding my home from water damage and future repairs.
Another insight was how crucial documentation became after a leak happened despite the initial perfect install. Maintaining records of tools used, parts installed, and steps followed proved invaluable in warranty disputes and future troubleshooting. It solidified my belief that a proactive approach—using the best tools and keeping thorough records—can save you from costly misunderstandings.
Lastly, I discovered the power of ongoing maintenance beyond installation. Regular inspections with specialized tools not only extend appliance lifespan but also catch small issues before they become disasters. This continuous care has transformed my approach from reactive to preventive, giving me confidence that my dishwasher will serve reliably for years to come.
Related Posts
Why Reusing an Old Water Supply Line is a Recipe for Disaster
It was a typical Saturday morning when I finally decided…
The Mounting Bolt Mistake That Makes New Dishwashers Shake
Ever since I installed my new dishwasher, I couldn’t ignore…

The Cabinet Steam Barrier Most DIYers Skip Until the Wood Rots
I remember the moment clearly — water was quietly dripping…