Have you ever stood in your kitchen, staring at that stubbornly tight cabinet space, questioning how anyone ever managed to install a dishwasher there without cursing the entire project? I’ve been there myself. The first time I tried to slide a bulky dishwasher into a cramped corner, I felt like I was trying to squeeze an elephant through a keyhole. It was frustrating, and honestly, it made me doubt whether a successful install was even possible without professional help.
Why Getting This Right Can Save You Headaches and Dollars
Here’s the truth: installing a dishwasher in a tight space isn’t just about making it fit—it’s about ensuring long-term performance, ease of maintenance, and even preserving your warranty. I learned that a poorly installed dishwasher, especially in confined spots, can lead to leaks, noises, or even early failure. And no one wants to deal with landmines hidden behind cabinetry years down the line.
Why is it so tricky to install in tight spaces?
It’s mainly due to limited room for maneuvering the appliance, aligning hoses, and securing mounting brackets properly. I initially thought a quick shove would do the trick, but I soon realized that rushing can lead to critical mistakes, like damaging the drain hose or forgetting to level the unit, which can cause operational issues down the line. In fact, according to appliancedoctorz.com, understanding your dishwasher’s parts and how they fit together is essential for effective installation and maintenance.
So, if you’re like me, determined to tackle this challenge head-on, stay with me. I’ll guide you through strategies to make this daunting task manageable, revealing the smartest ways to install your dishwasher securely—no matter how tight the space is. And trust me, once you master this trick, those tight corners will no longer be a headache but a badge of your DIY prowess.
Prepare Your Workspace for Success
Before diving into installation, clear the area and identify potential obstacles like cabinetry hinges or plumbing access. Use a level to check the countertop or flooring; a tilted dishwasher can cause leaks and uneven operation. I remember the first time I installed my dishwasher, realizing I overlooked this step led to multiple readjustments later. Always shut off water and power sources before beginning. Visit this guide for detailed prep steps.
Secure Proper Parts and Tools
Gather Essential Components
Use quality parts tailored for your model: a brass inlet valve, durable braided supply hoses, and a high-quality drain pump. Proper parts maximize warranty coverage and long-term performance. Remember, reusing old hoses or cheap plastic fittings can jeopardize warranties and lead to leaks. Check top tips for selecting the right parts.
Assemble Necessary Tools
Tools like a socket wrench set, screwdrivers, a multimeter for electrical checks, and a level are non-negotiable. Having a rubber mallet helps snug fittings without damage. I once tried to force fittings with a hammer, which cracked the plastic bracket—after that, I replaced the entire unit. Proper tools save time and prevent costly mistakes.
Connect Plumbing and Electrical Components
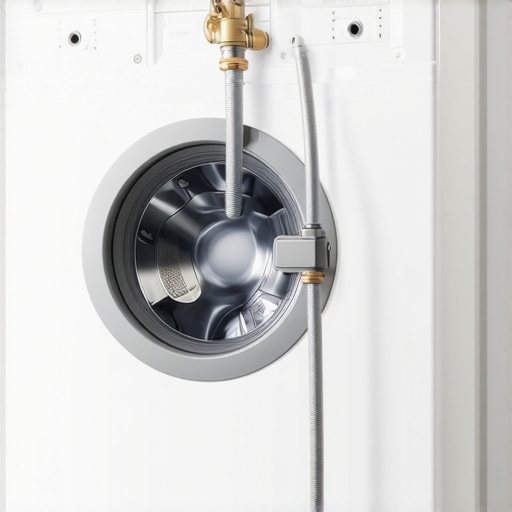
Attach Water Supply Line Correctly
Use a brass compression fitting and tighten by hand plus a quarter turn with a wrench; avoid over-tightening, which can crack fittings or deform hoses. Incorporate a high loop in the drain hose—this prevents backflow and water siphoning problems. When I installed my unit, I initially ignored the high loop. Later, I encountered a foul smell from backflow, which was solved by re-routing the drain hose properly. See this resource for details.
Electrical Connection Tips
Ensure the dishwasher’s power cord is connected to a dedicated circuit with grounded outlets. Test the circuit with a multimeter to confirm voltage. I once had a neighbor’s unit shutting down randomly because of a loose connection; I recommend periodically testing your setup for peace of mind. Proper electrical wiring not only protects the appliance but also safeguards your home.
Level and Secure the Machine
Position the dishwasher between cabinets and use a spirit level to check front-to-back and side-to-side alignment. Adjust leveling feet as needed; for stubborn cases, a simple wooden shim can provide extra support. Precise leveling ensures proper door sealing and prevents vibration during operation. I learned this the hard way when my unlevel dishwasher caused leaks and noisy cycles—correcting the tilt restored quiet operation and prolongs the appliance’s lifespan.
Finalize Installation and Test Run
Double-check all connections, tighten mounting brackets, and secure the unit to the countertop if necessary. Turn on water and power, then run a short cycle to verify water intake, drainage, and operation. Observe for leaks or abnormal noises. Document the installation with photos, especially if deviations from standard procedures occur, to facilitate warranty claims if needed. For detailed troubleshooting and tips, visit installation troubleshooting resources.
Many homeowners assume that selecting the right parts or following standard installation procedures guarantees long-term performance and warranty coverage. However, the real challenge lies in understanding the nuanced roles certain components play and how common misconceptions can lead to costly mistakes. For instance, a frequent myth is that using generic replacement parts won’t affect warranty validity. In truth, manufacturers often specify that only OEM or approved components are permissible, and deviation can void your warranty—an important detail often overlooked. Additionally, the assumption that tightening hose fittings by hand is sufficient can be a trap; over-tightening or under-tightening can cause leaks or fittings to fail prematurely, emphasizing the importance of knowing the correct torque levels, as detailed in this guide. Advanced installers understand that certain parts, like inlet valves or drain pumps, possess specific tolerances and installation alignments; neglecting these nuances can lead to operational issues and warranty denials. A common mistake is ignoring proper electrical grounding; even a minor oversight here can result in damage to the control board or void warranty protections, underscoring why detailed wiring knowledge matters. Have you ever fallen into this trap? Let me know in the comments. Keep in mind that understanding these subtle distinctions, such as the importance of correctly routing the drain hose to prevent siphoning or backflow, protects your investment and ensures compliance with warranty policies. For a comprehensive overview, visit this resource. Mastering these intricacies transforms a standard DIY project into a professional-level installation, reducing the risk of future repair costs or warranty disputes.
Tools You Can Trust for Long-Term Performance
When it comes to maintaining your dishwasher, having the right tools at your disposal makes all the difference. I personally rely on a quality digital multimeter, such as the Fluke 117, because it provides accurate readings of electrical components like thermostats and control boards, helping me diagnose issues without guesswork. Additionally, a set of precision screwdriver bits allows me to access tight compartments and secure connections efficiently. For leveling and minor adjustments, a reliable spirit level is indispensable—I’ve found that even small misalignments can lead to leaks or uneven water distribution.
Using Software for Preventive Maintenance
Modern dishwashers often include diagnostic modes accessible via touchscreen interfaces or dedicated apps. I recommend familiarizing yourself with these features; they can alert you to developing problems like out-of-range temperature sensors or faulty water inlet valves before a total breakdown occurs. Apps that connect to smart dishwashers can log cycle data and provide reminders for filter cleaning or part replacements, extending the lifespan of your appliance. Looking ahead, I predict that AI-driven diagnostic tools integrated into home appliances will become standard, making maintenance even more straightforward.
Regular Inspection and Cleaning
Beyond tools, routine checks are vital. For example, inspecting the inlet valve for mineral buildup or debris can prevent water flow issues, as highlighted in this resource. I regularly remove the spray arms and clean nozzles with a toothbrush and vinegar solution to prevent clogging. Also, testing the door springs periodically ensures proper sealing and prevents leaks that could void your warranty. A small investment in these habits pays off by avoiding costly repairs down the line.
How Do I Maintain My Dishwasher Over Time
To keep your dishwasher humming along, follow a schedule of inspecting and replacing wear-and-tear parts like the door gasket and inlet valve. Using manufacturer-recommended detergents and avoiding overloading the machine also preserve seals and internal components. For more comprehensive guidance, I suggest reviewing this detailed guide. Remember, proactive maintenance not only maintains performance but also maximizes your warranty coverage, as explained in this article.
One advanced tip is to periodically test the control board voltage with your multimeter to catch early signs of failing components. This simple yet effective practice can save you from sudden breakdowns. Don’t wait for a leak or error code—regular checks keep your dishwasher functioning smoothly for years to come!

Lessons That Changed My Perspective on Parts, Dishwasher, Installation, and Warranty
- One of the hardest lessons I learned was realizing that not all parts are created equal. Using generic or cheap components might save a few dollars upfront but can jeopardize warranty coverage and long-term performance. The importance of trusting OEM-verified parts became clear only after a costly leak occurred due to a subpar inlet valve.
- I used to think that installation was just about fitting the dishwasher into the space. Turns out, proper leveling and securing prevent vibration and leaks, which directly influence warranty validity. A small misalignment might seem insignificant but can void your warranty—a fact I learned the hard way.
- Another revelation was the significance of understanding warranty policies. Knowing what voids your warranty—like improper parts or installation mistakes—empowers you to make informed decisions. Regularly consulting resources like this guide helped me navigate warranty terms confidently.
- Finally, I discovered that a seemingly minor mistake, such as ignoring the high loop requirement for the drain hose, can cause backflow issues and jeopardize warranty claims. Paying attention to these small details truly saves time, money, and frustration in the long run.
My Toolbox for Long-Lasting Dishwasher Performance
- Fluke 117 Multimeter: Reliable for electrical diagnostics, ensuring your control boards and sensors are functioning properly. Trust is key here—I’ve relied on this tool for years.
- Precision Screwdriver Set: Perfect for tight spaces and delicate fittings. Quality tools prevent damage and make installation smoother.
- Spirit Level: Ensures your dishwasher is perfectly aligned, preventing leaks and operational issues. Small adjustments with this simple tool make a big difference.
- Vinegar and Brush Kit: Keep spray arms and nozzles clog-free by regular cleaning. Simple maintenance goes a long way.
Believe in Your Ability to Transform Your Kitchen
Every successful dishwasher installation in a tight space boosts your confidence and enhances your home’s functionality. Remember, understanding the nuances of parts and proper installation practices can turn a daunting project into a satisfying achievement. Don’t wait for problems—embrace proactive maintenance, stay informed through trusted resources, and celebrate your DIY victories. The future of efficient, leak-free dishwashing is within your reach—start today and enjoy the peace of mind that comes with a job well done!
Have you ever encountered a tricky installation challenge or discovered a warranty pitfall? Share your stories below and let’s learn from each other’s experiences!
.
Related Posts
Why Your Drain Hose High Loop Is Non-Negotiable for Safety
It was a frustrating Saturday when I discovered water pooling…
Why Your Dishwasher Door Won’t Latch After a Floor Renovation
It was a morning like any other, until I went…

Why Reusing an Old Copper Water Line is a Disaster Waiting to Happen
I vividly remember the moment I realized my quick fix…