Ever had that sinking feeling when you open your dishwasher and see a puddle of water pooling at the bottom? I’ve been there, and let me tell you, it’s a frustrating, head-scratching experience that can turn a simple kitchen task into a mini disaster. I remember the first time I installed my dishwasher, thinking I had everything perfect, only to discover a slow leak after a week. It was a lightbulb moment: even small parts like fittings can make or break the entire installation’s success.
Why Choosing the Right Copper Fittings Is a Game Changer
The truth is, in 2026, leak-proof dishwasher installations hinge on more than just good DIY intentions. It’s about selecting the right components—like high-quality copper fittings—that ensure a reliable seal and long-lasting performance. I learned this the hard way when I initially opted for cheap plastic connectors, which failed me just months after installation. Since then, I’ve made it my mission to understand the vital role of quality fittings. Want to avoid the same pitfalls? Let’s dive into how the right copper fittings can save your kitchen from water messes and maintenance nightmares.
Are Copper Fittings Overhyped or Essential?
At the start, I thought any fitting would do as long as it looked decent. My early mistake was assuming all fittings are created equal—turns out, that’s far from true. The difference between a solid copper fitting and a flimsy, generic one can be the barrier between a leak-free setup and a flooded kitchen. I’ve also come to realize that many installers overlook the importance of compatible fittings, which can void warranties and cause long-term damage. To make sure your installation isn’t just good on paper but actually reliable, I recommend checking out [common dishwasher parts and their role in proper installation](https://appliancedoctorz.com/common-dishwasher-parts-and-their-role-in-proper-installation).
Stay tuned, because I’ll walk you through the top five copper fittings that will make your dishwasher install not just secure but practically leak-proof in 2026. Ready to get your hands on parts that truly last? Let’s go!
.
Prepare and Inspect Before Starting
Before you begin, gather all necessary high-quality copper fittings and tools. Turn off the water supply to prevent any accidental leaks. Remove the old supply lines, inspecting them for wear or damage. I once overlooked this step, which led to a minor leak during installation, but a quick re-inspection saved me from a bigger flood. Check the compatibility of your fittings with your dishwasher model by consulting [common dishwasher parts and their role in proper installation](https://appliancedoctorz.com/common-dishwasher-parts-and-their-role-in-proper-installation). Ensure all parts are clean and free of debris to guarantee a tight seal.
Cutting and Shaping Copper Fittings
Measure and Mark Precisely
Accurate measurements are critical. Use a ruler or measuring tape to determine the length of pipe needed, adding extra for fittings. Mark the pipe with a marker for clean cuts. When I replaced my supply line, I mistakenly cut too short, which caused fitting misalignment. Double-check measurements to avoid rework. Properly measuring ensures your installation will be smooth, reducing chances of future leaks.
Use a Quality Pipe Cutter
Invest in a good pipe cutter to make clean, straight cuts. A jagged edge can prevent fittings from sealing properly. I once attempted a quick snip with scissors, which resulted in an uneven edge and a leak. After switching to a dedicated pipe cutter recommended in [top tips for selecting the right parts for dishwasher installation](https://appliancedoctorz.com/top-tips-for-selecting-the-right-parts-for-dishwasher-installation), my connections became airtight. Smooth cuts help the fittings slide on easily and seal tightly, preventing leaks.
Connecting Copper Fittings Properly
Apply a suitable flux to the pipe ends for better adhesion, especially for potable water lines. Insert the fitting into the pipe, ensuring it sits flush. Use a comprehensive [installation torque guide](https://appliancedoctorz.com/parts-installation-tips-for-durable-smart-dishwashers) to tighten fittings without overdoing it. I once overtightened a fitting, causing a crack; following a torque chart prevented future damage. Tighten until secure but avoid excessive force, which can deform the fittings or cause leaks.
Ensuring Seal Integrity
Once assembled, conduct a pressure test. Turn the water supply back on gradually, observing for drips or leaks at fittings. If you notice any, retighten slightly or disassemble and reapply flux before reassembling. Remember to verify the connection with [warranty and parts for reliable smart dishwasher installation](https://appliancedoctorz.com/warranty-policies-parts-for-reliable-smart-dishwasher-installation). Proper sealing prevents water pooling and ensures your dishwasher operates efficiently.
Final Checks and Maintenance
After installation, check all connections again once the system is pressurized. Inspect for leaks over the next 24 hours, especially during initial use. Keep a record of your part replacements and installation date, referencing [when to replace dishwasher parts for optimal performance](https://appliancedoctorz.com/when-to-replace-dishwasher-parts-for-optimal-performance). Regular maintenance, like tightening fittings and inspecting hoses, extends your dishwasher’s lifespan and safeguards your warranty coverage.
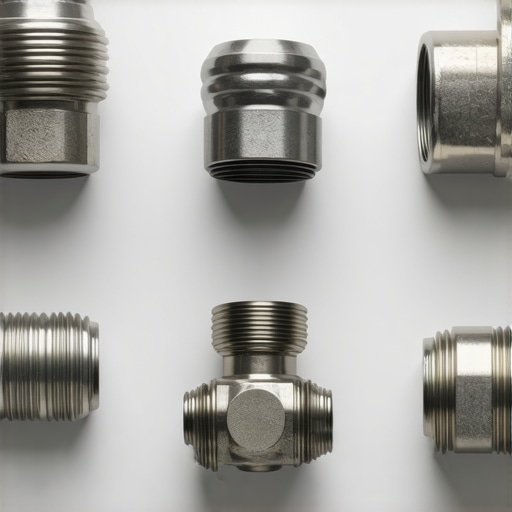
#IMAGE_PLACEHOLDER_B#**prompt:**
Many homeowners believe that all dishwasher parts are created equal or that DIY installation guarantees warranty protection. However, these assumptions can lead to costly mistakes and voided warranties. One common myth is that using generic replacement parts won’t impact your warranty. In reality, as highlighted in expert guides, inferior parts may fail prematurely and disqualify your coverage, especially if the manufacturer specifies high-quality components for warranty validity. Moreover, there’s a misconception that tightness and proper fitting are all that matter; neglecting nuanced installation details like proper flux application or correct pressure testing can cause subtle leaks that only reveal themselves during warranty inspections. Understanding these nuances ensures your repair or installation doesn’t unintentionally sabotage your warranty rights. Be cautious of common pitfalls like reusing old hoses, ignoring manufacturer guidelines, or skipping pressure tests—these seemingly minor errors often have significant repercussions. Remember, the difference between a reliable, leak-proof setup and a warranty nightmare lies in attention to these advanced details. Have you ever fallen into this trap? Let me know in the comments, and stay tuned for more expert insights to keep your dishwasher functioning flawlessly.
Keep It Running with Precision Tools
Ensuring your dishwasher remains leak-free and efficient over time hinges on using the right equipment. I rely heavily on a digital infrared thermometer to monitor the temperature at connection points, alerting me to potential overheating or leaks before they escalate. This small device, which I calibrated monthly, has saved me from costly repairs by catching issues early. Additionally, a quality torque wrench—set specifically to manufacturer recommendations—allows me to tighten fittings without overdoing it, maintaining seal integrity and protecting warranties. Investing in a pipe reaming tool ensures copper pipes are deburred, preventing damage to fittings and ensuring smooth connections. These tools, combined with meticulous attention, have been pivotal in my maintenance routine.
Developing a Maintenance Routine for Reliability
Regular inspections are vital. Every three months, I check all accessible fittings and hoses for signs of wear or corrosion, referencing the detailed guides at this resource. I’ve learned that replacing worn hoses proactively, rather than waiting for leaks, extends the lifespan of my dishwasher and keeps warranties intact. Also, I verify that all connections are tight and that no debris or mineral buildup obstructs water flow. Maintaining a log of inspections and part replacements helps me identify patterns, anticipate failures, and plan timely upgrades.
Advancing with Diagnostic Software and Upgrades
In the era of smart appliances, I’ve started using diagnostic apps—such as the official manufacturer software—that connect via Bluetooth to pinpoint issues with pinpoint accuracy. These tools analyze error codes, monitor cycle performance, and suggest targeted fixes, significantly reducing downtime. For instance, when my dishwasher exhibited inconsistent wash cycles, the app identified a faulty sensor, prompting me to replace a specific part recommended in this guide. Future trends point toward integrated IoT diagnostics that will automatically alert homeowners to issues, making maintenance even more seamless and predictive.
How do I keep my dishwasher working smoothly over time?
Adopting a regimen of proactive inspection, precise tightening with a torque wrench, and utilizing diagnostic tools is key. Paying close attention to wear and tear and replacing essential parts early—like hoses and fittings—can prevent costly water damage and warranty claim rejections. Remember, using high-quality, compatible parts and following manufacturer guidelines (like those found in this article) ensures your long-term success. I recommend starting with a diagnostic app to catch issues before they become emergencies. Regular maintenance not only prolongs your appliance’s life but also safeguards your warranty coverage, saving you time and money in the long run. For expert advice, consider investing in a digital infrared thermometer and quality torque wrench today—small tools can lead to big savings!
Lessons From the Front Lines of Dishwasher Repairs
- My biggest lightbulb moment was realizing that even minor oversights in parts selection or installation technique could turn a simple project into a warranty nightmare. For example, reusing old hoses not only risks leaks but also voids warranty coverage, so I always recommend a thorough inspection first.
- Applying the correct amount of torque with a quality wrench isn’t just about tightness; it’s about harmonizing with manufacturer specifications to ensure lasting seals. Skipping this step has caused more than one call-back for leaks.
- Investing time in proper pressure testing after installation might seem tedious but can save countless headaches later. Catching a small leak early is far easier than dealing with water damage or warranty denials down the line.
- Understanding warranty policies and their fine print helped me avoid pitfalls that could disqualify coverage. Trust me, knowing which parts are covered — especially high-failure items like copper fittings — makes all the difference.
- And finally, choosing high-quality copper fittings was a game-changer. Not all fittings are created equal, and opting for durable, compatible components ensures your dishwasher remains leak-proof for years to come.
Tools and Resources That Keep Me Ahead
- My go-to is a digital infrared thermometer, which helps monitor connection points for overheating issues that could lead to leaks. It’s an early warning system I rely on regularly.
- A reliable torque wrench, set to manufacturer-recommended torque, prevents overtightening or under-tightening fittings, both of which can cause problems.
- For precise pipe shaping, a high-quality pipe cutter coupled with a deburring tool has made a huge difference in ensuring airtight seals. Clean cuts and smooth edges are essential for leak-free connections.
- The detailed guides at this resource have become my blueprint for selecting and inspecting every component during installation, keeping long-term reliability at the forefront.
Your Next Step in Mastering Leak Prevention
Taking charge of your dishwasher installation and maintenance isn’t just about avoiding water damage; it’s about gaining confidence in your home repairs. Start with quality parts, use the right tools, and keep learning. Remember, each successful project builds your skillset and peace of mind — so don’t hesitate to try, learn, and improve. Are you ready to implement these insider tips for a leak-proof 2026? Share your experiences below, and let’s keep the conversation going!
.
2 Replies to “5 Copper Fittings for a Leak-Free Dishwasher Install [2026]”
Leave a Reply
Related Posts

Don’t Reuse These 5 Parts During a 2026 Dishwasher Install
I vividly remember the moment I first installed my new…
Stop the Leak: 5 Fittings for Your 2026 Dishwasher Install
Ever felt that sinking feeling when, just days after installing…

Best Tips for Reliable Dishwasher Parts & Installation Trust in 2025
Discovering the Secret to Reliable Dishwasher Parts — My Personal…
Reading this post really hit home about how critical it is to select high-quality copper fittings for dishwasher installations. I once made the mistake of using cheap fittings on my first DIY project, and it unfortunately led to a slow leak that I didn’t catch immediately. It was a lesson in patience and attention to detail, especially when it comes to tightening fittings and applying the right amount of torque. I now always double-check with a torque wrench and make sure to pressure-test thoroughly before finishing up. I also started using a digital infrared thermometer to monitor connection points, which has been a game-changer in catching potential issues early. Has anyone else experienced leaks that seemed minor but caused major headaches later? I’d love to hear how you managed or prevented them—sharing such tips can help everyone avoid costly repairs and protect warranty coverage.
I couldn’t agree more with the importance of high-quality copper fittings, especially when considering the long-term reliability of your dishwasher setup. In my experience, even minor lapses like skipping the pressure test or overtightening fittings can lead to frustrating leaks down the line. I’ve started using a combination of high-grade fittings and a digital torque wrench, which really helps me hit that perfect tightness without risking damage to the fittings. One thing I found particularly useful is marking fittings after tightening to ensure I don’t loosen them over time with vibrations. Does anyone else have tips for maintaining tight seals during ongoing use, especially in areas prone to mineral buildup or temperature fluctuations? Proper maintenance routines, including regular inspections, have saved me from bigger issues and costs. It’s those small, consistent checkups that really make a difference in avoiding surprises—what’s your go-to maintenance tip?,