I still remember the first time I installed a dishwasher myself. I was proud, eager, ready to save a few bucks. But that excitement quickly turned to frustration when I realized I’d overlooked a crucial detail—something as simple as tightening a hose too much or forgetting the high loop in the drain line. The leak started dripping, and before I knew it, I was dealing with water pooling under my kitchen floor. It was a lightbulb moment—understanding that even small installation mistakes can lead to big, costly problems down the line.
Why Improper Dishwasher Installation Can Cost You More Than You Think
If you’re considering installing a dishwasher yourself or just want to understand what to watch out for, it’s essential to know how minor slip-ups can impact your appliance’s performance and longevity. A poorly installed dishwasher might seem fine initially, but over time, these mistakes can cause leaks, reduce efficiency, and even void your warranty.
Early on, I made the mistake of ignoring the importance of the high loop in the drain hose—believing it was a minor detail. It’s a common error among DIYers and even some professionals. But that high loop is critical to prevent backflow and nasty odors, not just a fancy feature. Not paying attention here can lead to siphoning problems, which might cause your dishwasher to drain poorly or flood your kitchen. For a detailed breakdown of essential parts and installation tips, check out this installation guide.
Ever Felt Skeptical About DIY Installation Risks?
Trust me, I’ve been there. I used to think a few tightenings here and there would do the trick. But I learned the hard way that cutting corners can lead to long-term headaches. For instance, I once skipped using a new braided hose, assuming the old one was fine. Turns out, old hoses can wear out, and reusing them often causes leaks—something many professional installers recommend avoiding to prevent water damage. For more on this, see how proper hose choice can save you thousands in repairs.
Are you worried about making these mistakes? That’s natural. But with a bit of knowledge and the right checklist, DIY can be both rewarding and safe. In the next sections, we’ll walk step-by-step through how to install your dishwasher correctly, avoiding common pitfalls that often trip up even seasoned DIYers. So, let’s get started on making your installation secure, efficient, and worry-free.
Organizing your installation process can seem overwhelming, but understanding these pitfalls is the first step to a smooth setup. Ready to dive into the practical tips that will keep your dishwasher running flawlessly for years? Let’s go!
,
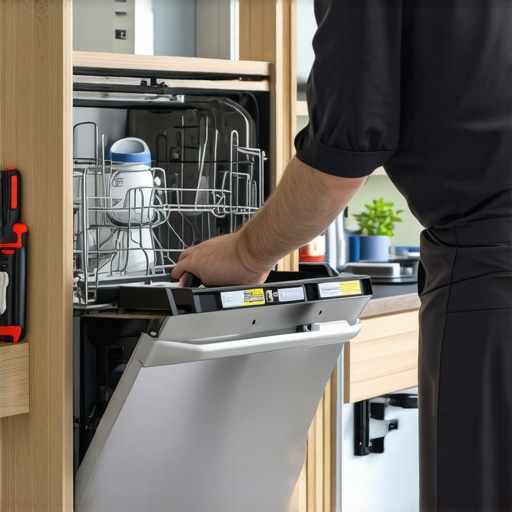
Secure the Mounting and Level the Appliance
Start by positioning your dishwasher in the designated spot, ensuring it’s close enough to the water supply and drain connections. Use a level to check side-to-side and front-to-back alignment. If the appliance isn’t perfectly level, it can cause door leaks or improper rinsing. Adjust the leveling legs accordingly, tightening or loosening them while checking with the level. During my last installation, I spent extra time leveling, which prevented a persistent leak and prolonged my dishwasher’s life.
Connect the Water Supply Correctly
Attach the inlet valve using a new, high-quality braided supply line, avoiding reuse of old hoses to prevent leaks. Hand-tighten the compression nut, then give a quarter-turn with a wrench—no more. Over-tightening crushes the fittings and can cause cracks, leading to water damage. Always verify tightness by gently tugging the hose. For detailed advice on selecting parts that maximize warranty coverage, visit this resource.
Set Up the Drainage System Properly
The drain hose must be connected with a high loop at least 34 inches above the floor to prevent backflow and odors. Secure it firmly to avoid accidental disconnection. Use a sturdy clamp—hand-tight is enough; do not overtighten, which might damage the hose or fittings. If your drain line is clogged or improperly routed, it can cause water to back into the dishwasher, leading to leaks or poor drainage. An incorrect drain setup is one of the leading causes of post-installation issues; for troubleshooting tips, see this guide.
Electrify the Unit Safely
Before connecting the electrical outlet, ensure the circuit breaker is off. Use a dedicated outlet with the correct voltage and amperage. Follow the manufacturer’s wiring diagram meticulously—connect ground, neutral, and live wires securely using wire nuts or terminals provided. Never daisy-chain multiple appliances on the same circuit. I learned this the hard way when a shared circuit caused my dishwasher to malfunction. To avoid common wiring mistakes, consult this resource.
Verify All Connections and Test
Once assembled, double-check every connection—water, drain, and electrical. Turn on the water supply and check for leaks. Power up the dishwasher to ensure it runs through a cycle without issues. Observe the first few minutes to confirm proper water fill and drainage. During my most recent setup, this step caught a loose clamp that prevented a leak, saving me from future water damage. This routine is crucial; issues found early can often be repaired or re-seated before becoming major problems, and for more on diagnosing issues during the warranty period, refer to this article.
When it comes to installing or maintaining your dishwasher, many believe they understand the basics, but the truth is there’s a lot more nuance than most realize. A common misconception is that all parts are created equal—yet, many assume that any replacement part will work seamlessly and be covered by warranty. In reality, not all parts are guaranteed under warranties, and choosing the wrong components can void your coverage, leading to costly repairs. For example, some manufacturers specify certain brands or specifications for critical parts like inlet valves or door springs; using generic replacements might save money upfront but could exclude you from warranty benefits, as explained in this comprehensive guide.
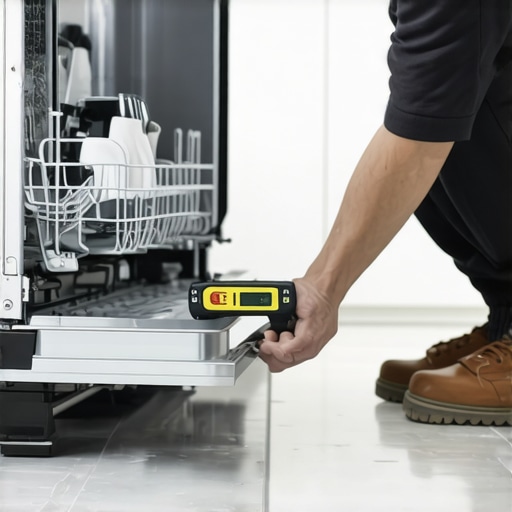
Keep It Running: The Tools I Trust for Effective Maintenance
Over the years, I’ve come to rely on a handful of specialized tools that make maintaining and troubleshooting dishwashers much more manageable. One of my staples is a high-quality multimeter, which I use daily to test thermal fuses and wiring continuity—crucial steps when diagnosing electrical issues. I personally prefer a compact, digital multimeter like the Fluke 117, known for its reliability and ease of use, especially since many wiring problems are subtle and require precise measurement.
Another invaluable tool is a set of nut drivers with ratcheting mechanisms. They enable quick removal and tightening of clamps and mounting bolts without stripping them—saving time and preventing unnecessary damage. I especially recommend a 10-in-1 ratcheting screwdriver set for versatility. For checking water inlet and drain hoses, a flow rate meter helps verify whether your water pressure and flow are sufficient, which directly impacts cycle efficiency and longevity.
Why Regular Visual Inspection Matters
Beyond tools, a routine visual inspection of hoses, gaskets, and seals using a bright LED flashlight can reveal signs of wear, cracks, or leaks before they escalate. I make it a point to check these components biannually, especially before and after warranty periods. Consistent checks help catch issues early, reducing costly repairs and potential warranty claims. For detailed guidance on what parts to focus on, visit this comprehensive resource.
Best Practices for Long-Term Performance
Maintaining your dishwasher effectively isn’t just about tools—it’s about adopting habitual practices. Regularly cleaning the filter and inspecting spray arms ensures proper water circulation, which is vital for cleaning efficiency. I recommend a monthly check of these parts, especially if your water supply contains hard minerals. Using a vinegar rinse once a quarter helps prevent mineral buildup inside jets and seals, extending component life.
Additionally, scheduling a professional inspection annually can uncover hidden issues like faulty wiring connections or degrading seals that aren’t obvious during routine checks. Keep detailed logs of maintenance activities and parts replacements; this documentation supports warranty claims and future troubleshooting. Want to streamline your maintenance? Try setting a calendar reminder for these tasks—consistency is key!
Anticipating Future Trends in Dishwasher Maintenance
The evolution of smart home technology is transforming dishwasher upkeep. Expect to see more integrated sensors and IoT capabilities that alert homeowners to issues proactively, reducing downtime and repair costs. As these systems become more widespread, compatibility and cybersecurity will become critical considerations. For proactive owners, learning to interpret data from these smart diagnostics will be increasingly valuable, leading to smarter, more efficient maintenance routines.
How do I maintain my dishwasher over time?
Implementing a routine of regular inspections, using precise diagnostic tools like multimeters, and staying ahead with scheduled professional checkups will keep your dishwasher performing at its best for years to come. Next, try setting a monthly cleaning schedule with vinegar solutions and monitor your water flow using a flow rate meter—small steps that make a big difference. Remember, staying vigilant today prevents costly repairs tomorrow.
If you’d like personalized advice on selecting the right parts or troubleshooting specific issues, don’t hesitate to reach out to me. Consistent maintenance and the right tools truly unlock the full potential of your dishwasher, ensuring it serves you reliably for years.
The Hardest Lesson I Learned About parts,warranty,dishwasher,installation
One of the most valuable insights I gained was the importance of meticulousness during installation. Skipping even a small step, like correctly securing a hose clamp, can lead to leaks that damage your warranty coverage—and your wallet. I realized that understanding the nuances behind each part’s role saves me from costly repairs and warranty denials in the future.
3 Myths About parts,warranty,dishwasher,installation That Held Me Back
Believing that all replacement parts are interchangeable or that professional installation isn’t worth the cost were misconceptions I had early on. These myths caused me to overlook warranty terms and buy incompatible parts, risking performance issues. I’ve learned that sourcing the right parts, respecting warranties, and knowing when to call a pro keeps my dishwasher running smoothly and my warranty intact.
What Experts Won’t Tell You About parts,warranty,dishwasher,installation
Many professionals keep silent about the simplest ways to prevent warranty voidance—like documenting each step of your installation or choosing parts that meet manufacturer specifications. I discovered that being proactive with documentation and carefully selecting parts not only improves performance but also ensures a smoother warranty claim process when needed. This insider knowledge is invaluable for every DIY enthusiast striving for peace of mind.
My Essential Toolkit for maintaining your dishwasher’s longevity
Over the years, I’ve relied on a few critical tools: a high-quality multimeter for electrical troubleshooting, precision nut drivers for securing components, and a flow rate meter to verify water supply performance. I trust these tools because they provide accurate diagnostics and prevent small issues from becoming major repairs. Investing in the right toolkit makes all the difference in maintaining long-term dishwasher health.
Where to Go from Here
If you’re serious about ensuring your dishwasher operates flawlessly and remains backed by warranty coverage, I encourage you to explore detailed guides on parts selection and installation strategies available on trusted sites. Regular inspections, proper parts sourcing, and equipment like a multimeter truly empower you to handle issues proactively. Remember, a well-maintained dishwasher isn’t just about convenience—it’s about safeguarding your investment for years to come.
Take Action and Make It Last
Now that you know the lessons learned and essential tools, it’s time to put that knowledge into practice. Proper installation, attentive maintenance, and understanding warranty nuances will keep your dishwasher performing optimally. Are you ready to take charge of your appliance’s longevity? Sharing your experience or asking questions below can inspire others on their maintenance journey.
Related Posts
How to Align a Dishwasher Toe-Kick for a Flush Custom Finish
It was a moment of frustration that finally made me…
How to Level a Dishwasher on an Uneven Tile Floor
Ever had that sinking feeling when you open your dishwasher…

Why Reusing an Old Copper Water Line is a Disaster Waiting to Happen
I vividly remember the moment I realized my quick fix…