Ever turned on my dishwasher only to hear strange noises and realize my brand-new machine wasn’t functioning as it should? That frustrating moment when I discovered the replacement part I bought was a cheap knockoff, and I was left scrambling to fix the mess. It was a lightbulb moment that made me realize many others might be facing the same sneaky problem with their 2026 dishwasher parts.
Why Fake Parts Can Cost You More Than You Think
Purchasing genuine dishwasher parts is more critical than most realize. Counterfeit components often look identical but lack the durability and safety features of authentic items. I initially thought I was saving money with cheaper alternatives—big mistake. Not only did they fail prematurely, but I also risked damaging my entire appliance, voiding warranties, and racking up repair costs. According to the Consumer Federation of America, fake appliance parts are surprisingly common and can be dangerous, often producing safety hazards like leaks or electrical failures. This is why I want to share my experience and help you avoid the pitfalls that fake parts can bring into your home.
Is It Really Worth the Risk to Use Cheaper Parts?
I used to believe that buying affordable, generic parts was a smart move—until I learned the hard way. Early in my appliance repair journey, I made the mistake of trusting a low-cost supplier without verifying their credentials. That misstep cost me hours of frustration and extra expenses. Now, I always recommend researching suppliers thoroughly and knowing how to spot authentic parts. For a detailed guide, check out [this comprehensive resource](https://appliancedoctorz.com/top-tips-for-selecting-the-right-parts-for-dishwasher-installation). In the upcoming sections, I’ll show you practical steps to identify fakes, so you can keep your dishwasher running smoothly and protect your warranty. Have you ever had a similar experience with counterfeit parts? If so, you’re not alone, and I’m here to help you navigate this tricky landscape with confidence.
Select the Right Parts with Confidence
Begin by thoroughly researching suppliers before purchasing any replacement components. Cross-reference the part numbers with the original manufacturer specifications to ensure compatibility. I once received a suspected genuine part from an online marketplace that was an imitative knockoff, which caused early failure. To avoid this, always verify the supplier’s credentials and explore resources like top tips for selecting the right parts. Confirm that the part covers your specific dishwasher model, especially critical for 2026 models where warranty coverage hinges on authentic components.
Inspect and Prepare Your Workspace
Before starting installation, disconnect the dishwasher from power and water sources. Wear gloves and safety glasses to prevent injury. Lay out all tools and new parts on a clean surface. Remember, a clean, organized workspace reduces mistakes and helps you keep track of tiny components. I learned this the hard way when I accidentally knocked a small screw into the drain pan and had to disassemble again. Use the checklist for parts during installation to ensure nothing is overlooked.
Follow Manufacturer’s Installation Guidelines Precisely
Read the installation manual carefully; each model can have specific steps and torque requirements. Use a torque wrench to tighten fittings to manufacturer’s specifications, avoiding under-tightening (causing leaks) or over-tightening (damaging threads). For example, installing a water supply line too loosely resulted in a minor leak that I wasn’t able to detect until days later. To deepen your understanding, refer to common parts and their role in correct setup.
Secure All Connections and Fittings
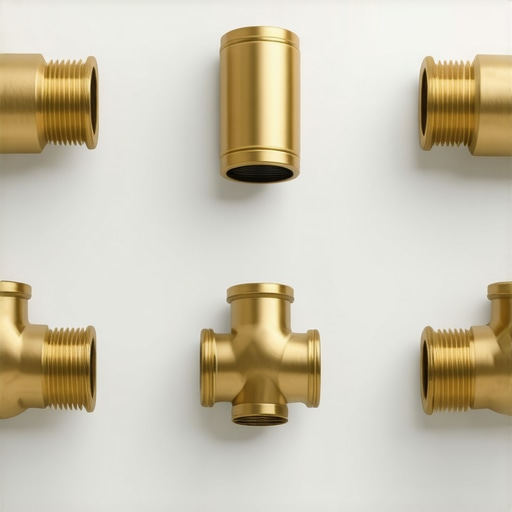
Once assembled, double-check every connection. Use brass fittings wherever possible for durability, especially critical in the hot water supply line. During my third installation, I initially reused an old plastic connector, which cracked under pressure, causing water to leak. This mishap underscored the importance of replacing old fittings with new, high-quality brass fittings to prevent leaks and preserve warranty coverage. Consult 5 brass fittings to prevent leaks for a comprehensive list.
Test Without Running the Full Cycle
Before fully operating the dishwasher, run a short cycle with just water. Monitor for leaks, strange noises, or error codes on the display. This step helps catch issues early and prevents damage to your new parts or voiding your warranty. I once missed a loose drain hose clamp, which caused an overflow during my first test, leading to a cleanup that could have been avoided. Use diagnostic tips to troubleshoot potential problems effectively.
Document Your Installation
Keep detailed records, including photos of the setup, receipts for authentic parts, and notes on the installation process. These documents are invaluable if you need to verify warranty eligibility later. I kept a photo record when I replaced a faulty float switch, which helped me quickly prove that the repair was done correctly and that I used genuine parts. For guidance, see tips on warranty verification.
Many homeowners assume that following manufacturers’ instructions verbatim ensures a perfect dishwasher setup. However, even seasoned DIYers often overlook subtle but crucial details that can compromise warranty protection and long-term performance. One widespread misconception is that using generic parts doesn’t affect warranty eligibility. In reality, counterfeit or incompatible components, even if they seem identical, can void your warranty and lead to costly damages. For example, choosing the wrong water inlet valve or neglecting to use the recommended brass fittings might trigger warranty exclusions, as detailed in this guide on parts and warranty. It’s a common myth that all replacement parts are equally valid; in truth, the manufacturer’s specifications are critical for maintaining coverage.
One of the more insidious traps is the belief that installation is straightforward, so skipping steps won’t cause issues. But small mistakes—such as insufficient tightening of fittings or improper leveling—can cause leaks, which might not show immediately but can void the warranty. The risk of damaging sensitive electronic sensors or thermal fuses during hurried or incomplete installations is often underestimated. Experts warn that these errors are silent killers for warranties and appliance longevity, emphasizing the importance of meticulous adherence to guidelines found at this resource on installation nuances.
A common misconception is that warranties cover every repair or component issue. While warranties typically cover manufacturing defects, they often exclude damages caused by incorrect installation or the use of non-approved parts. For instance, using plastic fittings instead of durable brass ones can lead to leaks and potentially void your coverage. It’s essential to understand that warranties are meant to protect against factory faults, not user-induced damages. To safeguard your coverage, review the detailed requirements at this comprehensive warranty guide.
So, how can you avoid these pitfalls and secure your warranty? First, double-check that all replacement parts meet OEM specifications—this small step can prevent major issues later. Second, follow installation instructions precisely, and don’t skip steps, especially those involving fittings and level adjustments. Third, keep detailed records, receipts, and photos of every part you install, as proof of compliance if disputes arise.
Have you ever fallen into this trap? Let me know in the comments. Remember, the devil is in the details—being an informed DIYer saves money and preserves your warranty in the long run.
Essential Tools for Effective Dishwasher Maintenance
Investing in the right tools can make all the difference in maintaining your dishwasher’s long-term performance. I personally rely on a quality digital multimeter to check electrical connections and ensure safety when troubleshooting. A digital multimeter allows me to accurately measure voltage and resistance, helping to diagnose issues with control boards or wiring without guesswork. Additionally, a precision torque wrench is invaluable during installation or reassembly, ensuring fittings are tightened to manufacturer specifications and preventing leaks that could void your warranty. I also recommend having a set of small, magnetized screwdrivers—perfect for accessing tight spaces and avoiding lost screws, especially when replacing delicate parts like sensors or thermistors.
Streamlining Workflow with Smart Maintenance Software
Modern tools can elevate your maintenance routine. I use specialized diagnostic apps that connect via Bluetooth to certain smart dishwasher models, providing real-time data on system health and error codes. These apps streamline troubleshooting, saving time and reducing trial-and-error, especially with complex electronic components. For older models, maintaining a digital log of repairs and part replacements helps track patterns and preempt future issues. Keeping detailed records, including photos and dates, can be crucial if warranty disputes arise. As technology advances, I predict that AI-powered diagnostics will become more accessible, offering proactive recommendations for parts replacements before failures occur.
How do I maintain my dishwasher over time?
Regular inspection and cleaning are key. I schedule monthly checks of filters, spray arms, and door seals—using a toothbrush and mild vinegar solution to remove buildup. Ensuring all moving parts are free of debris helps prevent strain on motors and pumps. Also, replacing consumables like water inlet filters according to manufacturer guidelines—often found in this resource—can extend the lifespan of your appliance. Additionally, installing a water softener if you have hard water minimizes mineral deposits that can clog components. In the coming years, self-maintaining systems with integrated sensor alerts will likely alert homeowners to potential issues before breakdowns happen, revolutionizing appliance care.
For troubleshooting persistent problems, I always check the parts to inspect during maintenance. For example, the precision of a high-quality float switch can prevent overflow, while the integrity of the door latch ensures proper sealing—both crucial for performance and warranty validation.
Remember, routine checks and timely part replacements, guided by accurate diagnostics and proper tools, are your best defense against costly repairs. I encourage you to try using a multimeter for testing control boards; it’s a simple step that can save you significant headaches down the line. With the right approach and tools, keeping your dishwasher in peak condition becomes an achievable task, ensuring smooth operation for years to come. As the industry trend points toward more integrated smart diagnostics, staying ahead with manual tools will remain a vital skill for every homeowner or technician alike.
The Hard Lessons that Changed My Dishwasher Game
One of my biggest lightbulb moments came when I realized that rushing through the installation process, thinking small mistakes don’t matter, actually voided my warranty and caused unnecessary repairs. I learned the importance of meticulous inspection—what seemed minor at the time turned out to be critical for long-term performance.
Another insight was understanding that counterfeit parts aren’t just cheap—they can be downright dangerous. I once installed a fake water inlet valve, which led to a leak and a costly warranty dispute. That experience convinced me that authentic, OEM-approved components are worth every penny.
Patience during assembly truly pays off. Skipping follow-up tests or ignoring manufacturer specifications can hide issues until they escalate. Taking the extra time with tests and double-checking fittings saved me from future headaches and warranty hassles.
Lastly, documenting every step, from taking photos to saving receipts, became my secret weapon. When warranty claims seemed complicated, those records proved I followed best practices and used genuine parts, ensuring my coverage remained intact.
Tools and Resources That Keep Me Confident
My go-to toolkit now includes a reliable digital multimeter—essential for diagnosing electrical issues in control boards or sensors, giving me confidence in each repair. A high-quality torque wrench helps tighten fittings precisely, preventing leaks that could jeopardize my warranty. For detailed guidance, I often refer to this resource on selecting the right parts to ensure compatibility and durability.
Additionally, I use a comprehensive checklist for installation to avoid missing critical steps, and I keep a digital log of repairs and part replacements. These habits streamline workflows and serve as valuable proof if warranty questions arise. I believe staying informed and organized is key to prolonging the life of my dishwasher and maintaining warranty coverage.
Empower Your Next Dishwasher Journey
Remember, every mistake is a learning opportunity that can save you time and money in the future. Investing in the right tools, following expert tips, and keeping thorough records transform DIY repairs from risky guesses into confident actions. Your dishwasher, warranty, and wallet will thank you. Ready to take control and master your appliance maintenance? Share your experiences or questions below—I’m here to help you thrive in your DIY journey.
Related Posts
5 Brass Fittings to Prevent 2026 Dishwasher Install Leaks
I'll never forget the sinking feeling I had when I…
Skip the Kit: 4 Specific Parts for a Pro 2026 Dishwasher Install
Ever felt that sinking frustration when your brand-new dishwasher leaks…
Is Your 2026 Dishwasher Supply Line Rated for 120 PSI?
I'll never forget the sinking feeling I experienced when my…