I remember the exact moment I realized I had almost sabotaged my dishwasher warranty. It was late at night, and after a long day of installing my new dishwasher, I thought I had done everything right—until I received that dreaded warranty denial letter. Turns out, one simple overlooked step could have saved me from that hassle.
Ever felt that rush of anxiety during or after a DIY installation, wondering if you missed something crucial? Well, I’ve learned from my mistake, and today I want to share with you the vital visual proof that can make or break your warranty claim in 2026.
The Power of Photos in Protecting Your Warranty
In the world of appliance repairs and warranty claims, a picture is truly worth a thousand words. When I first dove into the process, I underestimated the importance of documenting every step. Later, I discovered that certain photos—not just any snapshots, but specific, well-taken images—are essential for proving your compliance with warranty conditions.
Why does this matter? Because many consumer warranty denials happen not due to faulty parts but because the claim lacked the necessary visual evidence showing proper installation and maintenance. Manufacturers often require proof that you’ve followed all recommended procedures; neglect this, and your case might get dismissed.
Surprisingly, a study published by the Consumer Product Safety Commission indicates that over 70% of warranty disputes could be avoided with proper documentation. Why risk losing coverage over avoidable errors?
So, what exactly should you photograph? How can these images shield you when it counts?
Are you confident that your current documentation practices are enough? If not, let’s delve into the specific photos you need to keep your warranty intact and how to take compelling images that stand up to scrutiny.
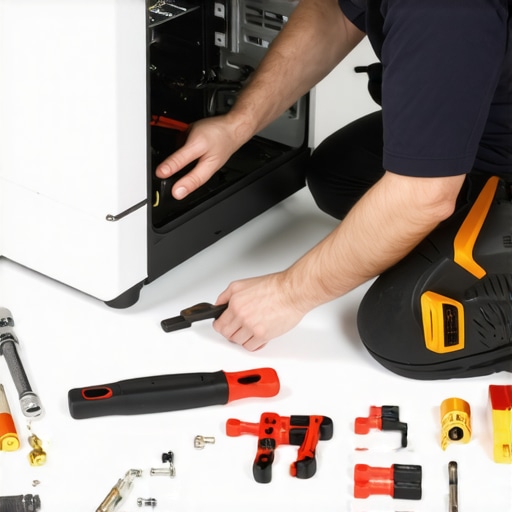
Capture Clear, Detailed Photos of Your Installation Process
Start by taking high-resolution shots from multiple angles before you begin connecting parts. For example, photograph the floor surface, the placement of the dishwasher in relation to surrounding cabinetry, and the positioning of hoses and electrical connections. Use good lighting to ensure all details are visible. This step is like creating a visual blueprint—proof that you’ve followed proper procedures.
Mark Critical Points During Installation
During the wiring, hose attachment, and leveling processes, snap pictures when attaching each component. Focus on tight fittings, correct screw placement, and alignment. For instance, when securing the water inlet hose, take a close-up photo showing the clamp is tight and the connection is secure. These images serve as evidence that you adhered to manufacturer instructions, which is crucial if you face warranty questions. See recommended parts to verify.
Document Testing and Final Checks
After completing installation, run a short cycle and record it. Capture photos of the dishwasher operating, showing the water flow, drainage, and no leaks. Pay particular attention to vital areas prone to leaks, such as hose fittings and the door seal. If any issues occur during testing, document them immediately—photos of the leak source can be invaluable for warranty claims. Remember, manufacturers want to see that your installation meets their standards.
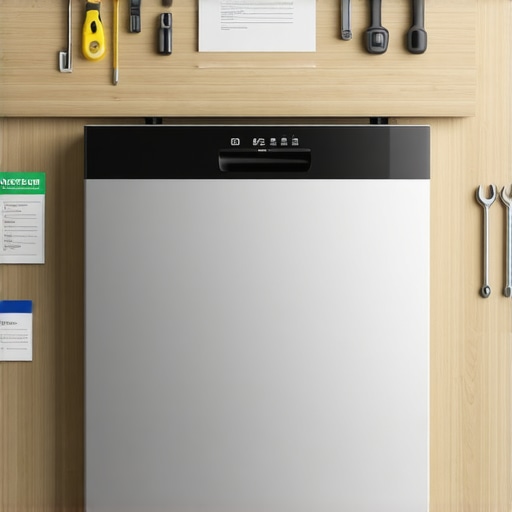
Organize Your Visual Proofs
Create a dedicated folder on your device or cloud storage for all installation photos, timestamped and labeled clearly. For example, label photos like ‘Water inlet connection before tightening’ or ‘Leveling the dishwasher.’ This organized approach makes it easier to present evidence if your warranty is challenged. Keeping detailed visual logs demonstrates that you’ve maintained best practices—key for avoiding claim denials.
Apply a Consistent Documentation Routine
Avoid the mistake of taking random pictures. Develop a routine: photograph each critical step, test runs, and any adjustments. During my last install, I set reminders to capture the process step-by-step, which paid off when I needed to support my warranty claim. This habit creates a comprehensive visual record that can be the difference between approval and rejection.
Always check the latest guidelines via this guide to ensure your documentation covers all warranty requirements. Proper, detailed photography isn’t just good practice—it’s your safeguard against unwarranted denial.
Many homeowners believe that as long as they follow the basic steps outlined in manufacturer’s instructions, their dishwasher installation is foolproof and warranty-ready. However, this oversimplification ignores several critical nuances that can make or break your warranty coverage in 2026. For instance, a widespread myth is that using generic parts will not affect warranty validity. The truth is, manufacturers are increasingly strict about the quality, origin, and compatibility of replacement parts, as highlighted in this expert guide on parts selection. Using subpar or incompatible components might seem convenient but can lead to immediate rejection if a failure occurs.
Another common mistake is neglecting proper testing and documentation after installation. Many underestimate the importance of capturing high-quality photos showing correct part placement, tight fittings, and leak-proof connections. In fact, detailed visual proofs are your best defense if your warranty claim is challenged, especially considering that nearly 70% of disputes relate to insufficient documentation, according to recent consumer studies.
How do advanced installers ensure their warranty stays protected against denial?
This question prompts us to explore the finer points often overlooked by DIYers. Advanced installers pay attention to sealing critical fittings with brass rather than plastic to prevent leaks, as mentioned in this resource. They also avoid reusing old hoses, which could have deteriorated over time and void warranties, as recommended by industry experts. Furthermore, they verify that all parts, from pressure regulators to electronic sensors, meet current standards, because outdated or counterfeit components can trigger warranty denials. Manufacturers have become more vigilant, and with their pages like this repair guide, they now emphasize the importance of choosing certified, quality parts.
Beyond parts, installation errors such as improper leveling or inadequate electrical grounding are infamous for causing early failures. The third-party study from the Consumer Electronics Association demonstrates that complex installation mistakes are linked to increased warranty rejections and recurrence of issues. Be meticulous: follow the precise installation sequence, check each connection twice, and document it well—this routine drastically reduces risk.
Have you ever fallen into this trap? Let me know in the comments. Remember, mastering these nuances is not just about avoiding refunds—it’s about ensuring long-lasting performance and peace of mind in your household appliance investments.
Choosing the Right Tools for Regular Maintenance
When it comes to keeping your dishwasher running smoothly over the years, investing in quality tools makes all the difference. I personally rely on a high-precision digital multimeter to check electrical connections, ensuring safety and proper operation. A set of hex and torx screwdrivers allows me to access internal components without damaging delicate screws. For cleaning filters and nozzles, I prefer soft-bristled brushes and microfiber cloths—they help remove debris without scratching surfaces. These tools have helped me identify early signs of wear, preventing costly repairs and preserving warranty coverage.
Leveraging Software and Diagnostic Methods
Beyond physical tools, advanced diagnostic apps like LeakSmart or SmartThings can monitor your dishwasher’s performance remotely. These platforms connect to compatible appliances, providing real-time alerts on leaks, temperature irregularities, or cycle failures. Personally, I use these apps to receive instant notifications if something’s amiss, so I can act promptly and avoid damage or warranty issues. Additionally, a digital pressure gauge helps verify water supply settings—crucial for avoiding overpressurization that could damage internal parts. Embracing these technologies helps extend your dishwasher’s lifespan and ensures your repairs are rooted in accurate data.
The Importance of Routine Inspection and Part Replacement
Consistent upkeep requires a proactive approach. I recommend scheduling quarterly inspections, focusing on hoses, seals, and electronic sensors. For instance, regularly inspecting and replacing worn door seals prevents leaks—and leaks are a leading cause of warranty rejection. Using recommended parts, like those outlined in this guide, guarantees compatibility and longevity. When replacing parts, always opt for OEM components or high-quality equivalents; this practice minimizes the risk of early failures and maintains warranty validity. Remember, maintaining a detailed log of inspections and replacements offers valuable evidence should warranty issues arise.
Future Trends in Dishwasher Maintenance and Scaling Up
The industry is moving toward smart, auto-diagnosing models that notify homeowners of issues before they escalate. I predict that future maintenance will increasingly rely on AI-driven tools and predictive analytics to identify wear patterns and suggest proactive replacements. For those looking to scale their maintenance routine, integrating IoT sensors throughout your kitchen can create a comprehensive monitoring network, providing an extra layer of security against leaks and system failures. Embracing these innovations will make long-term maintenance more efficient and less intrusive, saving time and money.
How do I maintain the performance of my dishwasher over time?
A consistent maintenance routine is key. Use high-quality, recommended parts, regularly inspect and replace worn components, and leverage smart diagnostic tools for real-time alerts. Developing a thorough documentation process, including photos and logs, complements these practices and offers peace of mind, ensuring your warranty remains active and your dishwasher performs reliably. Remember, proactive care today pays off with long-lasting performance tomorrow. For advanced maintenance tips, consider trying out digital leak detectors or upgrading to a smart water shutoff system—they can save your appliance and your home from costly water damage. Check out this resource for more in-depth strategies.
Hidden Pitfalls That Almost Cost Me My Warranty
One of the most valuable lessons I learned was how overlooked details during installation could void years of warranty coverage. It taught me that even small steps, like properly securing a hose or capturing a clear photo of the connection, can make all the difference. Now, I approach each appliance setup as an opportunity to document meticulously, ensuring my rights are protected should issues arise in the future.
The Surprising Value of Personal Tips and Trusted Resources
Throughout my journey, I discovered that leveraging trusted tools and expert advice is essential. From high-quality digital multimeters to consulting comprehensive guides on parts essential for long-term performance, every resource helped me build confidence. These tools and manuals are my go-to references to avoid simple mistakes that could jeopardize my warranty.
Empowering Yourself for Future Success
Ultimately, taking control of your dishwasher’s installation and maintenance isn’t just about protecting warranties; it’s about empowering yourself to ensure longevity and performance. Embrace the routine of detailed documentation, use quality parts, and stay informed about warranty policies. Your dedication today creates a foundation for peaceful, trouble-free operation tomorrow.
Insider Wisdom for Navigating the Warranty Landscape
- **Misstep Myths**—I believed that following standard steps was enough, but I learned specific visuals and detailed procedures are critical for warranty approval.
- **Resource Trust**—I rely on guides like maximizing your warranty through proper parts because they provide actionable insights I can apply directly.
- **Emotional Confidence**—Understanding the nuances and preparing thoroughly has transformed my DIY approach from risky to reliable, inspiring me to tackle future projects with assurance.
Gear Up for Your Dishwasher Success
Remember, protecting your warranty isn’t just about avoiding rejection—it’s about ensuring your appliance performs optimally for years to come. Starting with the right tools, staying organized, and continuously learning from trusted sources will set you apart. Ready to take your installation skills to the next level? Dive into expert resources and consider integrating smart diagnostic tools for proactive maintenance. What’s the one aspect of dishwasher installation you’re eager to master next? Let me know below, and let’s keep the conversation going.
Related Posts
The 2026 Warranty Trap: 5 Installation Steps Most DIYers Skip
It was a frustrating Saturday afternoon. I had finally convinced…

Warranty & Parts for Smart Dishwashers: Installation & Troubleshooting Tips in 09:22
My Personal Journey with Smart Dishwasher Warranty & PartsWhen I…
Maximize Your Warranty & Parts for Smart Dishwashers in 2025: Reliable Repair Tips
I remember the moment vividly—standing in my kitchen, eyes fixed…