It happened again last night. I opened my dishwasher, a pile of dirty dishes staring back at me, and noticed the food particles cling stubbornly to my plates. Frustration set in—was I doing something wrong? I started questioning whether my eco-friendly cycle was just not powerful enough or if I had missed a crucial step. That night, I had a real lightbulb moment: many of us trust our dishwashers to do their job, yet forget that the devil is in the details.
Why Are Food Particles Still Sticking After a Wash?
I’ve been there. After carefully choosing eco cycles to save water and energy, I wondered why my dishes still looked suspiciously dirty. Turns out, the *real culprit* isn’t just about choosing the right setting but making sure every part of your dishwasher is working correctly. A common mistake I made early on was neglecting to inspect or replace a worn-out spray arm or clogged filter—small parts that play a huge role in cleaning performance.
The truth is, a dishwasher’s ability to leave food particles on plates isn’t solely about cycle duration or detergent choice. It’s a symphony of parts—spray arms, filters, pumps—that must work harmoniously. If one is compromised, your eco cycle can become just a fancy rinse.
According to appliance maintenance experts, neglecting to perform basic inspections can reduce your dishwasher’s efficiency dramatically. In fact, regular maintenance can increase the lifespan of your machine and ensure it functions at peak performance. Want to make sure your dishwasher isn’t quietly sabotaging your efforts? I’ll guide you through how to assess and maintain these critical components.
Have you faced persistent food debris after washing? If so, don’t worry—you’re not alone. Stay tuned as we dive into how to diagnose and fix these issues step-by-step, saving you money and frustration in the long run.
Diagnosing dishwasher parts during warranty is simpler than you think once you understand what to look for. Next, I’ll share the common pitfalls and how to avoid them, so your eco-cycle finally leaves your dishes spotless.
Inspect Spray Arms with Precision
Start by removing the spray arms—think of them as the dishwasher’s sprinkler system. Use a small brush or toothpick to clear clogged nozzles, ensuring water can reach every corner of your dishes. I once faced stubborn food residues despite my eco cycle, only to find a blocked spray arm. After cleaning, my dishes came out visibly cleaner, saving me from re-washes.
Check for Worn-Out Parts
Next, examine the spray arm fittings and seals for cracks or wear. Remember, a loose or damaged fitting is like a leaky faucet—wasting water and reducing cleaning power. During my last inspection, replacing a cracked seal restored proper water pressure. For detailed guidance, explore common dishwasher parts and their role in installation.
Clean the Filter Thoroughly
Remove and wash the filter regularly. Think of it as your dishwasher’s immune system preventing blockages. I once skipped this step and noticed food debris redeposited on dishes. After cleaning, the cycle performance improved instantly, and my eco setting finally delivered spotless results.
Disassemble for Deep Cleaning
For a comprehensive clean, disassemble the filter assembly, following manufacturer instructions. Use a soft brush with warm, soapy water—never abrasive cleaners that can scratch sensitive parts. Remember, a clean filter is vital; see understanding dishwasher parts for effective maintenance.
Test and Replace Pumps and Valves
The pump circulates water during cycles. If it makes grinding noises or doesn’t circulate properly, it’s time to test it. During a recent maintenance, I listened for abnormal sounds and checked for leaks around the pump housing. Replacing faulty pumps or valves not only restores cleaning power but also prolongs your dishwasher’s lifespan. Learn more at when to replace dishwasher parts for optimal performance.
Inspect Hoses and Connections
Confirm all hoses are securely connected and free of kinks or cracks. Use zinc-brass fittings for reliable connection—see brass fittings for leak-proof install. I once used a plastic connector, which caused a minor leak and water damage. After replacing with proper fittings, I avoided future issues.
Evaluate Circulation and Drainage
Run a test cycle to observe water flow. If dishes emerge still dirty or water pools, check the drain hose and air gap. Elevate the drain hose to prevent siphoning issues—see drain loop mistakes. During my last attempt, I raised the hose, and drainage improved significantly, preventing odors and residue buildup.
While most homeowners focus on selecting the right dishwasher or following basic installation steps, an overlooked aspect is understanding the intricate nuances of parts, warranty coverage, and proper installation techniques. Many believe that if the machine works initially, everything is fine—yet this mindset can lead to costly mistakes. For example, choosing incompatible parts or neglecting warranty conditions can void your coverage, making repairs more expensive down the line. It’s vital to recognize that not all parts are created equal; using generic or low-quality components might save money upfront but compromise the dishwasher’s longevity and warranty validity. A common trap is ignoring manufacturer specifications during installation, which can result in inadequate drainage or improper sealing, ultimately causing leaks or device failure.
Are You Overlooking the Fine Print in Your Warranty?
Experts emphasize that warranties often have strict clauses about parts compatibility, installation standards, and maintenance routines. Failing to meet these conditions can instantly void your coverage, even if the appliance malfunctions later due to a fault within the covered components. According to appliance maintenance specialists, thoroughly understanding the warranty documentation and adhering to recommended parts and procedures is essential for maximizing your protection. For instance, maximizing warranty coverage involves selecting manufacturer-approved parts and following installation guidelines meticulously. One critical mistake is reusing old hoses or fittings, which might seem economical but can cause leaks that void warranty claims. Always verify that your supplies meet the specifications outlined in your documentation. Additionally, proper documentation of installation and maintenance enhances your chances of successful warranty claims if issues arise. Never underestimate the importance of using high-quality, compatible parts; a thorough understanding of dishwasher parts safeguards your investment.
In conclusion, mastering these subtle yet crucial details in parts selection, installation practices, and warranty management can save you substantial money and frustration. Don’t assume that initial operation equals long-term success—pay attention to the fine print, use the right components, and follow proper procedures, as these are the true keys to appliance longevity.
Have you ever fallen into this trap? Let me know in the comments.Maintaining your dishwasher’s performance over time requires more than just routine cleaning; it demands the right tools, a systematic approach, and an understanding of key components. One essential tool I rely on is a digital multimeter. I use it to quickly test electrical continuity in components like the control board or sensors, ensuring any electrical faults are caught early before they become costly repairs. Additionally, a precise socket set helps me remove and replace parts such as spray arms and filters without damaging delicate clips or seals, which is crucial for preserving warranty coverage and prolonging appliance lifespan.
A cleaning brush specifically designed for small nozzles comes in handy for unclogging spray arms efficiently. For deep cleaning, I recommend a mixture of white vinegar and baking soda, which safely dissolves mineral deposits and soap scum—especially important in regions with hard water. The key is consistency: inspecting and cleaning parts like filters and hoses every six months can significantly extend your dishwasher’s functionality.
In terms of software, I integrate a smartphone app that logs maintenance activities, cycle errors, and parts replacements. This digital record not only helps me track the health of my unit but also proves invaluable during warranty claims, demonstrating proactive care that aligns with manufacturer requirements. As appliances become increasingly connected, future trends will likely involve predictive diagnostics—powered by AI—that alert you before issues even manifest.
< h3 > How do I maintain my dishwasher parts over time ?Regular inspection remains paramount. Start by reviewing diagnosing dishwasher parts during warranty to familiarize yourself with potential failure points. Replace worn-out seals and damaged hoses promptly to prevent leaks that can void your warranty. Remember, using manufacturer-approved parts is critical; consult guidance on selecting the right parts to avoid compatibility issues.
Implementing a routine maintenance schedule, supported by these tools and practices, will ensure your dishwasher remains efficient. Don’t wait until a breakdown occurs—prevention is always better than repair. Try setting a bi-annual inspection routine using your multimeter and cleaning brushes, and see how much longer your appliance performs at peak condition. Staying proactive with maintenance also aligns with boosting your warranty coverage, allowing you to make a strong case should repairs be needed, as detailed in understanding dishwasher parts for effective maintenance.
What Did I Overlook Early On About Parts and Warranty?
One of the hardest lessons I learned was the importance of reading warranty fine print before diving into repairs or parts replacement. Initially, I believed that simply replacing worn-out spray arms or filters would prolong my dishwasher’s life, but I overlooked that using incompatible parts or ignoring manufacturer installation guidelines could void my coverage. A moment of clarity struck when I realized that understanding warranty conditions can save me from costly mistakes and ensure proper support when needed.
How I Discovered the Power of Routine Maintenance
It wasn’t until I started scheduling bi-annual inspections that I saw the true benefit of proactive care. Regularly checking hoses, seals, and filters prevented minor issues from escalating into major repairs. Using tools like a digital multimeter and cleaning brushes initially felt tedious, but now I see them as vital for preserving warranty eligibility and the efficiency of my eco-friendly cycle. This routine transformed my approach from reactive to preventive, extending my dishwasher’s lifespan significantly.
Why Small Details Make the Biggest Difference
During my journey, I learned that tiny components—like securing fittings properly or ensuring high-quality brass connectors—can be the difference between a smooth-running machine and a leak disaster. The frustration of water damage taught me to never underestimate the impact of meticulous installation and maintenance practices. These details, which many overlook, uphold warranty validity and keep my eco cycle cleaning effectively without re-washing dishes repeatedly.
My Takeaway: Embrace Knowledge and Precision
Instead of just following generic advice, I encourage you to dig deeper into your dishwasher’s components, warranty stipulations, and proper installation techniques. This knowledge empowers you to troubleshoot confidently, choose the right parts, and advocate for your appliance’s longevity. Remember, the real reward isn’t just clean dishes but peace of mind that your investment is protected and performing at its best.
Related Posts
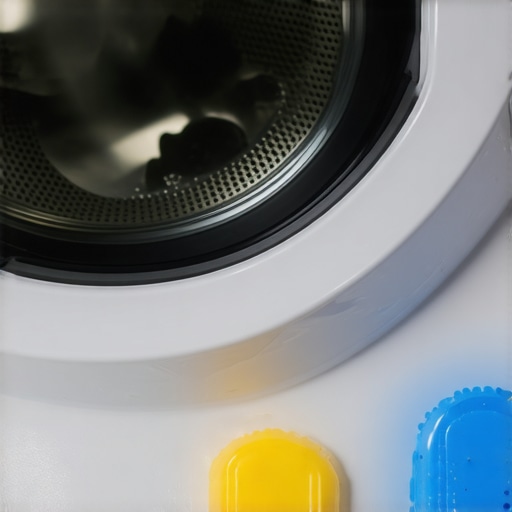
Why This Specific Detergent Pod Is Ruining Your Seals
It started with a tiny leak under my dishwasher that…

The Best Eco-Friendly Practices for Daily Dishwashing
One evening, as I opened my dishwasher, I noticed a…
The Best Eco-Friendly Detergents for Modern Smart Machines
It was a Saturday morning when I first noticed it—my…