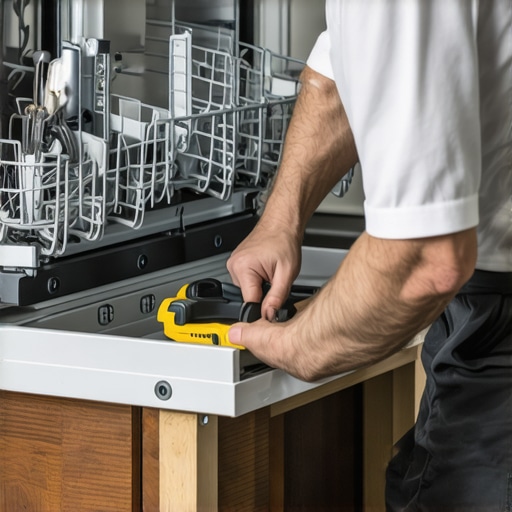
One day, during a kitchen remodel, I set out to install a new dishwasher. I thought I knew everything about the process—until I hit a snag: the air gap height. Water was backing up into the sink, and I realized I’d overlooked a crucial detail. That lightbulb moment made me realize just how important proper Air Gap placement truly is. If you’ve ever had a similar experience—frustrated by water leaks, or wondering if your installation will hold up under warranty—then you’re in the right place. Today, I’ll help you understand why the correct height for your dishwasher air gap matters and how to get it right the first time.
Why the height of your dishwasher’s air gap can make or break your kitchen’s plumbing peace of mind
The air gap acts as a safeguard, preventing wastewater from siphoning back into your dishwasher and contaminating your clean dishes. But here’s the kicker—if it’s installed too low or too high, it can cause all sorts of problems. Water may back up, leaks can develop, and worst of all, you might unknowingly void your warranty. I learned this the hard way early on, when I installed mine without paying attention to an official recommendation—only to face water issues a few weeks later. Installing the air gap at the right height isn’t just a matter of looks; it’s about ensuring your entire dishwasher system functions smoothly and stays protected.
To avoid common mistakes, it’s helpful to understand what the experts say. According to industry standards, the air gap should be positioned at a height that allows gravity to do its job—usually between 18 and 24 inches above the drain connection. But, more importantly, it should be level and firmly secured. For detailed guidelines on parts and installation, it’s worthwhile to check out resources like this article on crucial dishwasher parts. Knowing these specifics sets the foundation for a proper and effective setup.
Is worrying about air gap height overhyped?
Honestly, I was initially skeptical, too. I thought, does it really matter if I just place the air gap somewhere above the sink? Turns out, yes. A misaligned air gap can lead to unexpected backups, pipe leaks, and even damage to your dishwasher’s pump. Plus, a poorly installed air gap might cause your warranty to be denied—something I learned when I almost lost coverage because I overlooked this detail. Ensuring the correct height is not about unnecessary fuss; it’s about practical protection and peace of mind. If you’ve ever faced water backing up during a busy morning, you’ll understand why this small detail deserves your attention.
Now that I’ve shared my story, let’s dive into how to measure and install your air gap properly. The key is to follow a few simple steps, avoid common pitfalls, and make sure your installation aligns with the manufacturer’s recommendations for long-term performance and warranty protection.
,
Select the Perfect Location to Install the Air Gap
Before you begin, choose a mounting spot that’s at least 18 inches above the drain connection. Think of it as placing a dam in a river—positioning it correctly ensures smooth water flow and prevents backups. I once attempted to install my air gap under the sink, thinking it didn’t matter, only to find water backing into the dishwasher during heavy loads. To avoid repeating that mistake, opt for a visible, accessible spot near the sink or countertop, making future maintenance easier. Use a level to verify the height; this simple step guarantees gravity will do its job effectively. For detailed part recommendations, check top tips for selecting the right parts.
Many homeowners assume that selecting the right parts is enough to guarantee a successful dishwasher installation. However, overlooking nuanced installation details can lead to issues that void warranties or cause costly repairs. A prevalent misconception is that high-quality components alone suffice; in reality, the proper installation technique combined with appropriate parts ensures long-term performance. For example, even if you use a premium inlet valve, improper sealing or incorrect placement can result in leaks, ultimately compromising your warranty coverage. Many people forget that warranty policies often specify precise installation guidelines, including torque specifications and environmental considerations. Ignoring these details increases the risk of early component failure, which can be confusing when troubleshooting or claiming warranty benefits. It’s essential to understand that optimal parts selection and meticulous installation go hand-in-hand for safeguarding your investment.
One critical mistake I frequently see is reusing old hoses or connectors without verifying their compatibility or condition. This shortcut might seem convenient, but as highlighted in this detailed guide, outdated or degraded hoses can lead to sudden failures or leaks. An often-overlooked nuance is the significance of correct torque when tightening fittings; under-tightening can cause leaks, while over-tightening may damage threads or crush seals, both leading to warranty issues. Advanced installers pay close attention to these torque specs and use thread sealants where applicable, ensuring a watertight, durable connection. Remember, tiny oversights here can result in water damage, mold growth, or loss of warranty coverage, which is why precise attention to detail is crucial.
Can choosing the right parts compensate for a novice installation? It depends.
While selecting high-quality components improves the odds of a successful setup, expert-level installation practices often make the real difference. Even premium parts can fail prematurely if installed incorrectly—like a high-flow drain pump not functioning properly because of inadequate securing or incorrect angles. This point is emphasized in this resource on warranty maximization. Professional installers are trained to recognize subtle issues such as alignment problems, proper drainage loops, and electrical grounding, which DIYers might overlook. For instance, an improperly positioned high loop drain hose may not be overtly obvious but can cause siphoning or backflow, risking both appliance damage and warranty denial. The takeaway is that expertise in installation—combined with thoughtful parts selection—ensures your dishwasher operates reliably and remains under warranty for years. Remember, cutting corners now can lead to costly callbacks later. Have you ever fallen into this trap? Let me know in the comments.
Tools I Recommend for Long-Term Dishwasher Care
Maintaining your dishwasher over time demands the right equipment. I personally swear by a few specific tools that make all the difference. A high-quality digital multimeter, for example, is indispensable for diagnosing electrical issues—I’ve found that a reputable Fluke multimeter provides precise readings, making troubleshooting circuit boards or sensors straightforward. When it comes to cleaning delicate parts like turbidity sensors, I use a soft-bristled brush and non-abrasive cleaning solution; this combo prevents scratching and ensures accuracy. Additionally, an inline water pressure gauge helps verify that water inlet pressure stays within manufacturer-specified ranges, which is crucial for optimal operation.
For those investing in ongoing maintenance, portable ultrasonic cleaners have proved invaluable for cleaning small parts such as spray arms and filters. The ultrasonic vibrations effectively dislodge debris without damaging components, prolonging their lifespan. To plan preventive maintenance tasks, I rely on a detailed maintenance log—either digital or paper—that tracks part replacements, sensor calibrations, and when to perform thorough cleanings. This systematic approach helps me identify patterns, schedule timely repairs, and avoid costly breakdowns.
Future of Dishwasher Maintenance Tools
Looking ahead, I predict a surge in smart diagnostic tools integrated into appliances themselves. Manufacturers are increasingly embedding sensors and connectivity features that alert homeowners to issues before they escalate, saving time and money. Apps that remotely monitor appliance health and suggest maintenance schedules are becoming more sophisticated, making maintenance more proactive than ever before.
How do I keep my dishwasher functioning flawlessly over the years?
Implementing a regular maintenance routine is key. Use recommended tools like digital multimeters to verify electrical integrity, ultrasonic cleaners for delicate parts, and water pressure gauges to ensure proper inlet conditions. Combining these with detailed records of your maintenance activities helps ensure your dishwasher operates at peak efficiency and remains covered under warranty. Regularly checking parts before they fail—guided by resources like this comprehensive guide—can save you from unexpected breakdowns. Don’t forget, staying ahead with these tools not only prolongs your appliance’s lifespan but also helps maintain warranty validity, especially as warranties often stipulate routine checks and part replacements to keep coverage intact.

The Hardest Lesson I Learned About installation,parts,dishwasher,warranty
One pivotal experience taught me that even seemingly minor details like air gap height can determine the longevity of your dishwasher’s performance and its warranty validity. Overlooking precise measurements initially led me to costly repairs, revealing that every component’s placement matters significantly. Embracing meticulous attention to detail transformed my approach, emphasizing the importance of follow-through on installation nuances. This lesson underscored that what seems trivial often holds the key to avoiding future headaches and preserving warranty coverage.
3 Myths About installation,parts,dishwasher,warranty That Held Me Back
Early on, I believed that placing the air gap anywhere above the sink would suffice, and that high-quality parts guaranteed success—both misconceptions. I also thought that leveling was secondary to just securing components. These myths delayed my learning curve, leading to backups and leaks. Debunking these false beliefs revealed that precision, proper positioning, and understanding manufacturer guidelines are crucial. Challenging assumptions can save you from preventable issues and ensure your warranty remains intact.
What Experts Won’t Tell You About installation,parts,dishwasher,warranty
Many experts stress the importance of correct height, but few emphasize how deviations—even a few inches—can void your warranty or cause silent failures. I discovered that detailed measurements, level placement, and adhering to standards are often overlooked but vital. This insight made me realize that diligent, informed installation practices are your best defense against unexpected damages and insurance claim denials. Learning these behind-the-scenes tips offers a deeper understanding that empowers confident, long-lasting setups.
My Essential Toolkit for installation,parts,dishwasher,warranty
Over time, I’ve curated a set of tools that simplify precise installation and maintenance. A high-quality digital multimeter helps me verify electrical connections, while an ultrasonic cleaner keeps parts squeaky clean without damage. A reliable water pressure gauge ensures inlet flows are optimal, preventing backups. I also rely on a sturdy level and torque wrench for fittings—these tools have been game-changers in avoiding leaks and ensuring warranty compliance. Investing in these essentials has proven invaluable for peace of mind and appliance longevity.
Where to Go from Here
If you’re serious about your dishwasher’s performance, I recommend exploring in-depth resources like this comprehensive guide to dishwasher parts. It offers insights into selecting the right components and understanding their roles, which is crucial for troubleshooting and warranty claims. Additionally, mastering proper installation techniques through trusted tutorials can help you avoid rookie mistakes. Remember, staying informed and organized with your maintenance logs ensures you’re always prepared and protected against unexpected issues. Taking proactive steps now pays off in long-term savings and satisfaction.
Related Posts
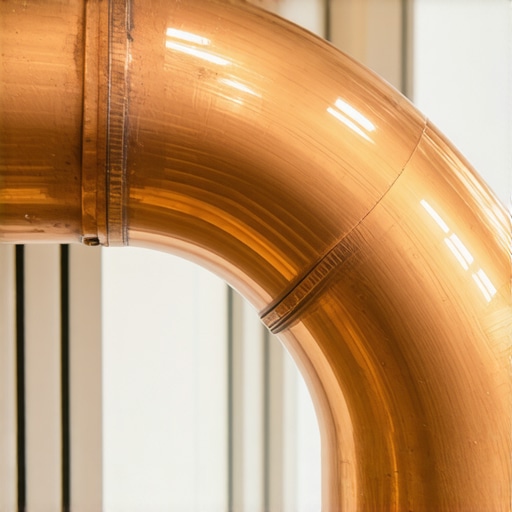
The $12 Copper Coupler That Stops Kitchen Floor Rot
I remember the moment I first noticed that unmistakable smell…
How to Align a Dishwasher Toe-Kick for a Custom Look
I remember the first time I installed a new dishwasher…
The Real Cost of Reusing an Old Water Supply Line
Have you ever reached behind your dishwasher, only to be…