
Ever had that sinking feeling when you realize your dishwasher isn’t draining properly, and then discovery hits—you might be dealing with a clogged valve caused by hard water buildup. I remember the first time it happened to me. After investing in what I thought was a reliable appliance, I faced an unexpected repair bill. It was a real wake-up call about the importance of understanding how hard water can silently sabotage your home systems.
Dealing with Hidden Water Woes and Warranty Limits
When water hardness becomes extreme, minerals like calcium and magnesium can accumulate inside valves and other components, leading to blockages that are tricky to detect. What surprised me was that even with a valid warranty, many claims get denied because the issue stems from mineral deposits, which aren’t always considered manufacturer’s defects. So, the question is—how do you prevent this and ensure your warranty stays valid? Today, I’ll walk you through the common pitfalls and practical steps based on my personal experience and research.
Is Hard Water Buildup a Common Warrantable Issue?
This is a big concern many homeowners underestimate. Manufacturers often exclude damage caused by mineral buildup because it’s viewed as a maintenance issue. Early in my troubleshooting, I made the mistake of ignoring my home’s water quality, which compounded the problem. To avoid this, I recommend checking out detailed guides, like this resource on warranty coverage for dishwasher parts.
Knowing where your water hardness stands can help you plan maintenance proactively. Installing a water softener can reduce mineral deposits and prolong the life of valves and other sensitive parts, saving you from costly repairs and uncertain warranty claims.
Next, let’s dive into how you can identify early signs of a clogged valve and what practical steps you can take to fix it before warranty issues arise. Stay tuned—because tackling this problem now could save you both money and frustration in the long run.
Assess Your Water Quality and Install a Softener
Begin by testing your home’s water hardness using a simple test strip available at hardware stores. During my own kitchen upgrade, I used one of these strips to confirm my water was hard enough to cause mineral buildup. Once confirmed, I installed a water softener before connecting the dishwasher, which dramatically reduced mineral deposits and extended the lifespan of internal valves. For installation tips, check this comprehensive guide.
Regular Inspection of Key Components
Check the Inlet Valve and Filter
Hard water can cause calcium deposits to clog the inlet valve. To inspect, turn off power and water supply, then access the inlet valve behind the kickplate. Remove any debris, and if mineral buildup is found, consider replacing the valve with a corrosion-resistant model. Reviewing this resource helps identify suitable parts for longevity.
Clean the Drain Pump and Filter
Mineral deposits may also accumulate in the drain pump. Remove and clean the filter thoroughly with vinegar to dissolve scale. I learned this firsthand when my drain was slow despite a new pump; cleaning the filter resolved the issue without new parts. For detailed steps, see this troubleshooting guide.
Implement Preventative Maintenance Routines
Establish a schedule to rinse out components with vinegar or descaling solutions every 3-6 months, especially if your water is particularly hard. This proactive step reduces mineral buildup and maintains water flow. Keep a maintenance log with timestamps and images to document care, which can be invaluable if warranty claims arise.
Mind the Warranty Nuances on Mineral Damage
Remember, manufacturers often exclude damage caused by minerals from warranty coverage. So, documenting your maintenance efforts and water quality readings can support your claim if a component fails prematurely. Familiarize yourself with warranty coverage details to understand your rights.
Upgrade Critical Parts for Hard Water Conditions
If your tests show extremely hard water, consider upgrading parts like stainless steel hoses and corrosion-resistant valves. These materials withstand mineral buildup far better than plastic or standard models. When choosing parts, review this selection guide to optimize for longevity and warranty compliance.
Document Everything During Installation and Repairs
Take photos of each step—especially connections and labels—to create a detailed record of your setup. This documentation can be a lifesaver when requesting warranty service or troubleshooting persistent issues. I once had to supply a timestamped photo proving my adherence to installation standards, which expedited my claim process.
Use the Right Tools and Parts
Always employ the proper tools for compression fittings and the correct gasket types to prevent leaks and damage. Avoid shortcuts like reusing old hoses or aftermarket parts not approved for your model, as these can void warranty coverage. Review this tool guide for best practices.
Stay Vigilant and Replace When Necessary
Despite preventive efforts, some components will eventually succumb to mineral corrosion. Monitor for signs like leaks, unusual noises, or poor performance. When replacements are needed, prioritize OEM parts or high-quality aftermarket options recommended in this resource. Timely action avoids further damage and preserves your warranty rights.
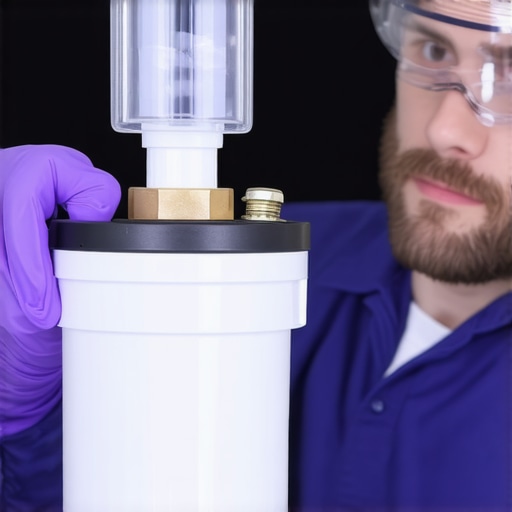 Many homeowners believe that once a dishwasher is properly installed, their worries about warranty coverage and part longevity are over, but in reality, several lesser-known factors can trip you up. Let’s dig deeper into what most people get wrong, so you can avoid common pitfalls. First, a widespread misconception is that all parts are covered equally under warranty, but manufacturers often exclude components like inlet valves and filters from coverage if mineral buildup is the cause—a nuance overlooked by many. Relying solely on generic repair tips can lead to expensive mistakes; for example, reusing old water supply hoses or ignoring the importance of selecting corrosion-resistant parts might void your warranty, as outlined in this resource. Now, here’s a critical trap: assume that installing a water softener eliminates all mineral-related issues. While softeners significantly reduce calcium and magnesium deposits, they don’t prevent all forms of scale, especially when your water hardness exceeds typical levels. Overlooking this can lead to premature part failure despite your best efforts. So, how do you upgrade your installation approach? Consider investing in high-quality, OEM-certified parts, which not only support warranty claims but also outperform cheaper alternatives in longevity—see this guide. Another commonly missed nuance is the importance of precise assembly torque, especially for compression fittings. Over-tightening can cause damage, leading to leaks or even voided warranties, as explained in this detailed article. Advanced installers often wonder, “What’s the best way to ensure my warranty remains valid if a component fails prematurely?” The answer involves meticulous documentation—photos, serial numbers, and maintenance logs—to support your claims, as recommended in this post. You might think that replacing worn parts with inexpensive or generic components wouldn’t impact warranty coverage, but many manufacturers’ policies specify only OEM or approved aftermarket parts are eligible for warranty repairs. Using the wrong parts can inadvertently deny your claim, further emphasizing the importance of proper Part selection and installation consistency. Finally, don’t forget that even the most diligent maintenance can’t stave off all issues; components like float switches or drainage systems inherently wear out over time. Recognizing signs early through regular checks is paramount. Remember, understanding these nuanced details can be the difference between a seamless warranty experience and unexpected expenses. Have you ever fallen into this trap? Let me know in the comments.
How do I keep my dishwasher running smoothly over time?
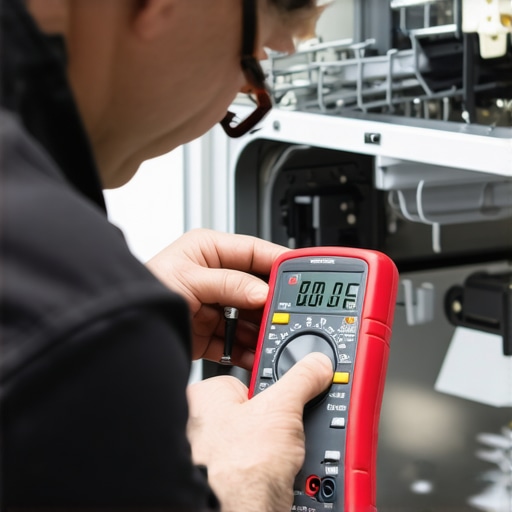
Maintaining your dishwasher’s performance requires more than occasional cleaning; it hinges on the right tools and disciplined routines. Personally, I swear by high-quality inspection mirrors and digital multimeters because they allow me to diagnose issues precisely before they escalate. An inspection mirror, for example, helps me see behind tight spots or under components without disassembly, saving time and preventing accidental damage. Coupled with a multimeter, I can test electrical components like heating elements or sensors accurately, ensuring they’re functioning correctly and preventing premature failures.
When it comes to cleaning, I rely on a good set of soft brushes and vinegar-based descaling solutions. These tools enable me to remove mineral buildup from valves and filters effectively. Regular inspection of parts like inlet valves and drain pumps—guided by detailed procedures from this resource—helps me catch wear and tear early. Keeping a maintenance log in a digital note helps track when I last serviced each component, which is invaluable when dealing with warranties or planning replacements.
Looking ahead, I predict that smart diagnostic tools integrated with apps will become increasingly essential, allowing homeowners to monitor performance remotely and receive alerts for potential issues. This evolution will empower users to perform preventive maintenance proactively, extending appliance lifespan and reducing repair costs.
Why should I regularly check and calibrate my dishwasher components?
Doing so not only ensures optimal cleaning results but also prevents minor issues from becoming major failures. For instance, verifying the correct torque on compression fittings using a torque wrench minimizes leaks and prevents warranty voidance, especially critical in high-hardness water conditions. I recommend checking connections with a digital torque wrench, ensuring fittings are tightened to manufacturer specifications detailed in this guide to avoid over-tightening or under-tightening that leads to leaks or poor seals.
Moreover, calibrating water hardness levels through the control panel or external testing kits helps maintain the balance needed for effective rinsing. Using a precise water hardness test strip, like the ones discussed here, lets me optimize my softener’s settings and prolong the lifespan of internal parts like the float switch and spray arms. Implementing these measures makes a tangible difference in performance and can save money on repairs and warranty claims.
To maximize your dishwasher’s performance, adopting a routine of component checks, calibration, and documentation is key. Investing in quality tools—like a digital multimeter and torque wrench—and keeping detailed records can streamline repairs, improve efficiency, and support warranty claims if needed. Consider integrating smart sensors and diagnostic apps into your maintenance routine; they represent the future of appliance care, allowing you to stay ahead of problems before they cause costly damage. Start by testing your water hardness with a reliable strip and calibrate your softener accordingly — a simple step that pays big dividends.
Three Surprising Lessons from My Dishwasher Journey
The first time I faced a clogged inlet valve, I believed a simple repair would suffice. It taught me that overlooked water quality could silently sabotage even the best appliances. I realized that diligent water testing and using the right parts protect both my investment and my warranty rights. Additionally, I discovered that regular inspection routines, combined with proper documentation, can make or break warranty claims. These lightbulb moments transformed my approach from reactive fixes to proactive care, ensuring longevity and peace of mind.
Tools and Resources That Changed My Game
If you’re serious about maintaining your dishwasher and maximizing warranty coverage, these tools are game-changers. A reliable water hardness test strip helps you identify mineral buildup early, preventing costly damage. Investing in a quality torque wrench ensures fittings are tightened correctly, avoiding leaks that could void warranties. My go-to guide is this comprehensive resource on part selection; it helped me pick durable, warranty-compliant components. Lastly, a detailed maintenance log, including photos, is invaluable when submitting warranty claims. Trust me, these tools make the difference between a smooth repair and a frustrating denial.
Stay Ahead and Keep Your Dishwasher Happy
Your proactive efforts today lay the foundation for trouble-free operation tomorrow. Regularly check and calibrate components like float switches and spray arms, ensuring optimal performance. Don’t underestimate the power of documenting every repair step—photos, serial numbers, and timestamps strengthen your warranty claims when necessary. Embrace smart diagnostic apps and remote monitoring tools; they’re the next evolution in appliance care that can alert you before problems escalate. Ready to take control? Starting with a simple water hardness test and maintaining detailed records will set you on the path to appliance longevity and warranty success.
What’s Your Next Step in Dishwasher Care?
Have you ever struggled with a warranty claim or overlooked maintenance that caused issues? Share your experiences below, and let’s grow together in mastering dishwasher maintenance and warranty confidence.
Related Posts
Why Your Warranty Claim Hinges on Using the Right Salt
Ever had that sinking feeling when your brand-new dishwasher suddenly…
Why Your Warranty Covers Parts but Maybe Not the Labor
It was a morning just like any other when I…

The Evidence You Need to Keep Your Warranty Intact After a Move
I remember the moment clearly—finally floor-ing my new kitchen, I…