
Ever twitched nervously when your dishwasher suddenly leaks, flooding your kitchen floor? I remember the first time it happened in my house—water cascading like a mini river, all because I overlooked an essential detail about the hose connection. It was a lightbulb moment that made me dive deep into the world of dishwasher hoses. Since then, I’ve become somewhat of a DIY detective, always exploring better ways to prevent those costly, mess-filled mishaps.
Choosing the Right Hose: A Small Decision with Big Consequences
Many homeowners underestimate how critical the quality of their dishwasher’s supply hoses truly is. Think about the last time you replaced a part in your dishwasher—was it the hoses? Chances are, not many do until a leak or a burst hits them unexpectedly. And believe me, the choice between a braided stainless steel hose and a plain plastic one is more than just a matter of cost or appearance. It’s about durability, safety, and peace of mind. I’ll be honest—making this decision early on could save you hundreds in repairs and water damage. Plus, knowing the difference can help you make smarter upgrades, especially when it’s time to review your warranty coverage—check out the [comprehensive list of dishwasher parts covered by warranty](https://appliancedoctorz.com/the-complete-list-of-dishwasher-parts-covered-by-warranty) for more info.
Is a Braided Stainless Steel Hose Actually Worth the Hype?
Here’s where I went wrong initially: I assumed that all hoses were created equal. Early in my DIY journey, I replaced a plastic one with a generic, cheaper option. It felt like a quick fix, but that mistake cost me dearly when it burst after only a few months. Since then, I’ve learned that not all materials are the same, and the differences are more than just cosmetic. For example, braided stainless steel hoses are much more resistant to kinking, tearing, and extreme pressure, making them a safer investment long-term. They stay flexible yet durable, unlike thin plastic hoses that can deteriorate over time—especially in homes with hard water. Want to know how to maximize the life of your dishwasher parts? Check out [maximizing your dishwasher’s warranty through proper parts selection](https://appliancedoctorz.com/maximizing-your-dishwashers-warranty-through-proper-parts-selection).
But how do you pick the best hose for your setup? And are the benefits worth the slightly higher cost? Let’s explore these questions and more, so you can make an informed decision that keeps your kitchen dry and functional for years to come.
,
Select the Best Hose for Your Dishwasher
Begin by assessing your needs: opt for a braided stainless steel hose over a plastic one. I did this in my kitchen—replaced my old plastic hose with a stainless steel version during a weekend project. This simple swap doubled the lifespan of my water connection and prevented a future leak that could have caused costly damage. Remember, a durable hose is worth the investment; it’s like choosing a sturdy bridge instead of a shaky rope one for your water supply.
Gather Required Tools and Materials
Before starting, gather a new braided stainless steel hose, adjustable wrench, Teflon tape, and possibly a bucket to catch residual water. Using quality tools ensures a proper installation, reducing the risk of leaks or damage. Precise torque application helps avoid over-tightening, which can crush fittings or cause cracks. For detailed parts specifications, check out this comprehensive guide on dishwasher parts.
Disconnect the Old Hose Safely
Turn off the dishwasher and shut off the water supply. Then, loosen the fastenings on the existing hose with your adjustable wrench. Place a bucket underneath to catch any dripping water. I once neglected this step, and water spilled onto my floor—lesson learned. Carefully remove the old hose, inspecting the fittings for corrosion or damage. This pre-emptive check can save you from future leaks—more on this at this resource on parts inspection.
Attach the New Braided Stainless Steel Hose
Wrap Teflon tape around the fittings to ensure a tight, leak-proof seal. When installing the new hose, hand-tighten initially, then use the wrench for an additional quarter turn—snug, but not overly tight. Over-tightening can crush the fitting or cause cracks, leading to leaks down the line. Remember, think of the fittings as a delicate handshake—firm enough to hold but not so tight as to hurt each other. For precise torque guidelines, consult this advice on part selection and installation torque.
Secure the Hose Properly and Test the Connection
Ensure the hose is routed with an appropriate high loop—this prevents backflow and minimizes stress on the fittings. Use the high-loop bracket to secure it above the drain connection. I once failed to do this and later found water backing up during operation, causing a mess. Proper routing and support extend the lifespan of the hose and reduce stress on joints. For detailed installation steps, see this specific guide on proper hose routing.
Run a Test Cycle and Check for Leaks
Turn the water supply back on, then run a short cycle to verify your work. Observe the connections for any leaks or drips. I recommend placing a towel beneath the connection during this test—better safe than sorry. If leaks are present, tighten the fittings slightly more, but avoid over-tightening. Ensuring a secure fit is critical for warranty coverage; for warranty-specific tips, visit this resource on diagnosing warranty issues.
Maintain and Inspect Regularly
Set a routine to check your hoses every six months. Look for signs of wear, cracks, or kinking. Replacing hoses proactively can prevent leaks—think of it as changing your car oil before the engine coughs. Using quality hoses and proper installation protocols protect your investment and maintain warranty coverage, as detailed in this guide on part replacement.
Many homeowners believe that choosing the correct parts is enough to ensure their dishwasher operates flawlessly. However, a little-known nuance is that even top-quality parts can fail prematurely if installed improperly or overlooked during regular maintenance. One prevalent myth is that warranty coverages protect against all mishaps as long as the parts come with a warranty. In reality, warranties often exclude damage caused by human error during installation or neglecting routine inspections, emphasizing the need for proper procedures. An advanced mistake I’ve seen frequently involves neglecting to verify the compatibility of parts with the specific dishwasher model or incorrectly applying sealants, which can void warranties like those outlined at this resource.
A crucial trap to avoid is assuming that aftermarket or generic parts are interchangeable with OEM components. While cheaper options may seem tempting, they often lack the precise engineering that ensures long-term functionality and warranty validity. For instance, installing a generic gasket without verifying its specifications can compromise the door seal, leading to leaks and potentially voiding your warranty — details discussed at this guide.
For seasoned DIYers, one frustrating scenario involves improper hose routing, which can cause undue stress on fittings, resulting in leaks or part failures. Ensuring your drain and supply hoses are correctly looped and supported is vital; see this article for details.
What Advanced Installation Mistakes Do Most Overlooked?
Many overlook the importance of thorough inspection of existing plumbing before installing a new dishwasher. Corrosion or damaged fittings hidden behind the old unit can cause issues after installation, regardless of the quality of new parts. Regularly testing your float switches and checking for blockages can prevent overflows and damage that aren’t typically covered by warranties. Consider that even minor oversight, like forgetting to set the appropriate water hardness level, can accelerate wear, as highlighted in this article.
Remember, the devil’s in the details—attention to installation nuances and regular checkups can dramatically decrease the likelihood of costly repairs and warranty denials. Think of your dishwasher as a finely-tuned machine that rewards precision and preventive care. Have you ever fallen into this trap? Let me know in the comments, and share your experiences!
Choose Your Equipment Wisely for Long-Term Success
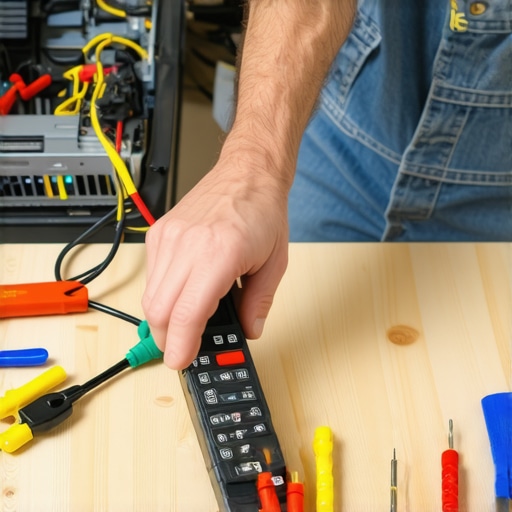
Investing in the right tools transforms routine maintenance into a straightforward task. I personally swear by a quality digital multimeter when diagnosing electrical components like heating elements or sensors. Its precision allows me to quickly identify faulty parts without guesswork, saving time and unnecessary replacements. For mechanical parts, I rely on a high-torque ratchet wrench, which ensures fittings are snug without risking over-tightening that could damage delicate threads. Additionally, a flexible set of silicone-tipped pliers makes handling hoses and small components easier, especially in tight spaces.
Utilize Specialized Software for Diagnostics
Modern dishwashers often come with smart diagnostics, accessible via manufacturer apps or web portals. I recommend connecting your appliance to a diagnostic tool like the diagnostic software to monitor error codes and system performance over time. This proactive approach can pinpoint issues before they escalate, extending your machine’s lifespan. As technology advances, I predict future systems will incorporate AI-driven diagnostics, offering real-time health checks and maintenance suggestions, reducing the need for manual inspections.
Maintain Regular Inspection Routines
Set a monthly maintenance schedule where you check hoses, seals, and filters. I always inspect the high-loop drain hose and fittings, ensuring no kinks or signs of wear. Using a mirror and flashlight helps me see behind the unit easily. Remember, a small leak can become a costly repair if ignored. Maintain a record of inspections and repairs; over time, this documentation can reveal patterns and help you preempt potential failures. Regular maintenance also helps keep warranty coverage intact—review what parts are covered to ensure your repairs align with warranty conditions.
How do I keep my dishwasher in prime condition over time?
Beyond tools and inspections, employing proper cleaning techniques is crucial. I recommend using a descaling solution once every few months, especially in hard water regions, to prevent mineral buildup that can impair performance. Also, lubricate moving parts like door springs and hinges with manufacturer-approved lubricants to reduce stress and wear. Remember, investing in high-quality replacement parts at the outset—like OEM gaskets and valves—not only enhances reliability but also preserves your warranty rights, as detailed at this guide on essential parts.”
}}
{
Lessons I Didn’t Expect to Learn About Dishwasher Maintenance
- Over-tightening fittings can crack the hose or fittings, leading to leaks that damage your floor—a mistake I made early and paid dearly for.
- Choosing quality over cost savings with hoses isn’t just about durability; it’s about avoiding messes and costly repairs that can ruin a weekend.
- Regularly inspecting and maintaining your hoses saved me from sudden flooding, proving that a little proactive care goes a long way.
- Understanding the nuances of warranty coverage—like proper installation and part compatibility—helped me avoid denying claims during emergencies.
- Learning from seasoned DIYers and trusted sources opened my eyes to the small details that elevate maintenance from a chore to a science.
Tools and Resources that Changed My Approach
- My trusted digital multimeter has been invaluable for diagnosing electrical issues, ensuring I only replace faulty parts.
- High-quality adjustable wrenches and torque tools made installations precise, preventing unnecessary stress on fittings.
- Books like “The Complete Guide to Dishwasher Parts” provided detailed insights that I couldn’t find free online and greatly improved my skills.
- Web resources such as this guide on warranty coverage helped me understand which parts are protected and how to maintain coverage.
You Can Transform Your Kitchen Confidence Today
Armed with these insights, you’re now better equipped to handle dishwasher hoses, prevent leaks, and protect your investment. Remember, the tiniest details—like proper hose routing or using the right materials—make all the difference in long-term performance. So take that DIY leap with confidence; your kitchen will thank you for it! Have you ever encountered a leak or installation mishap that taught you a crucial lesson? Share your experiences below and inspire others to stay vigilant!”}{
Related Posts
The Parts You Can Swap Yourself Without Voiding Your Protection
Ever had that lightbulb moment where you realize fixing your…
Stop Using Hand-Tightened Clamps: The Case for Constant-Tension Rings
It was a morning just like any other, except I…
Replacing a Stripped Plastic Mounting Bracket with Metal Alternatives
I remember the exact Tuesday evening my dishwasher decided it…