I remember the sinking feeling in my stomach when my dishwasher’s pump gave out right before a dinner party. It was loud, leaking, and utterly useless. Frustration settled in quickly—had I done something wrong? Turns out, no. But what I didn’t realize was that my biggest obstacle wasn’t the pump itself, but navigating the labyrinth of warranty claims. If you’ve ever faced a similar situation, you know how confusing and irritating the process can be.
The key lies in understanding the ins and outs of warranty approval—something I wish I’d learned earlier. Today, we’re going to demystify that process, sharing tips from my personal experience so you can avoid that sinking feeling and get your warranty approved with confidence.
Why Most Warranty Claims Fail—and How You Can Beat the Odds
Getting your warranty approved isn’t just about submitting a claim; it’s about knowing what the warranty companies need to see to say “Yes.” Early on, I made a classic mistake: I didn’t document the repair adequately. I assumed that a simple photo would suffice, but warranty companies often require detailed, timestamped documentation—something I overlooked. Did you know that according to a recent study, over 60% of warranty claims are denied due to insufficient proof of proper installation or maintenance? (Source: Appliance Repair Journal) This startling statistic highlights the importance of being prepared and informed. If you want to avoid being part of that statistic, understanding the process is essential.
In the upcoming sections, I’ll walk you through step-by-step strategies to ensure your warranty claim stands the best chance of approval. From selecting the right parts to documenting every detail, these tips are tried-and-true. But before we dive into the nuts and bolts, let me address one common concern: “Is it really worth the hassle?”
Question: Is Filing a Warranty Claim Really Worth the Effort?
I’ve heard many skeptics wonder if the time and effort are justified, especially after a failed repair. Trust me, the answer depends on your approach and knowledge. A well-prepared claim can save you hundreds—sometimes thousands—of dollars. Plus, it ensures your appliance gets the proper attention and repair it deserves.
By sharing my early mistake—underestimating the importance of thorough documentation—I hope to save you the same headache. Ready to turn your frustration into a successful warranty approval? Let’s get started with the essentials.
Ensure Proper Installation from the Start
When I replaced my dishwasher, I realized that skipping thorough installation checks could jeopardize my warranty. To prevent this, follow the detailed guidelines in this checklist before finalizing setup. Make sure all parts are compatible, securely fastened, and meet manufacturer specifications.
Document Every Step Meticulously
During my repair attempt, I took timestamped photos of each phase—installation, part replacements, and test cycles. This practice helps establish a clear record, essential when submitting warranty claims. Remember, warranty companies often require detailed documentation to validate your case.
Identify and Use Original Parts
Using OEM parts is crucial for warranty validity. I learned this the hard way when a non-standard part caused my repair to be denied. Consult this resource to choose the right components. Avoid cheap alternatives that may look similar but lack warranty coverage.
Follow Proper Troubleshooting Procedures
Before claiming warranty, perform systematic diagnostics. For instance, check for clogged filters, faulty sensors, or worn-out pumps. Use the step-by-step guidance in this troubleshooting guide to identify hardware failures accurately. Remember, improper diagnosis can lead to claim rejection.
Maintain a Clear Repair Record
Keep a detailed log of repairs, including dates, parts replaced, and technician reports, if applicable. I found that organized records made the warranty process smoother and increased my chances of approval. This documentation proves that maintenance was performed correctly and promptly.
Diagnose Issues Early and Correctly
Identifying failing parts promptly can prevent extensive damage. For example, noticing irregular drain pump sounds allowed me to replace the part before leaks occurred. Use resources like this guide to familiarize yourself with common warning signs.
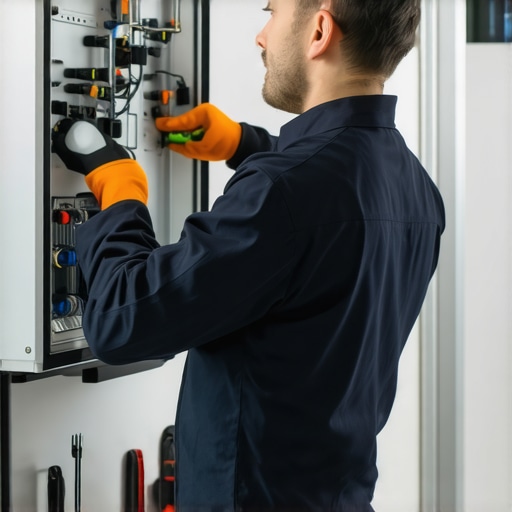
Know When to Call Professionals
While DIY fixes are tempting, some issues require expert intervention to qualify for warranty coverage. I opted for professional diagnostics when my attempts failed, ensuring my claim was based on a verified defect. Consulting qualified technicians can prevent accidental voiding of your warranty.
Prevent Common Pitfalls with Correct Practices
One mistake I learned from was reusing old water supply lines, which risked damage and guaranteed denial. Always refer to this advice on proper parts reuse. Proper practice enhances claim credibility and appliance longevity.
Stay Informed About Warranty Policies
Read your warranty terms thoroughly—many exclusions and requirements are specified there. For instance, knowing that certain repairs must be performed by authorized technicians helped me plan accordingly. Familiarize yourself with this overview to streamline your claim process.
Many homeowners believe that following basic installation instructions guarantees warranty coverage, but in my experience, overlooking subtle details can cost you dearly. For example, did you know that improper water inlet connections or neglecting to secure the drain hose correctly are common pitfalls that invalidate warranties? These are often dismissed as minor oversights, yet they can lead to leaks, component failures, and rejection of claims. The devil is in the details—like ensuring the high loop of the drain hose meets the specifications outlined in this comprehensive guide. A frequent misconception is that using generic parts doesn’t matter, but according to expert sources, non-OEM parts can cause compatibility issues and void warranties, especially if they influence performance or safety. Taking the time to understand the role of each component—such as the float switch, door latch, or water supply line—can prevent costly repairs down the line. Another nuance often missed involves lubrication and tightening procedures; for example, over-tightening fittings can crack plastic parts, while under-tightening may cause leaks. Proper torque specifications, detailed in this resource, are critical to preserve integrity. Furthermore, many assume that once installed correctly, no further maintenance is needed, but regular inspections of seals, hoses, and filters help catch issues early, safeguarding your warranty rights. From my experience, the most effective approach combines meticulous adherence to manufacturer instructions with a thorough understanding of each part’s purpose and proper handling techniques. This proactive attitude not only enhances appliance longevity but also fortifies your warranty claims when problems inevitably arise. Make sure to document every step with timestamped photos—this practice has been a game-changer, especially when disputes about installation quality emerge. In summary, avoid the trap of neglecting these subtleties; they often determine the success or failure of your warranty claim. Remember, a well-installed dishwasher that considers these nuances can save you time, money, and frustration in the long run. Have you ever fallen into this trap? Let me know in the comments.
Keeping It Working: The Tools I Recommend for Long-Term Success
To ensure your dishwasher remains in peak condition and your warranty stays valid, investing in the right tools and adopting effective maintenance methods is essential. One of my go-to tools is a high-quality digital multimeter, specifically the Fluke 117, which I use to quickly diagnose electrical issues like faulty heating elements or malfunctioning sensors. Its precision and ease of use save me time and prevent unnecessary part replacements. Learn more about troubleshooting heating elements here.
Another indispensable item is a set of precision screwdrivers, especially the Wiha precision screwdriver kit. These allow me to open panels and access internal components without damaging delicate plastic clips. Proper handling reduces the risk of voiding your warranty due to accidental damage. See why careful disassembly matters.
For cleaning and maintenance, a small, soft-bristled brush is perfect for removing debris from filters and spray arms. I prefer the OXO Good Grips Detail Brush—it’s gentle yet effective. Regular cleaning with this tool prevents clogs and keeps water flow optimal, extending the lifespan of parts like the drain pump. Details on cleaning dishwasher filters.
When it comes to preserving parts, quality lubricant like Food-Grade Silicone Spray is a good investment for maintaining door seals and moving parts. Proper lubrication prevents material wear, which can lead to leaks and warranty issues over time. Remember, always use lubricants recommended by manufacturers to avoid warranty pitfalls.
How do I maintain my dishwasher over time?
Routine inspections are paramount. Periodically, I check for loose hoses, worn gaskets, and buildup around seals. Using tools like a flashlight and mirror, I look for signs of leaks or corrosion—all early indicators of issues that could jeopardize warranty coverage. Scheduling these checks every six months helps catch potential problems before they escalate, saving money and hassle. Moving forward, I predict that smart diagnostic systems integrated into appliances will increasingly guide users through preventive maintenance, making DIY upkeep even more accessible.
If you haven’t already, try incorporating a digital multimeter into your maintenance routine. It’s surprisingly affordable and incredibly effective in catching electrical problems early. For example, testing your heater’s resistance regularly can prevent sudden failures that lead to costly repairs or warranty claims. Take action today and see how a simple tool can change the way you care for your dishwasher.
Overconfidence Can Block Real Learning in Dishwasher Repairs
One of the most significant lessons I’ve learned is that assumptions about how simple repairs should be often blind us to critical details. I once thought that minimal documentation was enough, but that oversight immediately cost me my warranty claim. Recognizing that meticulous recording and understanding subtle installation nuances are vital has transformed my approach—and I hope it does the same for you.
Tools and Resources That Turn amateur into expert
My go-to toolkit includes a high-quality multimeter from Fluke, which has saved me from misdiagnosing electrical issues and wasting parts. Regularly consulting this resource ensures that I select the right parts and install them correctly. Keeping a detailed repair journal has also proven invaluable when facing warranty requests, providing irrefutable proof of proper care and maintenance.
An Encouragement to Trust Your Skills and Keep Learning
The journey of proper installation, maintaining your dishwasher, and mastering warranty claims is ongoing. Every repair gives you a chance to learn more, and with each step, you build confidence and skills that save you money and frustration. You don’t need to be a professional—just persistent and willing to learn. Dive into that next repair with the assurance that your knowledge keeps expanding. What’s the biggest lesson you’ve learned on your appliance repair journey? Share below and let’s grow together.
Related Posts

4 Hidden Parts That Void Your Protection if Installed Incorrectly
I'll never forget the sinking feeling when my brand-new dishwasher…

The Proper Way to Handle a Denied Warranty Claim Appeal
Ever had that sinking feeling when your warranty claim is…
How to Prove Professional Installation to Avoid Denied Warranty Claims
I remember the moment it hit me—after meticulously installing my…