I remember the moment I realized I’d been wasting money on parts I didn’t need to buy from third-party sellers. It was a frustrating weekend when my brand-new dishwasher stopped mid-cycle, and after hours of troubleshooting, I was about to replace a component I’d purchased online for half the price. But what I didn’t know then — what I learned the hard way — is that not all parts are created equal, and some are better left to the manufacturers.
Why This Matters More Than Ever
In my early days of DIY repairs, I thought saving a few bucks meant I was being smart. Turns out, I was actually risking my appliance’s longevity and my own wallet. Appliances are complex, and diving into replacements based solely on price can lead to bigger problems down the line. For example, I discovered that using cheap, third-party replacement parts for critical components like the heating element or control boards often results in frequent breakdowns or voids the warranty altogether. This realization pushed me to dig deeper into what parts are worth buying from third-party sources and which ones should be reserved for the manufacturer.
According to experts, some components are designed with proprietary specifications that third-party sellers simply can’t replicate accurately, leading to poor fitment or subpar performance. Knowing which parts are covered by warranty can save you money and hassle, but only if you choose your replacements wisely.
So, what are these parts you should never buy from a third-party site? And how can you tell the difference between a genuine, durable part and an inferior imitation? That’s what we’re going to explore in this guide.
Should You Question the Value of Cheaper Parts?
My biggest mistake early on was assuming that all replacement parts were equal—an easy trap to fall into when trying to cut costs. But experience and industry insights show that cheap parts often lead to more expenses, especially if they cause warranty issues or damage other components. For a detailed understanding, check out this post on parts to check during installation.
Now, I want to hear from you — have you ever installed a third-party part and regretted it? Or maybe you’ve avoided it altogether? Share your stories in the comments — I bet a lot of us have been there. In the sections ahead, I’ll share the three parts that I vow to always buy directly from the manufacturer, and why that small investment pays off in the long run. Ready to avoid the pitfalls I fell into? Let’s dive in.
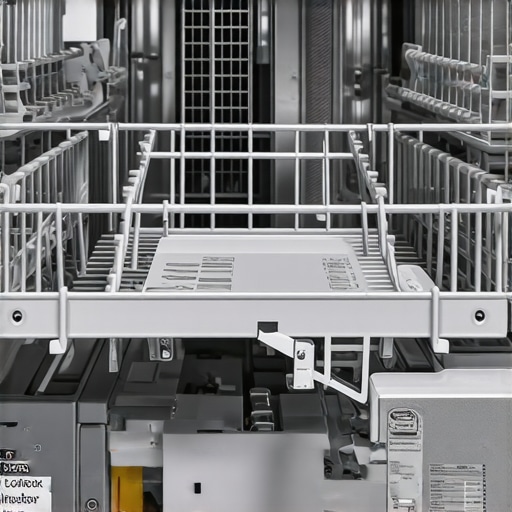
Identify Critical Parts That Require OEM Quality
Start by making a list of the dishwasher components most vital to its operation, such as the heating element, control board, and water inlet valve. These parts are typically proprietary and require genuine manufacturer parts to ensure optimal performance. For example, during my last repair, replacing the control board with a third-party version led to error codes and a short lifespan, confirming the importance of authentic components. To minimize risks, consult resources like this list of warranty-covered parts.
Source Parts from Trusted Suppliers and Manufacturers
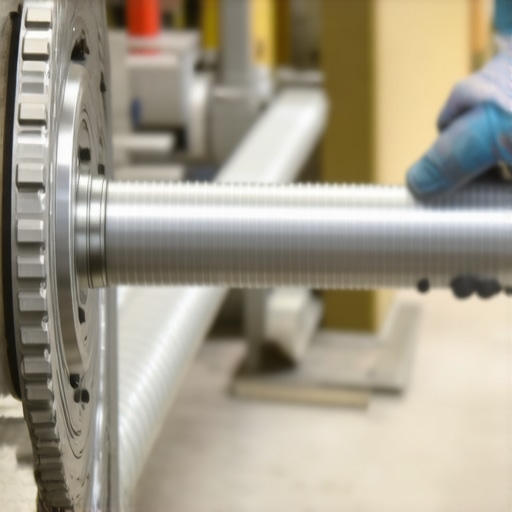
Purchase directly from the manufacturer or authorized dealers. This reduces the chance of receiving counterfeit or substandard parts. When ordering, verify the supplier’s credentials and check reviews. In one case, I ordered a replacement heating element from an unverified seller, only to find it’s rated for a different model, which could have caused damage. Always compare part numbers and specifications with the original to confirm compatibility. Use links such as these tips for selecting the right parts.
Check the Warranty Coverage Before Installing
Understanding your warranty coverage influences your part choices profoundly. If a critical component fails and you’ve used OEM parts, you’re more likely to be covered. I remember a time I installed a third-party water inlet valve, and my warranty was subsequently denied because I didn’t use the genuine part. To avoid this, review the conditions in this guide on warranty terms. Keep receipts and take photos of installed components to document compliance.
Follow Proper Installation Procedures
Even the best parts can fail prematurely if installed incorrectly. Replace components carefully, following the manufacturer’s instructions step-by-step. For example, when replacing the door seal, I used the proper gasket adhesive to prevent leaks, avoiding a messy water damage situation. Proper installation also involves ensuring all connections are torqued to manufacturer specifications. Refer to this article on installation checks for comprehensive guidance.
Test Components Immediately After Installation
Conduct thorough testing to confirm correct operation before completing the repair. Use measurement tools like a multimeter to verify electrical components—see this guide for testing heating elements. Running a short cycle allows you to catch issues early, preventing damage or warranty disputes. I once tested a new control board during a trial run and identified a faulty sensor, saving myself from a full system failure down the line.
Keep Documentation Ready for Warranty Claims
Photograph each step of the repair process, retain your purchase receipts, and record installation details. This evidence can verify that you used authorized parts and followed correct procedures when making warranty claims. For instance, a photo of my properly torqued water inlet connections helped me prove adherence to manufacturer specifications during a dispute. Store this info securely, as it can streamline future warranty interactions. Learning these steps transformed my DIY repairs into successful warranty claims, saving time and money.Many homeowners believe that purchasing cheaper dishwasher parts is a straightforward way to save money, but this overlooks critical nuances that can lead to costly mistakes. A prevalent myth is that all replacement parts are interchangeable—nothing could be further from the truth. Proprietary components like control boards and water inlet valves are often designed with specific specifications that third-party sellers can’t replicate accurately, risking subpar performance or voiding your warranty. In fact, relying on inferior parts may cause premature failures, leading to even higher repair costs over time. Moreover, there’s a misconception that warranties automatically cover any part replacement—this isn’t always true. Warranty coverage often hinges on using manufacturer-approved parts and proper installation procedures, details that many overlook. For example, installing a non-compliant inlet valve might seem minor but can result in denied warranty claims, as outlined in expert guides such as this resource on warranty conditions. An often-overlooked trap is neglecting the importance of professional installation. Even with the right parts, improper setup—such as incorrect leveling or faulty hose connections—can cause leaks and operational issues that void warranties. Advanced users might ask: how do you ensure compliance with warranty terms while avoiding hidden costs? The answer lies in sourcing parts from trusted suppliers and meticulously following installation guidelines, as detailed in this article on installation best practices. Remember, a small investment in OEM components and proper installation not only extends your dishwasher’s lifespan but also safeguards your warranty benefits. Have you ever fallen into this trap? Let me know in the comments.
Keeping your dishwasher in top shape requires more than just the right parts; it demands the proper tools, consistent maintenance routines, and a proactive attitude. Over time, I’ve refined my toolkit and techniques to ensure my appliances run smoothly and efficiently, saving me time and money. In this section, I’ll share the specific tools I personally rely on and explain why each is vital for effective maintenance and troubleshooting.
Why a Digital Multimeter Is Your Best Friend
I highly recommend investing in a quality digital multimeter, like the Fluke 115. Why? Because testing electrical components such as heating elements, control boards, and sensors becomes quick and accurate with a reliable multimeter. I use mine regularly—not only during repairs but also for routine diagnostics like verifying the resistance of the heating element, following methods outlined here. Accurate readings help prevent unnecessary part replacements and confirm that repairs are successful the first time.
Specialized Screwdrivers and Nut Drivers
Dishwasher panels and internal components are often secured with Torx, Phillips, or flat-head screws. I recommend keeping a set of high-quality screwdrivers, including Torx and precision bits, to avoid stripping fasteners. The right tool makes disassembly smoother and helps preserve your appliance’s integrity, especially when working on sensitive parts like control boards or door switches. I’ve found that cheap screwdrivers damage screws and can complicate repairs, so investing in a durable set pays dividends over time.
Flexible Inspection Mirrors and LED Flashlights
Sometimes, hidden issues cause leaks or improper operation. A small, 360-degree LED inspection mirror helps me peer into tight spots under the dishwasher and behind panels, ensuring I don’t miss critical clues. Complemented with a bright, rechargeable LED flashlight, I can illuminate hard-to-see areas without straining my eyes. These tools are invaluable during detailed inspections, especially when troubleshooting complex problems like clogged inlet valves or faulty wiring.
Drainage and Leak Detection Kits
Leaks can lead to costly damage, so I prefer using specialized leak detection kits that include dye tablets or electronic leak sensors. This allows me to identify seepage early. For example, when suspecting a slow leak, using dye trace helps confirm the source—be it a misaligned door seal or a cracked hose. Investing in these diagnostic aids avoids guesswork and ensures repairs address the root cause rather than just symptoms.
Maintaining Your Tools Ensures Long-Term Results
Clean, well-maintained tools are crucial for longevity and reliability. A simple routine of wiping down screwdrivers, calibrating your multimeter annually, and storing everything in a dedicated toolbox keeps your tools ready for any repair situation. Regularly checking calibration on your multimeter ensures measurement accuracy, which is critical for diagnosing electrical issues correctly.
Looking ahead, I believe technological advancements—such as wireless inspection cameras and IoT-enabled diagnostic devices—will make maintenance even easier. These innovations promise quicker troubleshooting and more precise diagnostics, reducing downtime and extending appliance lifespan.
How do I keep my dishwasher running smoothly over time?
The key lies in routine inspections and utilizing the right tools at each step. For instance, regularly testing your inlet valve with a multimeter and inspecting hoses with an inspection mirror can prevent leaks and breakdowns. Incorporating a scheduled cleaning of filters and sensors, along with proper part replacements, also plays a vital role. Remember, investing in quality tools and understanding their use boosts your confidence and success rate—saving you money and frustration in the long run. Why not try calibrating your multimeter today using the guide here? It’s a simple step that can reveal electrical issues early and keep your dishwasher humming smoothly.
Mind-Blowing Secrets Insiders Don’t Usually Share
One of my biggest lightbulb moments was realizing how critical it is to prioritize genuine parts for the most vital components of your dishwasher. Opting for OEM parts isn’t just about adhering to warranty requirements but about genuinely safeguarding your appliance’s lifespan. I also learned that many DIY enthusiasts readily overlook the importance of meticulous documentation—photos, receipts, and detailed notes—which can make or break warranty claims. Lastly, I discovered that even seemingly minor installation details, like proper leveling and correct hose loops, can prevent major breakdowns later on, saving both money and frustration.
Tools and Resources That Turn Repairs from Guesswork into Confidence
My essential toolkit now includes a reliable digital multimeter, high-quality screwdrivers with interchangeable bits, and a compact inspection mirror for those hard-to-see areas. Trusted online guides such as this testing method for heating elements and these tips for choosing the right parts have been game-changers. I also heavily rely on the official manufacturer documentation, which helps me confirm compatibility and installation procedures, ensuring my repairs are both effective and warranty-compliant.
Ignite Your Passion: Take Action and Make Repairs Count
The journey to becoming proficient at dishwasher maintenance isn’t reserved for pros—anyone with curiosity and patience can master it. Embrace the necessary tools, arm yourself with accurate information, and don’t shy away from diving in. Remember, a little investment upfront in good parts and quality tools goes a long way toward saving time, money, and headaches down the line. So, why not start today? Your appliance—and your wallet—will thank you. Are you ready to tackle your next repair with confidence? Share your challenges and victories below—I’d love to hear your story.
Related Posts
The $5 Part That Stops Your Lower Rack From Jumping Tracks
Ever had that heart-sinking moment where, during a wash cycle,…
Stop Using Hand-Tightened Clamps: The Case for Constant-Tension Rings
It was a morning just like any other, except I…

The $9 Replacement Gasket That Stops Door Edge Leaks
I remember the moment vividly. I was mid-cycle, the dishwasher…