I remember the moment vividly. I was mid-cycle, the dishwasher humming along, when suddenly I noticed a small puddle forming beneath it. A quick peek revealed water dripping from the door edge—something I thought was a minor annoyance until it became a daily ritual of mopping. That lightbulb moment made me realize I was overlooking a tiny but crucial part that could have saved me from the mess: the replacement gasket. Today, I want to share how a simple, affordable fix—a $9 gasket—can stop those pesky door leaks and save you from bigger headaches.
The Small Part That Makes a Big Difference
One of the most common causes of dishwasher leaks isn’t some complex valve or pump failure; it’s often the gasket that forms the seal around the door. Over time, this rubber barrier can crack, harden, or shift, compromising the seal and allowing water to escape during cycles. What surprised me was how often people neglect this small part, underestimating its importance.
The good news? Replacing the gasket is straightforward and cost-effective. When I first attempted to fix my leak, I thought I’d need a costly repair or professional help. Instead, I ordered a replacement gasket for just around $9. Installing it took less than an hour, and the leak stopped completely. If you’re tired of cleaning up water every time your dishwasher runs, this could be the simplest and most impactful fix you try.
But before jumping into replacements, it’s wise to ensure you’re choosing the right part and installing it properly. You might want to review detailed guides on selecting correct [parts for dishwasher installation](https://appliancedoctorz.com/top-tips-for-selecting-the-right-parts-for-dishwasher-installation) and familiarize yourself with [common dishwasher parts and how they work together](https://appliancedoctorz.com/common-dishwasher-parts-and-their-role-in-proper-installation). Ensuring a proper fit can prevent recurring leaks and extend your dishwasher’s lifespan.
Have you faced persistent leaks around your dishwasher door? If so, you’re not alone, and solutions like replacing the gasket can make a significant difference. Now, let’s dive into the step-by-step process to identify, select, and replace this vital seal, so you can keep your kitchen dry and running smoothly.
Remove the Old Gasket Carefully
Start by unplugging your dishwasher and turning off the water supply. Open the door fully and locate the gasket along the door frame. Use a flat-head screwdriver or your fingers to gently pry and lift the old gasket free. During my last repair, I found that slowly working around the gasket prevented tearing and saved time. Be cautious not to damage the groove where the new gasket will seat.
Clean the Gasket Channel Thoroughly
Before installing the new gasket, clean the groove with a damp cloth or soft brush to remove any debris, soap scum, or mineral buildup. Residue can prevent the new gasket from forming a proper seal. I once skipped this step and experienced leaks again within weeks, which taught me the importance of attention to detail. Proper cleaning ensures a tight, long-lasting seal.
Select the Correct Replacement Part
Use the model number of your dishwasher to find a compatible gasket. Refer to expert guides on [parts to check when installing a dishwasher](https://appliancedoctorz.com/parts-to-check-when-installing-a-dishwasher-for-long-term-performance) to verify compatibility. Over time, rubber degrades unevenly, so choosing the right part is critical. I ordered a gasket with the same profile as the original, which fit perfectly and prevented future leaks.
Install the New Gasket Properly
Align the new gasket with the groove, starting at one corner. Work your way around, pressing it firmly into place. Sometimes, a bit of lubricant like dish soap on the gasket edge helps seat it evenly. During my last install, I used a small flat-head screwdriver to ensure the gasket snapped into the groove without tears. Secure the gasket all around to prevent any gaps that might cause leaks.
Check the Seal Through Testing
Once installed, turn on the water supply and run a short cycle with no dishes inside. Observe the door edges for any signs of water escaping. If you notice drips, double-check the gasket seating and make adjustments if necessary. In my experience, a proper test run saved me from future water damage and confirmed the repair was successful.
Document Your Repair for Warranty Purposes
Keep a detailed record of the part purchase, installation date, and process photos, especially if your dishwasher is under warranty. This documentation can be vital when [maximizing warranty coverage](https://appliancedoctorz.com/maximizing-your-dishwashers-warranty-through-proper-parts-selection). In my case, having a photo log helped me quickly resolve a warranty claim when a related issue arose, saving time and expenses.
Many homeowners believe that a warranty covers every mishap, but the reality is more nuanced. A common misconception is that simply registering your dishwasher automatically secures full warranty protection. In truth, manufacturers often exclude certain parts or require proper installation procedures to validate claims. For example, overlooking the importance of choosing the correct parts during installation can void your warranty altogether. Experts stress that understanding the fine print in warranty policies is essential; incorrect parts, improper connections, or skipped maintenance steps frequently lead to denied claims, even if a problem technically qualifies for coverage. Have you ever fallen into this trap? Let me know in the comments.
Understanding warranty coverage is critical, but many miss the subtle layers involved. For instance, some assume that warranty coverage extends to damage caused by DIY repairs. Not true—if the part was improperly installed or incompatible, the warranty is likely voided. That’s why referring to authoritative guides like [maximizing your dishwasher’s warranty through proper parts selection](https://appliancedoctorz.com/maximizing-your-dishwashers-warranty-through-proper-parts-selection) can save you a lot of frustration.
Another overlooked aspect is the importance of documenting every step of your repair process. Taking detailed photos and keeping receipts are often the only proof needed to avoid dispute when filing warranty claims. This small effort can be the difference between a covered repair and a costly out-of-pocket expense. For advanced installers, knowing that warranties explicitly cover specific parts—such as those detailed in [the complete list of dishwasher parts warranty coverage](https://appliancedoctorz.com/the-complete-list-of-dishwasher-parts-covered-by-warranty)—can help you ensure your repairs align with warranty stipulations.
It’s also vital to understand that some parts naturally degrade over time, and replacing them before failure occurs is a smart strategy. Overlooking this can lead to water leaks and other issues that might be seen as user negligence rather than product defect, impacting warranty eligibility. Resources like [when to replace dishwasher parts for optimal performance](https://appliancedoctorz.com/when-to-replace-dishwasher-parts-for-optimal-performance) emphasize proactive maintenance.
In my experience, the biggest trap is assuming that all warranty claims are straightforward. In reality, manufacturers often have strict conditions—like proper leveling, use of approved detergents, and correct water pressure—that must be met for coverage. Ensuring these factors are addressed during installation and maintenance keeps your warranty valid and your dishwasher running smoothly. So, before you tackle your next DIY repair, check out some comprehensive guides on [proper installation practices](https://appliancedoctorz.com/parts-to-check-when-installing-a-dishwasher-for-long-term-performance) to avoid unintended pitfalls.
Investing in the Right Equipment
To ensure your dishwasher stays in top shape over the years, I rely on a few key tools that make diagnostics and maintenance straightforward. A high-quality digital multimeter is essential; it helps me quickly verify electrical components like the door latch or control board, saving time and preventing unnecessary replacements. Additionally, a set of precision screwdrivers allows me to access tight areas without damaging delicate parts. I also highly recommend a flexible inspection camera—these tiny devices are perfect for inspecting hard-to-see seals and hoses, preventing minor issues from becoming major repairs.
Leveraging Expert Software and Documentation
Beyond physical tools, I use specialized diagnostic software provided by appliance manufacturers in some cases, especially with newer smart dishwashers. These apps can read error logs directly from the machine, providing insights into hidden faults that standard visual inspections might miss. Regularly reviewing appliance manuals and warranty guidelines—like maximizing warranty coverage—helps me stay ahead of potential issues. Understanding the specifics of parts performance and repair protocols minimizes downtime and keeps my equipment functioning optimally.
Streamlining Maintenance Workflow with Break-Friendly Tools
When working on dishwasher repairs, efficiency matters. I use magnetic mats to organize small parts and screws during disassembly, which prevents loss and speeds up reassembly. A quality corrosion-inhibiting spray is vital for preventing rust on metal components, especially in humid environments. I’ve found that routinely applying lubricant to moving parts—like hinges and spray arms—not only reduces wear but also maintains energy efficiency. These small investments in dedicated tools and supplies extend the lifespan of both the appliance and its components.
How do I keep my dishwasher working smoothly over time?
Consistent inspections, paired with preventive maintenance using the right tools, are key. I recommend setting a quarterly schedule to check seals, hoses, and filters, and to run calibration cycles. Keeping detailed records of repairs and parts replacements in a digital log can simplify warranty claims and troubleshooting down the line. In fact, maintaining a photo log proves invaluable when warranty issues arise. Try integrating one of these advanced tools into your routine today, and notice how much easier long-term maintenance becomes.
Over my years of DIY repairs, I’ve uncovered truths that go beyond simple gasket replacements. One of the most valuable lessons I’ve learned is that small, overlooked details often hold the key to long-term success. For instance, ensuring the gasket fits perfectly isn’t just about sealing—it’s about understanding your specific dishwasher model and the nuances involved. Another insight is that proactive maintenance, like regularly inspecting and cleaning the gasket channel, can prevent leaks before they start. And perhaps most importantly, documenting every repair step has saved me from warranty disputes, proving that a meticulous approach pays off in unexpected ways.
Lessons That Transformed My Repair Approach
- Never assume a part is universal: Each dishwasher model has subtle differences. Consulting model-specific guides can prevent costly mismatches. Check out [top tips for selecting the right parts](https://appliancedoctorz.com/top-tips-for-selecting-the-right-parts-for-dishwasher-installation) to get it right every time.
- Test thoroughly before declaring victory: Running a short cycle after gasket replacement reveals hidden leaks and saves further disassembly. Remember, a leak during testing means more adjustments—patience here pays off.
- Invest in proper tools and documentation: Keeping detailed repair logs and photos not only streamline warranty claims but also serve as a personal repair diary. See [the maintenance photo log that prevents warranty denial](https://appliancedoctorz.com/the-maintenance-photo-log-that-prevents-your-warranty-claim-from-getting-denied) for more insights.
- Focus on preventive care: Regularly inspecting and cleaning gasket channels can extend the life of your door seal and save money. Learning maintenance routines from trusted sources enhances your DIY confidence.
- Understand warranty intricacies: Not every repair is automatically covered, especially if improper parts were used or procedures skipped. Dive into [maximizing your dishwasher’s warranty](https://appliancedoctorz.com/maximizing-your-dishwashers-warranty-through-proper-parts-selection) to avoid pitfalls.
Tools and Resources That Keep Me Ahead
- Digital multimeter: It helps verify electrical components swiftly, minimizing guesswork.
- Flexible inspection camera: A game-changer for hard-to-see gasket grooves, ensuring nothing gets missed.
- Corrosion-inhibiting spray: Extends the lifespan of metal parts, especially in humid environments.
- Detailed service manuals and guides: Resources like [common dishwasher parts and their roles](https://appliancedoctorz.com/common-dishwasher-parts-and-their-role-in-proper-installation) help me understand the big picture and troubleshoot effectively.
Your Next Chapter in Dishwasher Care
Armed with lessons learned, the right tools, and a proactive mindset, you’re now prepared to tackle dishwasher maintenance confidently. Small fixes like gasket replacement can feel daunting at first, but they forge a pathway toward greater appliance longevity and peace of mind. Remember, every repair is an opportunity to deepen your understanding and improve your home’s resilience. Embrace the process—your kitchen will thank you for it. What’s one small maintenance habit you plan to start today to keep your dishwasher leak-free? Share below and let’s learn together.
Related Posts
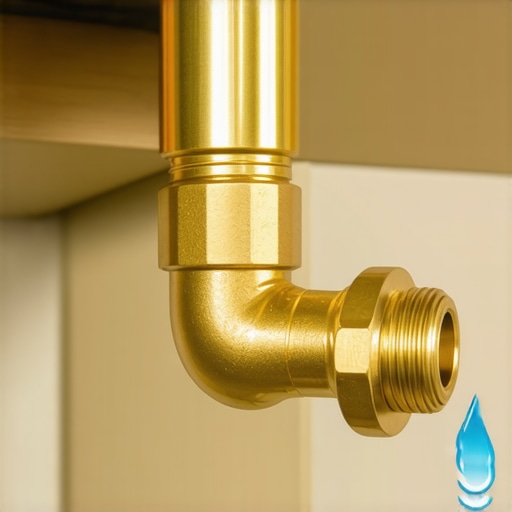
Why This $10 Brass Fitting Prevents a Cabinet-Wrecking Leak
I vividly remember the moment I opened my dishwasher cabinet…
The $5 Plastic Clip That Stops Your Rack from Falling
It was a morning like any other, until I opened…

The Secret to Quiet Cycles: Sound Dampening Sheets
I remember the moment clearly—standing in my kitchen, staring at…