It was a typical Saturday morning when I first noticed that faint, persistent drip under my kitchen sink. At first, I dismissed it as a minor nuisance, a simple loose connection perhaps. But as days went by, that tiny leak worsened. Water stains crept along the cabinet, and I found myself spending more on repairs and troubleshooting than I cared to admit. It wasn’t until I dove into the installation details that I realized the root cause wasn’t a faulty part, but a seemingly innocent hand-tightened clamp that I had overlooked.
Why Small Wins Can Lead to Big Leaks
The truth is, many homeowners—myself included at first—trust that hand-tightening clamps during installation is enough to keep water where it belongs. But as time passes, these clamps can loosen, or worse, cause hidden leaks that silently damage your home. This realization was a lightbulb moment for me. A tiny, seemingly secure clamp can be the Achilles’ heel in your plumbing if not properly installed.
Is Your Installation Truly Secure, or Just Sealed for Now?
Early on, I made the mistake of assuming that just tightening the clamp until it felt firm was sufficient. That was a mistake. Over-tightening risks damaging the fittings, while under-tightening invites leaks. Proper installation involves precise torque—knowing exactly how tight is enough without causing harm. I learned that relying solely on hand-tightening can create invisible vulnerabilities, especially with clamps designed to be tightened by hand. For a detailed overview of what to check when installing your dishwasher and avoid these pitfalls, visit this comprehensive guide.
The importance of choosing the right parts and installing them correctly cannot be overstated. Missteps here can lead to costly water damage, warranty issues, and endless frustration. But don’t worry—I’ll walk you through how to identify whether your clamps are truly secure and what practices will prevent future leaks.
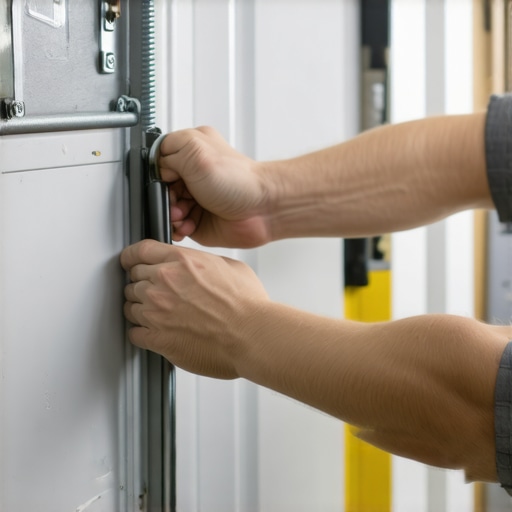
Secure All Connections with Precision
During my first dishwasher install, I learned the hard way that a loose clamp can lead to persistent leaks. To avoid this, start by assembling all fittings and hand-tightening the clamps snugly. Use a torque wrench to ensure you tighten to manufacturer specifications—over-tightening can crack fittings, while under-tightening invites leaks. I remember applying a consistent turning force with a socket wrench, which prevented damaging the plastic and created a secure seal. For detailed guidance on parts that need careful attention, visit this resource.
Inspect and Replace Faulty Parts Immediately
Next, I focused on verifying critical parts like inlet valves and drain hoses. An overlooked, worn-out inlet valve can cause water flow issues or leaks. Remove the panel and check for debris or damage—use a multimeter to test electrical continuity. If a part shows signs of wear or fails testing, replace it right away to prevent future issues. For a comprehensive list of essential parts, see this guide. Ensuring you’re using high-quality parts backed by warranty coverage saves time and money later.
Establish Proper Drainage Loops
One of the most common mistakes I encountered was a poorly configured drain hose. Without a high-loop or an air gap, backflow or siphoning can occur, causing leaks or water entry into cabinets. To fix this, I elevated the drain hose above the dishwasher’s height, maintaining a loop at least 32 inches above the floor—this prevents siphoning efficiently. For visual clarity, I inserted a high-quality hose with a secure clamp and secured it behind the sink using a dedicated bracket to prevent slipping. Proper drainage setup is critical, and you can find detailed instructions at this detailed guide.
Double-Check Water Supply Lines
After connecting the water inlet, I tested the system for leaks by gradually turning on the water supply. It’s essential to verify all hose fittings are tight and to inspect for drips right after turn-on. I used a damp cloth to check for moisture, tightening fittings where needed. Using the correct parts, like a durable braided hose and proper compression nuts, reduces the risk of leaks. For tips on selecting the best parts and ensuring warranty compliance, visit this resource. Remember, a small oversight here can lead to significant water damage, so patience pays off.
Test the System Before Finalizing
Once all connections are made, I ran a short cycle to ensure everything functioned correctly. During testing, I watched for leaks around clamps, hoses, and fittings. Water that escapes during this phase signals loose fittings or damaged parts needing immediate attention. I also monitored cycle duration and noise levels to catch any anomalies. Using this method allowed me to catch issues early, saving repair costs later. For troubleshooting tips during the warranty period, refer to this guide. Proper testing is an indispensable step that ensures a leak-free and long-lasting installation.While many believe that following basic installation steps guarantees a trouble-free dishwasher experience, the real nuances lie in understanding the subtleties of proper setup, parts selection, and warranty procedures. Common myths, such as the idea that hand-tightening clamps is sufficient for a secure seal, can lead to silent leaks and long-term damage if overlooked. Advanced mistakes—like neglecting to verify the torque specifications or using incompatible parts—are often the culprit behind costly repairs and warranty rejections.
Why Do So Many Get the Warranty Claims Wrong Even After Proper Installation?
According to industry experts, a significant percentage of warranty denials stem from improper documentation or using non-approved parts, which void coverage. Knowing the difference between OEM and third-party components is crucial; using inferior parts may seem cost-effective initially but can invalidate your warranty and cause performance issues. I recommend reviewing this guide on maximizing your warranty coverage to avoid these pitfalls. Additionally, understanding the precise installation requirements—such as correct drain hose loops and secure water supply connections—can make all the difference in longevity and warranty validity. Many DIYers miss these details, thinking a simple setup suffices. For comprehensive instructions, visit this step-by-step guide. Remember, even minor oversights like not verifying the torque on inlet valves or choosing the wrong clamp material can cause leaks that void warranties and lead to expensive repairs. Investing time in understanding these nuances ensures both optimal performance and peace of mind. Have you ever fallen into this trap? Let me know in the comments.
Keep It Running Smoothly with the Right Tools
Maintaining your dishwasher over time is about precision and knowing your equipment. I personally rely on a high-quality digital multimeter for testing electrical components like inlet valves and sensors. It’s essential because it provides quick, accurate readings—saving me time when diagnosing issues. For mechanical inspections, I use a compact inspection mirror, which helps me peek behind panels without disassembling everything. When it comes to cleaning parts like the turbidity sensor or spray arms, a fine brushes set combined with soft cloths does the trick, preventing scratches and buildup that impair performance.
Tools I Recommend for DIY Maintenance
For visual inspections, the LED pocket inspection light is invaluable. It illuminates dark cavities under the dishwasher, revealing hidden leaks or debris. I also keep a set of push-to-connect fittings and replacement clamps handy, so I can quickly replace worn parts without waiting. As I’ve learned from experience, using the correct tools, like a torque wrench for water supply fittings, is crucial to avoid over-tightening and damaging threads. Regularly check the list of parts to verify for longevity—a habit that prevents leaks before they happen.
The Future of Dishwasher Maintenance Looks Bright
Advancements in smart diagnostics integrated into newer models will likely be game-changers. Software updates that can remotely detect issues and guide DIY repairs are on the horizon. This trend encourages homeowners to adopt more proactive maintenance routines, reducing costly repairs and extending appliance life.
How do I maintain my dishwasher over time?
Developing a regular maintenance routine is key. Schedule periodic inspections of hoses, clamps, and seals—using your multimeter to check for electrical integrity if applicable. Keep spray arms and filters clean, following manufacturer guidelines. It’s also wise to replace parts before failure—like inlet valves or drain pumps—based on signs of wear. Remember, using high-quality, OEM-approved parts not only ensures your dishwasher performs optimally but also maintains your warranty coverage. To stay ahead, consult resources like this guide on warranties and parts selection, which supports long-term performance.
Finally, always document your maintenance efforts, including part replacements and inspections. This record is invaluable when troubleshooting warranty claims or future repairs. And don’t forget—regularly running diagnostic tests with specialized tools can catch issues early. For example, using a multimeter to verify the solenoid coil resistance helps confirm the inlet valve is functioning correctly. As technology evolves, staying informed on advanced troubleshooting techniques will empower you to keep your dishwasher running efficiently for years to come.
What No One Tells You About Small Leaks and Big Repairs
My experience taught me that even minor issues like a tiny drip can reveal underlying installation mistakes or faulty parts that threaten your warranty. Recognizing these early signs can save thousands and ensure your dishwasher runs smoothly for years. I learned that patience and attention to detail empower homeowners to catch leaks before they become costly disasters.
Tools and Knowledge That Elevated My Maintenance Skills
Investing in quality tools like a digital multimeter and a torque wrench, along with trusted resources such as this comprehensive parts guide, transformed my approach. These resources help me select the right parts, tighten connections properly, and verify system integrity, boosting confidence in DIY repairs and warranty adherence.
Your Journey Starts with Informed Choices and Care
The future of dishwasher maintenance lies in proactive care and smart troubleshooting. Developing a routine that includes inspecting hoses, testing electrical components, and documenting repairs ensures longevity. Remember, with the right mindset and tools, you can overcome installation pitfalls and protect your warranty, enjoying a reliable, leak-free appliance for the long haul.
Related Posts

How to Prevent Rust on Your Wire Racks Without Replacing the Unit
Have you ever taken out your dishwasher or oven and…

Fix Your Slumping Bottom Rack with These Heavy-Duty Rollers
There was a moment in my kitchen—an ordinary Saturday—that turned…
How to Replace a Snapped Door Spring in Ten Minutes
Ever had that gut-wrenching moment when you open your dishwasher…