
There was a moment in my kitchen—an ordinary Saturday—that turned into a lightbulb realization. I reached into my dishwasher to load a particularly stubborn casserole dish, only to find the bottom rack sagging and dragging, struggling to glide smoothly. It felt like the entire weight of the rack was winning the battle. Frustration crept in as I watched my carefully loaded dishes tumble, not because of the wash cycle, but because of a simple, overlooked issue: the rollers that support the rack were failing. That day, I realized how something as small as the rollers could make or break the efficiency of your appliance—and my mood!
Why Fixing Slumping Bottom Racks Matters For Your Kitchen
If your dishwasher’s lower rack keeps sagging or sticking, you’re not just dealing with an annoyance. It can lead to uneven dishwashing, damage to your dishes, and even more costly repairs if left unchecked. The good news is, this is often a fix accessible to most homeowners—and it starts with understanding what exactly is causing your rack to slump. Replacement rollers, particularly heavy-duty ones, can restore your rack’s glide and ensure your dishes come out spotless every time. After all, having a smoothly functioning dishwasher isn’t just about convenience. It’s about maintaining your home’s efficiency and safeguarding your investment.
Is Heavy-Duty Rollers Really a Game-Changer?
I used to underestimate the importance of quality parts, thinking any roller would do the trick. My early mistake was ignoring the load capacity and durability when replacing parts, which led to repeat failures. Switching to heavy-duty rollers transformed how my dishwasher performed—no more jamming or sagging. Plus, these rollers are designed to withstand years of use, saving you time and money in the long run. To get the most out of your dishwasher, ensuring you choose the right parts is key. Want to learn more about selecting parts that maximize your warranty coverage? Visit this guide for expert insights.
Thinking about tackling this issue yourself? Stay tuned as I walk you through the steps to replace your dishwasher rollers with heavy-duty options. But first, let’s address some common doubts many homeowners have about this repair process.
Prepare Your Workspace and Gather Tools
Before diving into the repair, clear your kitchen area and gather essential tools like screwdrivers, pliers, and a multimeter. Wearing gloves can protect your hands from sharp edges. Remember to disconnect the dishwasher from power and water supplies to ensure a safe workspace.
Access the Lower Rack and Remove It
Slide out the lower rack completely. Usually, there are clips or wheels holding it in place; gently lift or unscrew these as needed. Take note of how the rack is positioned to facilitate correct reinstallation. During my last repair, I kept a camera handy to document the setup, which saved me time during reassembly.
Locate the Rollers and Inspect for Damage
Find the rollers supporting the rack—typically at the front and rear of the tracks. Check for cracks, deformation, or debris buildup. Using a flashlight helps illuminate tight spots. When I inspected mine, I found accumulated grime that hindered smooth movement, highlighting the importance of clean rollers for longevity.
Remove the Old Rollers Carefully
Using pliers or a screwdriver, detach the rollers from their brackets. Be cautious to avoid damaging adjacent parts like glides or tracks. If the rollers are stuck, applying gentle leverage or penetrating lubricant can ease removal. In my experience, forcing parts can cause further damage, so patience is key.
Install the Heavy-Duty Replacement Rollers
Match the new heavy-duty rollers to the old ones, confirming compatibility via the model number or part specifications. Align them correctly and secure them into the brackets. Proper installation ensures the rack glides smoothly without wobbling or sagging. Choosing high-quality rollers extends the lifespan and maintains your warranty coverage, as discussed here.
Check for Proper Alignment and Function
Before reattaching the rack, manually slide it along the tracks to confirm smooth movement. Listen for any squeaks or resistance. If issues persist, revisit the roller installation. When I did this, I noticed a slight misalignment and adjusted the rollers accordingly, which restored perfect glide.
Reassemble and Test
Place the rack back into position and secure any clips or fasteners. Reconnect the dishwasher’s power and water supply, then run a short cycle to observe operation. Watching the rack glide without sticking confirms a successful repair. Properly functioning rollers not only improve performance but also help maintain your warranty, as outlined here.
Tips for Longevity and Safety
Regular inspections of rollers and tracks can prevent sudden sagging. Clean rollers to remove mineral deposits or debris, especially if you have hard water. Avoid overloading the rack, which can stress the rollers. Keep these parts in top condition, and your dishwasher will serve efficiently for years, ensuring you maximize warranty benefits and avoid costly repairs.
While many homeowners operate under the assumption that sticking to manufacturer instructions guarantees a long-lasting dishwasher, the reality is far more nuanced. One widespread misconception is that the cheapest replacement parts will suffice, but in my experience, this is a classic trap that can lead to recurring failures and even voided warranties. It’s tempting to save a few dollars initially, yet investing in heavy-duty, quality parts—like those discussed here—ensures that your appliance performs reliably for years, which ultimately protects your warranty coverage.
Why do most people overlook installation nuances?
Many assume that a standard installation is a one-size-fits-all process. However, improper sealing, incorrect placement of water inlet filters, or disregarding the need for a dedicated circuit can cause issues that are often misunderstood as product defects. According to industry experts, a key aspect of preserving your warranty is ensuring that installation adheres precisely to technical standards here. Skipping these details can lead to early breakdowns or even claims denial, which is an expensive lesson to learn.
Moreover, many owners incorrectly believe that warranty coverage extends to all repairs without exception. In reality, warranties typically exclude damage caused by improper installation, use of non-approved parts, or neglecting routine maintenance. Recognizing these nuances is essential for maximizing your coverage, as explained here. It’s worth noting that some myths persist around DIY repairs—more on that below.
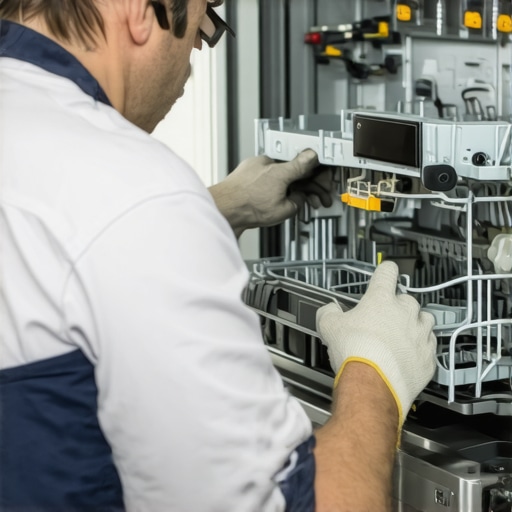
If you’re considering a DIY fix, beware of the ‘oops’ moments that can cost you your warranty eligibility. Simple mistakes like incorrect part sizing, improper reassembly, or failing to follow grounded safety procedures can turn a straightforward repair into an expensive lesson. The key is understanding the importance of using the correct parts, especially these commonly overlooked components, and ensuring proper installation techniques. Skimping here risks more than just your warranty—it can compromise your safety and the longevity of your dishwasher.
Advanced homeowners often ask, “How can I tell if I am voiding my warranty with my repair choices?” A recent guide clarifies that unauthorized modifications, even small ones, can void your coverage if they violate manufacturer guidelines; hence, the importance of consulting expert resources before proceeding here. Remember, a well-informed repair not only saves money but also sustains your warranty benefits.
Have you ever fallen into this trap? Let me know in the comments.
Maintaining a dishwasher requires more than just occasional cleaning; it demands precision and the right tools to ensure longevity and optimal performance. One of my go-to instruments is a digital multimeter, which I rely on to verify continuity in the door latch and control circuits. This device allows me to troubleshoot electrical issues accurately, saving time and avoiding unnecessary replacements. For mechanical inspections, I prefer using a flexible inspection mirror because it helps me navigate tight spaces without dismantling major components. These tools, paired with a clean rag and some contact cleaner, have been instrumental in keeping my dishwasher functioning flawlessly over the years.
Essential tools I trust for ongoing care
Beyond basic tools, I always recommend investing in a high-quality grease gun. Regular lubrication of the spray arm bearings and door hinges prevents squeaking and wear, which can cause unnecessary stress on other parts. Additionally, a set of precision screwdrivers with magnetic tips makes reassembling components straightforward, especially when handling tiny screws for the control panel or filter housing. In my experience, choosing tools with ergonomic handles reduces fatigue during prolonged maintenance sessions and improves overall safety. For those looking to streamline repairs further, I suggest considering a portable diagnostic scanner compatible with your dishwasher’s interface, which can read error codes directly, expediting troubleshooting and ensuring you don’t void your warranty by misdiagnosing issues.
What’s the future of dishwasher maintenance?
As appliance technology advances, I predict a move toward smarter maintenance solutions. Wireless sensors embedded in key components could alert homeowners about impending failures before they happen, and AI-powered apps might provide step-by-step guidance tailored to specific models. This evolution aims to make routine care more proactive and less guesswork-driven, ensuring appliances operate efficiently over their lifespan. To stay ahead, I encourage you to implement regular visual inspections and utilize the diagnostic tools available today—like multi-meters and error code readers—to catch problems early. Remember, proper parts selection and routine checks not only enhance performance but also safeguard your warranty coverage, which you can learn more about here. Don’t hesitate to try out one of these advanced diagnostic tools—they’re invaluable for keeping your dishwasher in top shape over the years.
The Hardest Lesson I Learned About dishwasher,installation,parts,warranty
One of the most eye-opening moments in my repair journey was realizing that not all replacement parts are created equal. I once bought the cheapest rollers available, only for them to fail within a year, causing me to redo the repair and void the warranty. Now, I always prioritize quality and durability, knowing that investing in heavy-duty rollers saves me time and money in the long run.
3 Myths About dishwasher,installation,parts,warranty That Held Me Back
A common misconception is that installing parts myself will void the warranty, which isn’t true if proper procedures are followed. Additionally, many believe that all parts are interchangeable, but incompatible components can damage your entire dishwasher and even lead to warranty denial. Learning the ins and outs of warranty policies has empowered me to make smarter choices and avoid costly mistakes.
What Experts Won’t Tell You About dishwasher,installation,parts,warranty
Professionals often keep quiet about routine maintenance tips that can prolong your dishwasher’s lifespan and protect your warranty—like regular roller inspections and proper loading techniques. They also know that proper parts selection, aligned with manufacturer specifications, makes all the difference. Knowledge of these behind-the-scenes insights helps me troubleshoot effectively and keep my appliance running smoothly, ensuring I maximize the manufacturer’s coverage.
Where to Go from Here
If you’re serious about maintaining your dishwasher’s performance and warranty, start by reviewing your manufacturer’s guidelines and investing in high-quality replacement parts here. Regular inspections and correct installation practices are your best allies in avoiding unnecessary repairs and warranty issues. Remember, every small effort counts toward a long-lasting, efficient appliance that serves your household well for years to come.
My Essential Toolkit for Dishwasher Maintenance
Over the years, I’ve learned that having the right tools makes all the difference. A digital multimeter helps me diagnose electrical issues accurately, while a flexible inspection mirror allows me to see tight spots without dismantling everything. A set of precision screwdrivers and a grease gun are invaluable for mechanical parts, ensuring smooth operation and long-term durability. Investing in quality tools not only streamlines repairs but also empowers you to tackle problems confidently.
Books That Changed How I View Appliance Care
While hands-on experience is essential, I’ve found that reading expert guides enhances my understanding. “The Complete List of Dishwasher Parts Covered by Warranty” offered me clarity on what components are warranty-protected, and “How to Diagnose Dishwasher Parts During Warranty Periods” sharpened my troubleshooting skills. These resources provide confidence and knowledge, making repairs more approachable and less intimidating.
Where to Go from Here
If you’re eager to elevate your maintenance game, explore these trusted sources and tools to guide you. Remember, proactive care and informed parts selection prevent most issues before they escalate. Proper maintenance not only keeps your dishwasher performing at its best but also helps you safeguard your warranty coverage, giving you peace of mind for the years to come here. Start today, and let your appliance serve you flawlessly for the long haul.
Related Posts
The 10-Cent Fix for a Noisy Drain Pump
Ever stood in your kitchen, hearing that relentless grinding or…
Why Your Dishwasher Trips the Breaker When the Heater Starts
Ever had that frustrating moment when your dishwasher is running…

How to Replace Your Spray Arm Without Calling a Repairman
Ever reached into your dishwasher and been met with a…