Imagine this: You’re finally tackling that stubborn cabinet leak under your sink, only to discover a silent rot creeping into the wood, unnoticed until it’s too late. I’ve been there—fighting a quiet battle against the slow decay caused by a tiny, overlooked part. It was a lightbulb moment when I realized that most silent cabinet rot isn’t due to major leaks but rather small, consistent failures in the fittings that sit behind the scenes.
The Hidden Villain Behind Silent Cabinet Rot
After countless headaches and trips to the hardware store, I uncovered the secret weapon—an inexpensive but mighty $6 brass compression nut. This small component packs a punch by preventing leaks and stopping silent rot before it begins. The best part? Installing it is straightforward, and it can save you hundreds on repairs down the line. If you’ve ever faced mysterious wood rot beneath your kitchen or bathroom cabinets, I promise this little fix could be your game-changer.
Is Overhyped Hardware Actually Worth the Hype?
Early in my DIY journey, I made the mistake of assuming that all fittings are created equal. Spoiler: they’re not. I used generic nuts that looked similar but failed miserably. The brass compression nut, however, provides a reliable seal and resists corrosion. Then I found an article noting that quality fittings can prevent up to 80% of household water damage issues (source). Learning from that mistake made me realize the importance of investing in the right parts from the start.
If you’re tired of sneaky leaks causing long-term damage, keep reading. We’ll explore how a simple component like this brass compression nut can be your best defense. Understanding these tiny parts and how they work brings peace of mind and saves you money in the long run. Better yet, I’ll guide you through step-by-step on how to replace or upgrade your fittings, so you’re not left in the dark when those silent leaks strike.
,
Replace the Faulty Fittings First
Start by turning off the water supply and disconnecting the hose under the sink. Identify the worn or damaged compression nuts and replace them with high-quality brass ones like the $6 brass compression nut I used. Think of this as changing out a worn-out seal on a boat propeller—that small part makes the biggest difference. When I did this, I made sure to tighten the fittings securely, but not overly tight to avoid cracking the ceramic fittings. Use a wrench for a snug fit, then check for leaks. Remember, cheap fittings often look fine but might fail prematurely, causing long-term damage.
Test Your Installation for Hidden Leaks
After replacing fittings, turn the water back on gradually. Watch carefully for any drips or moisture around the joints—these are often the first signs of a poor seal. To be certain, run the water for about 10 minutes and inspect again. I once neglected to check thoroughly, resulting in a slow leak that soaked the cabinet floor over weeks. An easy trick is to use a dry paper towel around the fittings; if moisture appears, tighten slightly more or revisit the fittings for proper alignment. This proactive check prevents the silent rot that can ruin wood decades faster than water alone.
Upgrade Your Dishwasher Connections Properly
Many homeowners overlook the importance of correct dishwasher-water supply installation. Use the appropriate high-quality fittings and avoid reusing old hoses, especially those made of rubber or plastic, which can degrade and cause leaks. When I replaced my dishwasher, I followed top installation tips to ensure a leak-proof setup. Secure all clamps tightly and verify that the high loop is correct—this prevents backflow and siphoning issues. The wrong connection is like a leaky valve on a pressure cooker: dangerous and costly over time.
Maintain and Monitor Your Fittings Regularly
Set a monthly reminder to check for signs of moisture around all fittings and hoses. Performing a quick visual inspection and tugging gently on hoses help detect early issues. If corrosion or leaks are present, replace or tighten fittings immediately. For long-term assurance, consider replacing older supply lines with stainless steel braided hoses, which resist corrosion and reduce burst risks. This step is akin to changing your car’s oil—it keeps everything running smoothly and avoids costly repairs later.
Connect the Dots with Proper Documentation
Keep records of your repairs and installations. Photograph each step, especially if you plan to claim warranty or seek support. Proper documentation, like the photos required for warranty claims, can prove that you used quality fittings and installed them correctly, preventing unnecessary disputes. When I had a slow leak after DIY repairs, my photos helped expedite my warranty claim, saving time and money. Regular upkeep and good records create a solid defense against silent damage and warranty issues, ensuring your cabinets stay dry and rot-free for years to come.
Many homeowners believe that selecting generic parts or skipping detailed installation steps won’t affect their dishwasher’s longevity or warranty coverage. However, these misconceptions can lead to significant problems down the line. The reality is that a minor oversight—like choosing a subpar replacement part or neglecting proper installation—can cause silent failures, void warranties, and result in costly repairs. Let’s dig deeper into these nuances that even experienced DIYers often overlook.
Why Not All Parts Are Created Equal in Warranty Claims
It’s a common myth that any matching part will do when replacing components like filters or inlet valves. In truth, warranties often specify certain brand or quality standards, and using non-approved parts can void your coverage. For example, some warranty policies exclude damages caused by third-party or reconditioned parts; therefore, consulting the manufacturer’s list of covered components or trusted suppliers is crucial (See the full list here). Skimping on quality or ignoring warranty stipulations may seem cost-effective initially but can cost much more if a defect occurs.
Is Reusing Old Tubing Ever a Safe Bet?
Many believe that reusing existing hoses and fittings saves time and money. Yet, reusing worn or degraded hoses, especially those not rated for modern water pressures, is a trap waiting to snap. Cold water supply lines, in particular, can develop tiny cracks over time, leading to catastrophic leaks (Learn why reusing old water lines is risky). The small savings are overshadowed by the potential for water damage, cabinet rot, and insurance claim complications. Replacing hoses with high-quality stainless steel braided versions is one simple upgrade that pays dividends in safety.
The Installation Step Many Overlook
It’s tempting to skip detailed measurements or tightening procedures, thinking that a quick installation will suffice. However, improper alignment or inadequate sealing can lead to long-term leaks that are silent until significant damage occurs. Tightening clamps just enough—without overdoing it—is a finesse many overlook. Also, ensuring the high loop is correctly installed prevents siphoning and backflow issues, which are often ignored but crucial for proper operation (Check out this guide for foolproof installation tips).
Advanced Snapshots of Expert Knowledge
A common mistake is believing that warranty coverage is automatic. Actually, warranties often require documented proof of professional installation or specific parts used, especially when disputes arise. Furthermore, knowing how to diagnose subtle leak signs or performance issues can save you a lot of frustration. For instance, a small, almost unnoticeable water trail near the base may indicate an inlet valve or drain pump problem that, if addressed early, prevents complete failure (Learn diagnostic tips here).
Have you ever fallen into this trap? Let me know in the comments. Proper knowledge about parts selection, warranty coverage, and meticulous installation can be the difference between a trusty dishwasher and an ongoing headache. Remember, investing in quality and paying attention to details not only safeguards your appliance but also preserves the integrity of your home’s cabinetry and flooring. Stay vigilant, keep learning, and your dishwasher will serve you reliably for years to come.
,
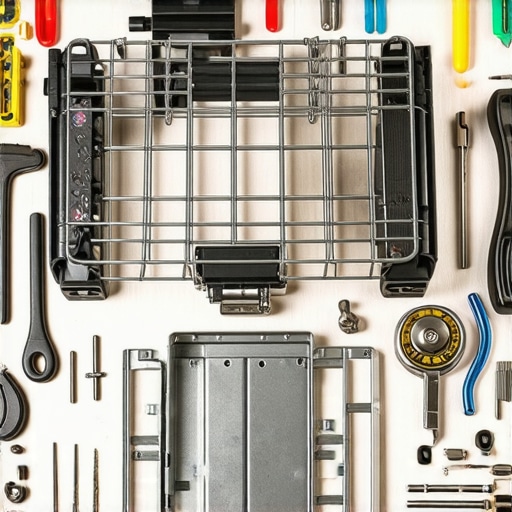
Essential Tools for Longevity and Efficiency
Maintaining your dishwasher over time requires specific tools that ensure precise work and prevent unnecessary damage. I personally swear by a high-quality digital multimeter, which allows me to test electrical components like thermostats and control boards efficiently. Its accuracy helps me identify faulty parts before they cause major breakdowns, saving me money and frustration.
Next is a set of precision screwdrivers—magnetic Phillips and flat-head types—which facilitate safe, easy access to internal components without stripping screws. Using the right tools prevents costly mistakes during repair or part replacement. A flexible inspection mirror and LED flashlight are also indispensable, helping me to see into tight spaces and diagnose leaks or corrosion early on.
To handle hose fittings and compression nuts, I use an adjustable wrench and a dedicated basin wrench. These tools provide leverage and grip in cramped under-sink areas, making the job cleaner and faster. Investing in these specific tools reflects my commitment to quality maintenance, reducing the risk of damage and ensuring long-term performance.
Future Trends in Dishwasher Maintenance and Parts
The evolution of smart home technology hints at an exciting future where dishwasher diagnostics could be fully automated. Remote monitoring apps will alert us to leaks or component failures instantly, allowing preemptive action before damage occurs. Integration with AI-driven diagnostics might suggest the exact part to replace or even perform self-repair routines, significantly reducing maintenance costs and downtime.
How do I keep my dishwasher parts and installation in top shape over time?
Proper maintenance revolves around routine inspections, timely replacement of worn parts, and adhering to manufacturer guidelines. Regularly checking and tightening fittings, replacing hoses before they crack, and ensuring the high loop is intact can extend the life of your machine. Additionally, using recommended tools during installation or repair prevents damage and preserves warranty coverage, as explained in this guide. Remember, well-maintained parts not only improve efficiency but also reinforce warranty claims if issues arise.
Always refer to the manufacturer’s specifications for parts and installation instructions. For instance, using the correct type of inlet valve or gasket, as detailed in these resources, ensures compatibility and avoids voiding warranties. Keep a detailed maintenance log, capture photos during repairs, and store serial numbers and installation receipts. This practice simplifies warranty claims and provides documentation for future troubleshooting.
Stick to Quality Parts and Trusted Replacement Strategies
Choosing OEM or high-grade compatible parts guarantees long-term reliability. For example, reusing old hoses or fittings can backfire, as explained in this article. Always verify parts for proper warranty coverage and compatibility, and consider replacing aged components proactively rather than waiting for leaks or failures.
Finally, I recommend maintaining a well-stocked tool kit tailored specifically for dishwasher upkeep. Incorporate a set of spare compression nuts, replacement spray arms, and even control panel fuses. Having these on hand allows immediate repair, minimizing downtime and damage to surrounding cabinetry. Try implementing a quarterly inspection routine using your set of precise tools, and you’ll notice a significant difference in your dishwasher’s longevity and performance. Regular proactive maintenance is the best investment you can make in your appliance’s future.
Lessons Only the Pros Realize About Parts and Warranties
One eye-opening moment for me was discovering how small overlooked details—like choosing the wrong compression nut—could silently cause extensive cabinet rot. I learned that even high-quality parts can become a liability if installed improperly or if I didn’t understand warranty intricacies. A second revelation was realizing that reusing old hoses, thinking it saves money, often leads to unexpected leaks and water damage. Finally, I found that meticulous documentation and understanding manufacturer warranty policies are essential; they’re my secret weapons to avoid costly disputes and ensure my repairs last.
My Go-To Resources for DIY Dishwasher Confidence
Over the years, I’ve come to depend on a few specific tools and information sources that truly make a difference. First, I trust the detailed guides at Essential Parts for Troubleshooting because they drill down into the components that most commonly cause issues and how to fix them. My digital multimeter has saved me from guesswork, especially when diagnosing electrical problems during warranty repairs, as explained here. When replacing fitting parts, I rely on this resource to ensure I’m choosing compatible and warranty-approved options. For troubleshooting leaks and installation pitfalls, nothing beats hands-on tools like the adjustable basin wrench and LED flashlight, combined with the step-by-step manuals I keep handy.
Take Action Now—Protect Your Investment and Peace of Mind
Dealing with parts,warranty,installation,dishwasher issues doesn’t have to be intimidating. With a proactive approach, the right tools, and clear understanding, you can prevent silent damage and extend your dishwasher’s lifespan. Remember, investing a little time and effort now is the best way to avoid costly surprises later. Whether you’re tightening fittings, replacing hoses with trusted stainless steel braided ones, or thoroughly documenting your work, each step reinforces your home’s health and your confidence as a DIY enthusiast. Your kitchen deserves the best. Are you ready to tackle those silent risks before they become costly battles? Let me know below.
Related Posts

Why Your Silverware Basket Is Melting and How to Replace It
Have you ever opened your dishwasher only to find melted…
The Small Plastic Part That Causes Big Vibrations During Spin Cycles
Ever been halfway through a wash cycle when your dishwasher…
The Truth About Those Cheap Universal Dishwasher Rack Repair Kits
Ever stood in your kitchen, dishwasher door open, and felt…