I vividly remember the day I clicked the disconnect valve on my trusty old water supply line, only to watch a small trickle turn into a full-blown leak within seconds. The rush of panic was instant. That moment was my lightbulb — reusing old water supply lines might seem like a money-saving shortcut, but often, it’s a ticking time bomb waiting to explode. Today, I want to share my experience and shed light on why this practice can be disastrous, especially when it comes to something as critical as your dishwasher connection.
The Hidden Dangers of Reusing Old Water Lines
Are You Saving Time or Setting Up for a Flood?
I used to think that reusing old water lines, especially copper ones, was no big deal. After all, they looked fine on the surface, right? Wrong. I learned the hard way that many of these lines have hidden corrosion, wear, or micro-cracks brought on by years of use and mineral buildup. These imperfections won’t show until you apply pressure or try to disconnect — then, surprise — leaks can start or worse, cause water damage behind your walls and under your cabinets.
What initially seemed like a small inconvenience turned into a costly fix, including replacing cabinetry and flooring. The financial and emotional toll was a wake-up call. Since then, I’ve dedicated myself to understanding why replacing these parts is so crucial.
Beyond my experience, expert sources emphasize that old water lines are a common failure point in plumbing systems. For example, the Appliance Doctor highlights that using old or damaged parts during installation can lead to significant problems down the line, including water leaks and damage. It’s a mistake I certainly don’t want you to make.
If you’re about to install a new dishwasher or repair your existing setup, ask yourself: Have I inspected my water supply line thoroughly? Or am I tempted to save a few bucks by reusing something that’s been buried under the house for years?
In the upcoming sections, we’ll explore exactly what makes these old lines so risky and how you can ensure your connection is safe, reliable, and built to last. After all, protecting your home from water damage not only preserves your property but also your peace of mind.
Ready to dive into the practical steps that can save you from a watery disaster? Let’s get started.
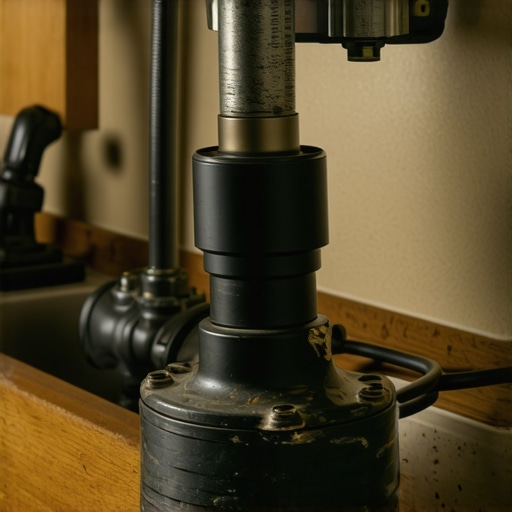
Inspect and Choose the Right Material
Before starting, turn off the main water supply to prevent any accidental leaks. Remove the old water line carefully, observing its connections and condition. Replace it with a new, high-quality braided stainless-steel hose, which offers durability and flexibility. Always select a line with the correct fittings and length suited to your kitchen setup. For guidance on selecting the best parts, visit this helpful guide.
Prepare Your Connections
Clean the inlet fittings on both the water supply valve and the dishwasher to remove any debris or mineral buildup. Using a soft cloth and a brush, ensure the fittings are free of corrosion or damage. Applying thread seal tape on the threaded connections can help create a watertight seal. Remember, tight but not overtightened is the goal to prevent cracks or leaks. For detailed steps, check this preparation guide.
Connect and Secure the Hose
Attach the new braided hose to the water supply valve first, tightening the fitting by hand and then using a wrench for an extra quarter turn. Repeat the process on the dishwasher’s inlet. To prevent leaks, use compression nuts and ensure they are snug but avoid excessive tightening that can deform fittings. Use a level to ensure your dishwasher is properly aligned, which aids in water flow and prevents long-term issues. For more about securing connections, see effective installation tips.

Test Before Finalizing
Slowly turn on the water supply to check for leaks along the connections. Watch closely for any drips or wet spots. It’s advisable to run a short cycle without dishes to ensure the water flows correctly and no leaks develop under pressure. If any issues arise, tighten fittings slightly more or reapply thread seal tape as needed. Proper testing prevents costly water damage and supports your warranty coverage. For troubleshooting, refer to here.
Even seasoned homeowners can fall prey to misconceptions about dishwasher parts, warranties, and installation protocols. Most assume that any replacement part from the local hardware store is suitable, or that a standard installation process guarantees long-term performance. But digging deeper reveals nuanced pitfalls that can compromise your appliance’s efficiency and your warranty rights.
Are You Overlooking Critical Details That Voided Your Coverage?
For instance, many believe that using third-party parts doesn’t affect warranty validity, but some manufacturers specify only original parts for coverage—violating these terms can lead to denied claims. Expert sources like Appliance Doctor emphasize that warranty policies can be surprisingly strict, especially concerning the compatibility of replacement components, which is why consulting trusted guides like this checklist can be a game-changer.
Another common myth involves installation timing. Some think that delaying checks or ignoring initial leaks won’t impact warranty claims. However, failure to properly secure hoses, level the dishwasher, or use compatible fittings can lead to water damage that isn’t covered, even during the warranty period. Remember, warranties often exclude damages from improper setup, making your due diligence crucial.
Why Do People Make This Advanced Installation Mistake?
The most overlooked nuance lies in the subtle but critical differences in parts quality and installation techniques. For example, reusing old water supply lines may seem like a cost-saving move, but as I highlight in my experience, it often results in micro-cracks or corrosion that cause leaks over time—costly problems that warranty claims may not cover if improper parts contributed to damage. Listening to professional advice on choosing quality parts is essential.
Furthermore, the importance of proper documentation can’t be overstated. Keeping detailed records of your installation, including photos and receipts, can be pivotal when contesting warranty denials. Studies from consumer protection agencies show that proper documentation can significantly increase the success rate of warranty claims, especially for complex repairs.
Have you ever fallen into this trap? Let me know in the comments. Staying informed about these nuances ensures that your investment in a dishwasher remains protected, and that you avoid the costly pitfalls of overlooked details.Maintaining your dishwasher’s performance over the long term requires more than just occasional cleaning; it demands the right tools, consistent methods, and an understanding of key replacement parts. I personally rely on a select set of equipment that enables me to troubleshoot and perform repairs efficiently, ensuring my appliance remains in peak condition.
Must-Have Tools for DIY Dishwasher Maintenance
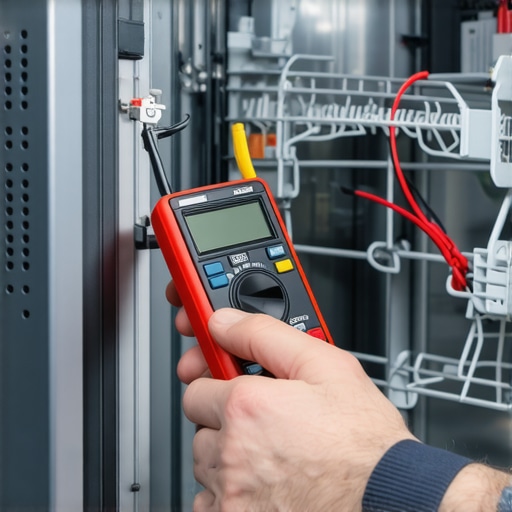
One of my favorites is a digital multimeter, which I use to test electrical components like thermostats and switches. Having a reliable multimeter allows me to diagnose issues accurately without guessing, saving time and preventing unnecessary replacement of parts. Also, a set of precision screwdrivers and a stubby nut driver make removing panels and securing fittings straightforward, especially in tight spaces. For checking water pressure and flow, I recommend a high-quality water pressure gauge, which helps identify issues with inlet valves or clogged filters before they cause bigger problems. These tools, combined with a digital camera or smartphone, enable me to document everything during maintenance or repairs, creating a record for warranty purposes and future reference.
Another invaluable item is a small, flexible inspection mirror. It helps me examine hard-to-see areas like the drain pump or beneath the spray arms without having to dismantle everything. To keep fittings tight and prevent leaks, I always use a quality set of adjustable wrenches and torque wrenches. Applying correct torque when securing connections not only ensures safety but also prolongs the lifespan of components. For cleaning, I prefer a soft-bristled toothbrush and a gentle abrasive pad to clean mineral buildup, particularly around inlet filters and spray arms.
Regarding software, I use diagnostic apps and manuals available through manufacturer portals, which provide troubleshooting guides and part identification. For example, accessing the detailed parts list through this resource ensures I select the right replacement components, preventing costly errors.
Predicting future trends, smart diagnostic tools integrated with home automation systems are becoming more prevalent, enabling remote monitoring and proactive maintenance alerts. Investing in these advancements now can save money and extend appliance life.
How do I maintain my dishwasher over time? Regularly inspecting hoses for cracks, checking for mineral buildup, and replacing worn parts before failure occurs are my go-to practices. I also schedule bi-annual maintenance sessions, during which I clean filters, conduct tests with my multimeter, and ensure all fittings are secure. For guidance on scheduled maintenance, I find this guide invaluable.
One advanced tip I recommend trying is installing a shut-off valve with a built-in filter. It allows for quick cutoff in case of leaks and prevents debris from entering the water supply system, thereby avoiding damage to your appliance. Proper implementation of this simple yet effective upgrade can prevent costly repairs and prolong your dishwasher’s lifespan. Exploring professional advice at this link can help you assess the suitability for your setup.
Why I Wish I Knew That First Time Around
One of my biggest lightbulb moments was realizing that reusing old water supply lines isn’t just a shortcut—it can lead to hidden corrosion and micro-cracks that cause leaks later, often when you least expect it. This lesson taught me that investments in quality and proper installation techniques save not only money but peace of mind in the long run. I also learned that even professional-looking parts can hide issues, so thorough inspection before installation is crucial. And perhaps most importantly, proper documentation of your repairs and parts used can be a lifesaver when dealing with warranty claims—so keep those receipts and photos handy. These insights have transformed my approach from reactive fixes to proactive maintenance, extending my dishwasher’s life and avoiding costly damages.
Related Posts
How to Spot a Failing Drain Pump Before Your Kitchen Floods
Ever had that sinking feeling when you open your dishwasher…
How to Swap a Door Gasket Without Calling a Pro
Have you ever stared at your dishwasher's door and felt…
How to Use a Multimeter to Test Your Dishwasher’s Thermal Fuse
Have you ever experienced that sinking feeling when your dishwasher…