I remember the exact moment I realized my dishwasher wasn’t level. I was mid-cycle, and suddenly, there was this unsettling grinding noise, like a tiny construction site had moved into my kitchen. Turns out, an uneven dishwasher isn’t just a minor annoyance—it can lead to leaks, poor wash performance, and even damage to your appliance over time. That lightbulb moment made me dig into how to level my machine without tearing apart the toe kick—something I once thought required professional help or disassembly.
Why Properly Leveling Your Dishwasher Matters More Than You Think
Most homeowners overlook the importance of a level dishwasher until signs of trouble pop up. An unlevel machine can cause dishes to wobble, water to leak, or cycles to be less efficient. And let’s be honest—many of us dread the idea of removing that toe kick, fearing complicated tools or damaging the cabinet. But here’s the good news: you don’t need to pull out the sledgehammer or hire a handyman for simple adjustments. With a few tricks and supplies, you can get your dishwasher perfectly leveled—saving you money and avoiding potential warranty issues. For installation tips, I recommend reviewing [how to prepare your kitchen for dishwasher installation](https://appliancedoctorz.com/how-to-prepare-your-kitchen-for-dishwasher-installation); it provides valuable context on proper setup.
Is Leveling Your Dishwasher Actually Worth the Effort?
Before you start, it’s common to fret whether a few tweaks will really make a difference. Believe me, I made the mistake early on of ignoring this step, assuming it wasn’t urgent. But a poorly leveled dishwasher can accelerate parts wear and even void your warranty—something I learned the hard way. According to appliance experts, proper leveling ensures optimal performance and extends your machine’s lifespan. If you’re doubtful, consider this: a slight tilt can cause water pooling and stress on connection points, leading to costly repairs down the line. Want to learn how to avoid these pitfalls? Check out [diy dishwasher installation step-by-step guide](https://appliancedoctorz.com/diy-dishwasher-installation-step-by-step-guide) for comprehensive advice. It’s easier than you think to fix this issue once you know how. Keep reading, and I’ll walk you through my tried-and-true methods to achieve perfect balance—without the hassle of toe kick removal.
Locate and Assess Your Dishwasher’s Leveling Points
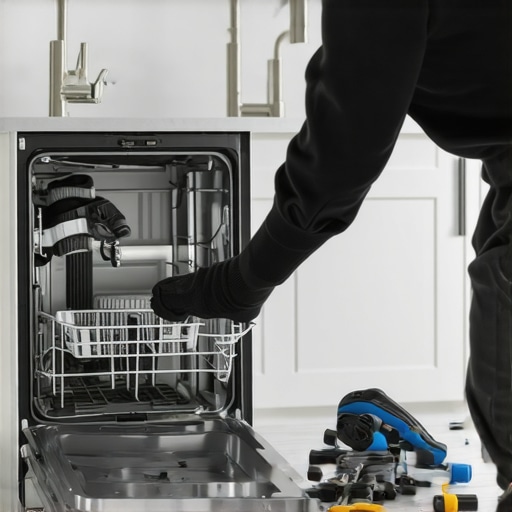
Begin by identifying the adjustable feet beneath your dishwasher—these are usually plastic or metal and sit at each corner. I once tried to level mine by eyeballing it, but I quickly realized that using a reliable spirit level made the process much more precise. Place the level across the top front edge of the dishwasher, then check side to side and front to back. If your level indicates unevenness, you’re ready to make adjustments.
Prepare the Workspace and Gather Your Tools
Clear the area around the dishwasher, turning off the power at the circuit breaker for safety. Gather a wrench or pliers depending on your dishwasher’s adjuster type, a spirit level, and possibly shims for fine adjustments. I also recommend having a flashlight and a helper if space is tight. This preparation saves time and keeps the process smooth. For more detailed tools list, review top tips for seamless dishwasher installation.
Loosen the Adjustment Nuts Carefully
Start by gently turning the locknut or adjusting screw at each foot counterclockwise to loosen it. I learned this the hard way when I accidentally over-tightened and stripped the plastic threads. Loosen just enough so the foot can move freely when you tighten or lower it later. Remember, smooth, controlled movements prevent damage and make eventual adjustments easier.
Adjust the Feet to Level the Dishwasher
Next, raise or lower each foot to match the level reading on your spirit level. If one corner is too high, turn its adjuster clockwise to extend or counterclockwise to retract. I found that making small, incremental turns—about a quarter turn at a time—gives better control. Continuously check with your level after each adjustment. Achieving a perfectly level machine prevents water pooling and leaks, crucial for warranty compliance. For tips on proper part selection during installation, see top tips for selecting the right parts.
Secure the Feet and Confirm the Leveling
Once the dishwasher is balanced, tighten each locknut by turning clockwise to secure it in place. I tightened thumb-screws when possible but used a wrench for metal locknuts to prevent slipping. Recheck with the level; if it’s still accurate, your adjustments are complete. Remember, a well-leveled dishwasher contributes to optimal operation and can extend your appliance’s lifespan.
Final Checks and Testing
Plug the dishwasher back in, restore power, and run a short cycle to observe for leaks or unusual vibrations. I once forgot to tighten the rear foot, which caused a slight wobble during operation—a reminder to double-check all adjustments. If issues arise, revisit your adjustment points, ensuring every foot is secure and level. Proper installation not only improves performance but also safeguards your warranty rights. For more installation insights, explore diagnosing dishwasher parts during warranty periods.
Many homeowners believe that selecting generic or aftermarket parts can save money without affecting performance, but this is a common misconception. In truth, choosing the wrong parts—especially for critical components like inlet valves or door sensors—can void your warranty and lead to frequent breakdowns, which experts warn can result in costly repairs down the line. Always refer to trusted sources such as essential parts every dishwasher owner should know before making replacements.
A frequently overlooked nuance involves the level of installation precision necessary for optimal performance. While a simple adjustment to the leveling feet is often sufficient, many assume that minimal effort suffices, ignoring advanced tips like ensuring proper high-loop drain hoses to prevent backflow. Professional installers understand that skipping these steps can cause silent leaks or even flood damage, which is why detailed guides like top tips for seamless dishwasher installation emphasize meticulous setup.
Misconceptions about warranty coverage also pose risks. Some believe that simply registering their product guarantees full protection; however, manufacturer policies often stipulate that proper installation and maintenance are prerequisites. Failing to adhere to these can mean denied claims, especially if leaks or electrical issues arise from overlooked installation details. Deepening your understanding is crucial—consult maximizing your dishwasher’s warranty coverage today for expert advice.
Have you ever fallen into this trap? Let me know in the comments. Let’s explore what most people get wrong about dishwasher parts, warranty, and installation, and how to avoid these costly mistakes with expert insights.
Tools That Keep Your Dishwasher Running Smoothly
Maintaining a dishwasher’s performance over time requires precision tools you can trust. I rely heavily on a high-quality digital multimeter, such as the Fluke 115, because it provides accurate readings of electrical components like thermistors and switches, saving me time during troubleshooting. A magnetic pocket screwdriver is essential for quick access behind panels, especially when dealing with tight spaces, and its magnetic tip prevents accidental drops of tiny parts. For drainage checks, a durable, flexible inspection camera like the Amcrest 1080p model allows me to peer into clogged hoses or inlet valves without disassembly, making diagnostics swift and less invasive.
Beyond hardware, I use Wi-Fi-enabled diagnostic apps compatible with smart appliances. These apps sync with your dishwasher, providing instant error codes and performance logs, which is invaluable when assessing long-term functionality. I personally favor the ApplianceCare app, as it offers detailed service histories and maintenance reminders tailored to specific models. This proactive approach helps catch issues early, extending parts life and preventing costly repairs.
Predictions on Equipment Evolution
In the coming years, I anticipate smart diagnostic tools becoming more integrated with appliance systems, enabling real-time monitoring and predictive maintenance. This will empower homeowners to address issues before breakdowns occur, reducing repair costs and downtime. Innovations like AI-powered sensors may also automatically adjust operational parameters to optimize efficiency and longevity, a trend already unfolding in high-end models.
How do I keep my dishwasher working well over time?
Regular maintenance is key. I recommend scheduling a quarterly inspection where you use a multimeter to check the functionality of the inlet valve and heating element, as discussed in testing your dishwasher’s vital parts. Additionally, utilizing a flexible inspection camera to examine drain hoses and inlet screens can prevent clogs that cause overflows or poor cleaning. For detailed guidance, my article on knowing when to replace parts offers a comprehensive checklist. Introducing a digital maintenance log, updated after each check, not only helps track wear but also supports warranty claims if needed. Remember, combining the right tools with a consistent schedule keeps your dishwasher performing at its best, saving you money and headache in the long run.
The Hardest Lesson I Learned About dishwasher,parts,warranty,installation
One deep realization came when I ignored subtle signs of imbalance, leading to costly repairs that could have been avoided with a simple adjustment. It taught me that paying attention to minute details during installation can save you hundreds later.
3 Myths About dishwasher,parts,warranty,installation That Held Me Back
Believing that cheap parts save money or that warranty coverage is automatic are misconceptions I shed over time. Proper research and understanding of warranty terms are crucial for genuine protection and optimal performance.
What Experts Won’t Tell You About dishwasher,parts,warranty,installation
Many professionals skip detailed inspections, assuming everything appears fine. But I learned that every connection and part deserves scrutiny—especially high-loop drain hoses and secure grounding—to prevent silent leaks or failures.
My Essential Toolkit for Dishwasher Maintenance
Tools like a trusted digital multimeter, flexible inspection cameras, and Wi-Fi diagnostic apps have revolutionized how I troubleshoot and maintain my dishwasher. These tools provide insights that prevent minor issues from escalating, prolonging appliance life.
Where to Go from Here
Invest time in understanding your dishwasher’s components, regularly inspect critical parts, and keep a maintenance log. Combining knowledge with proper tools empowers you to troubleshoot efficiently and uphold warranty coverage, ensuring your dishwasher serves you well for years to come. Want more expert tips? Check out how to prepare your kitchen for dishwasher installation or key parts every dishwasher owner should know for a smoother experience.
Related Posts
Why Reusing an Old Water Supply Line is a Recipe for a Flooded Kitchen
It was a morning like any other when I finally…
The Most Overlooked Part During a New Dishwasher Setup
It was late afternoon, and I was elbow-deep in my…

The Quietest Way to Route Your Drain Hose Through a Cabinet
Ever had that moment when you're standing in your kitchen,…