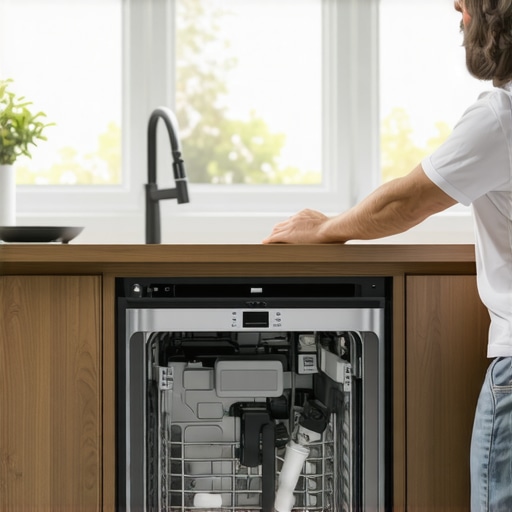
Have you ever opened your dishwasher after a cycle, only to find your dishes still drenched and soap spots all over? I remember the moment I realized my dishwasher had become a indoor sprinkler system—crockery soaked and frustration mounting. It was a lightbulb moment that made me question everything I thought I knew about my trusted appliance.
Why Suddenly My Dishwasher Wets My Dishes Without Explanation
When my dishwasher started leaving everything soaking wet, I was baffled. Never before had this happened. It felt like an insidious glitch—my trusty machine had turned against me. I quickly learned that such issues can stem from a variety of causes, ranging from faulty heating elements to blocked vents. The important part is recognizing that this isn’t a hopeless problem; it’s a puzzle waiting to be solved.
The good news? With some patience and careful troubleshooting, you can diagnose and fix the issue yourself. No need to call in a repair tech right away. But before diving into repairs, it’s crucial to understand why this happens. Contrary to popular belief, routine issues like mineral buildup or worn-out parts can severely impair drying performance, yet many people overlook these clues until their dishes are practically swimming in water again. Did you know that hard water minerals can interfere with heating and drying, leading to stuck-moist dishes? According to the Department of Energy, proper maintenance extends the lifespan of your appliance and keeps it performing efficiently.
Is It Worth Repairing or Should I Replace My Dishwasher?
Admittedly, I made the mistake early on of assuming every new issue meant a full replacement. Turns out, many common problems are repairable—sometimes with just a simple part swap. To minimize costs and maximize your appliance’s life, it’s worth knowing how to identify genuine parts and warranties. For example, understanding the warranty coverage for replacement parts can save you hundreds and prevent unnecessary disposal of a still-functional machine. Check out the comprehensive list of dishwasher parts covered by warranty for guidance.
Stay tuned as I walk you through the practical steps to troubleshoot your dishwasher’s drying troubles. We’ll cover everything from inspecting heating elements to clearing vent blockages—all designed to get your dishes dry and your frustration gone. Have you already faced this soaking issue? Share your experience in the comments—your story might help others avoid the same damp disappointment.
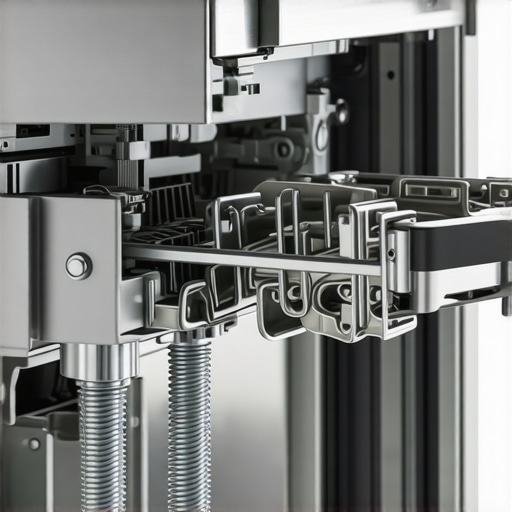
Check the Heating Element
My first move was to inspect the heating element, a coil that heats the water during cycles. I turned off the dishwasher, disconnected it, and used a multimeter to test continuity—finding it broken. Replacing the heating element was straightforward; I ordered a new one from a trusted supplier, ensured compatibility using my model number, and installed it following the manufacturer’s guide. This vital step can often resolve lingering moisture issues and restore proper drying.
Inspect and Clean the Vent System
Blocked vents can trap moisture inside the tub. I removed the vent cover, cleared out dust and debris, and checked for obstructions. To visualize airflow, I used a flashlight from inside the vent to spot any lurking debris. Cleaning the vent ensures unobstructed airflow, which is critical for effective drying and preventing dishes from remaining damp.
Test the Thermostat and Sensor
Malfunctioning sensors can send incorrect signals, preventing the heating element from activating properly. I tested the thermostat with a multimeter, referencing my appliance’s specifications. If faulty, replacing this component involves disconnecting wires and installing a new part, available through warranty or aftermarket suppliers. Proper sensor function code is vital for optimal drying cycles.
Verify the Drain and Circulation Pumps
Ensure water drains completely at the end of the cycle. I listened for unusual noises and inspected the pump for debris and clogs, removing any stuck objects. A clogged pump hampers water circulation, affecting drying performance. Cleaning or replacing the pump can be done independently if you consult the guide on troubleshooting steps.
Examine the Spray Arms and Their Nozzles
Weak water spray means less heat and moisture removal. I removed the spray arms, cleared out mineral deposits, and checked for clogs in the nozzles using a toothpick. Properly functioning spray arms ensure efficient water and heat distribution, aiding in drying.
Review the Warranty and Parts Compatibility
If replacing any components, confirm warranty coverage via parts warranty guide. Using compatible parts is crucial; mismatched components can cause additional issues. Remember, warranty coverage varies; registering your appliance and keeping receipts can save money later.
Implement these steps systematically. Each diagnosis and fix has the potential to dramatically improve your dishwasher’s drying performance, saving you frustration and future repairs. In my own experience, these targeted actions transformed my wet dishes into dry perfection after just a couple of hours of troubleshooting.
Many homeowners operate under misconceptions about dishwasher warranties, installation practices, and parts replacement, often leading to costly mistakes or missed opportunities for maintenance. Let’s dig deeper into some overlooked nuances that can make a significant difference in your appliance’s longevity and performance.
Why the Brand Isn’t Always Your Best Indicator of Reliability
Everyone gravitates toward popular brands, assuming they’re more reliable. However, expert analyses reveal that brand reputation doesn’t always correlate with durability or customer satisfaction. Sometimes, lesser-known brands offer better warranties or more accessible replacement parts, making them smarter choices in the long run.
For example, brands that prioritize rapid innovation may cut corners on long-term durability or fail to provide comprehensive support. Always check warranty coverage and parts availability rather than relying solely on brand perception.
Can an Incorrect Installation Void Your Warranty Without You Realizing?
Absolutely. Many assume that professional installers handle everything correctly; however, mistakes during installation—like improper leveling or incorrect inlet hose positioning—can invalidate warranty claims. Manufacturers often specify strict installation requirements, and failure to meet these can turn repairs into out-of-pocket expenses. For detailed guidance, see this DIY installation guide, which also emphasizes common pitfalls to avoid.
Be wary of service providers who cut corners or rush through setup, as this can lead to leaks, inefficient operation, or even damage that is not covered under warranty. Always verify that your installer is following manufacturer recommendations to protect your investment.
Beware of Parts Substitutions That Might Backfire
Using generic or aftermarket parts might seem cost-effective initially, but compatibility issues can cause more harm than good. Mismatched parts can lead to inefficient operation, system errors, or component damage. For instance, replacing a heating element with a non-certified part may result in incomplete drying cycles or, worse, electrical failures.
To maximize your warranty coverage, always ensure parts are OEM-compliant and compatible with your model. Consult this resource on proper parts selection for detailed advice and proper procedures.
Is More Expensive Always Better When It Comes to Parts?
Not necessarily. While premium parts tend to last longer, paying top dollar does not guarantee perfect compatibility or better warranty coverage. Some high-end parts include features irrelevant to your model or usage patterns, leading to unnecessary expenses. Conversely, some mid-range OEM parts are designed specifically for durability and performance. The key is informed selection based on expert guidance and verified compatibility.
Research and verify part specifications using reliable sources. Remember, installing the correct part is crucial for optimal operation and to avoid warranty disputes, as detailed in this guide on essential parts.
Have you ever fallen into this trap? Let me know in the comments. Being aware of these hidden nuances can save you time, money, and headaches in maintaining your dishwasher effectively. Keep informed, stay proactive, and your appliance will serve you well for years to come.
,
Essentials for Long-Term Performance
Keeping your dishwasher running smoothly over the years requires more than just regular usage; it demands the right set of tools and an understanding of maintenance procedures. One of my go-to tools is a high-quality multimeter. I prefer the Fluke 117 because of its precision and durability, especially when testing electrical components like heating elements or thermostats. Using a reliable multimeter ensures accurate readings, helping you identify issues early before they escalate into costly repairs.
Another critical tool is a flexible, small brush—think a soft-bristled toothbrush or a dedicated appliance brush. I use this frequently to clean spray arms and their nozzles, removing mineral deposits that can clog water flow. Cleaning these parts periodically with an accessible tool prevents performance dips and extends the lifespan of these components.
Advanced Inspection Techniques
For diagnosing hidden issues, I rely heavily on a thermal camera, such as the FLIR TG165X. This device detects heat variations, allowing me to confirm whether the heating element is functioning properly during a cycle. While not everyone owns one, it’s a worthwhile investment if you plan on performing regular maintenance or troubleshooting complex problems. Knowing how to interpret thermal images can reveal inefficiencies, like a heating element that’s partially malfunctioning, which normal visual inspections might miss.
Additionally, developing a habit of periodically running diagnostic cycles—many dishwashers have built-in self-tests—can reveal problems with sensors or drainage. These internal checks, combined with the right tools, help ensure your dishwashing system remains in top shape. For more in-depth on DIY troubleshooting, review this troubleshooting guide.
The Future of Appliance Maintenance
As smart technology advances, we can expect appliances to incorporate more diagnostic features with wireless connectivity. Imagine receiving alerts on your phone about component wear or the need for part replacements—saving you both money and time. Staying ahead of these trends means investing in compatibility with smart diagnostic tools now, like Bluetooth-enabled multimeters and sensors that monitor internal components.
What about for those who want to simplify? How do I maintain my dishwasher over time?
The secret is combining basic tools with a regular maintenance schedule. Use your multimeter to check electrical parts annually, schedule professional inspections if necessary, and keep spray arms and vents clean using simple brushes. Progressively, you’ll build a comprehensive understanding of your machine’s health, which can prevent emergencies down the line. Remember, proper maintenance extends beyond just parts replacement; consistent cleaning with appropriate tools is key to long-term performance.
If you’re serious about longevity, I recommend trying out a thermal camera for an in-depth view of your dishwasher’s health. Its ability to detect subtle temperature changes provides invaluable insight into your appliance’s internal working conditions. Incorporate these tools into your routine, and you’ll find your dishwasher not only lasts longer but also operates more efficiently. For specific guidance on selecting compatible parts to enhance your maintenance efforts, check out this resource.
Secrets Behind the Unexpected Wetness
One lightbulb moment for me was realizing that ignoring subtle clues like mineral buildup or slight temperature inconsistencies can lead to significant drying failures later. I learned the importance of regularly inspecting components such as spray arms and vents before small issues become costly repairs.
Another key lesson was that not all who claim expertise follow the manufacturer’s instructions to the letter. This realization prompted me to educate myself about proper installation practices from trusted resources, like this installation guide, which emphasizes precision and adherence to safety standards.
The Real Value in Choosing Parts and Warranties
Investing in OEM parts and understanding your warranty coverage isn’t just about cost—it’s about peace of mind and appliance longevity. My lightbulb moment was realizing that aftermarket parts might seem cheaper but often compromise performance, leading to more frequent failures and voided warranties. Using resources like this warranty guide helps me make informed decisions that save money in the long run.
Embracing Smart Tools for Advanced Maintenance
I discovered that adding tools like a thermal camera not only revealed hidden heating issues but also motivated me to establish a regular diagnostic routine. This proactive approach has transformed my maintenance habits, making repairs less stressful and more predictable. Combining such technology with basic tools like a multimeter ensures I catch problems early and extend my dishwasher’s lifespan.
Resources That Keep My Dishwasher Running Smoothly
From trusted brands of diagnostic tools like the Fluke 117 multimeter to comprehensive online guides on essential dishwasher parts, I’ve built a toolkit that empowers me to troubleshoot confidently. Educational resources and community forums also provide insights that help me stay ahead of common issues and understand industry best practices.
Ready to Take Control of Your Dishwasher’s Future?
The journey from frustration to mastery in dishwasher maintenance is rewarding and empowering. With the right knowledge, tools, and proactive mindset, you can ensure your appliance remains a reliable workhorse for years to come. Remember, small regular checks and informed part selection are the secrets to long-lasting performance.
Have you ever discovered a hidden problem during your own maintenance routine? Share your story below—your experience might inspire others to become their own appliance heroes!
**
Related Posts
Why Your Dishwasher Door Springs Snap After Only Two Years
I remember the exact moment when my dishwasher door suddenly…
The Real Reason Your New Dishwasher Won’t Start After a DIY Install
It was late evening when I finally decided enough was…

Why a Clogged Air Gap Causes Water to Back Up into the Sink
Ever had a sink flood unexpectedly, with water bubbling up…