It was a typical Tuesday evening when I noticed my smart home app flashing an alarm—I’d used an extra 5 gallons of water that day, according to the stats. I was instantly skeptical. Turns out, my water meter had been reading incorrectly for weeks, but I’d been trusting the numbers blindly, thinking they were perfect. That wake-up call made me realize something crucial: these water usage stats that smart home apps rely on aren’t always as accurate as they seem.
Don’t Let Inaccurate Data Fool You: Here’s Why It Matters
Smart home technology promises convenience, efficiency, and even savings, but only if the data it provides is reliable. When your water usage readings are off, it’s like trying to navigate using a broken compass—your decisions are based on false information. This can lead to wasting money, overlooking leaks, or even voiding warranties if you ignore faulty performance reports. The importance of accurate water metrics isn’t hypothetical; it affects your wallet, your time, and your peace of mind.
Is Trusting Smart Stats Really Worth It?
Early in my smart home journey, I made the mistake of assuming the app’s water readings were infallible. I didn’t double-check my actual water bill or inspect my plumbing, leading to costly surprises down the road. It’s a common trap—many homeowners believe their digital dashboards are gospel, but they aren’t foolproof. As [The Appliance Doctor](https://appliancedoctorz.com/privacy-policy-2) points out, calibration errors or sensor malfunctions are frequent culprits that skew data significantly.
So, why are these figures often wrong? And more importantly, what can we do about it? That’s what I’ll walk you through today. We’ll cover specific steps to identify and correct inaccuracies, ensuring your smart water stats truly serve your interests. Ready to stop being misled by faulty numbers? Let’s dive into the practicalities that will restore your confidence in your smart home system.
Check Your Water Meter for Calibration
Start by manually reading your water meter at a specific time—preferably early morning before use begins—and record the number. Then, avoid using any water for at least an hour, and recheck the meter. If the reading has changed when it shouldn’t have, the meter may be miscalibrated. Replacing or calibrating your sensor involves contacting your provider or a professional installer familiar with components like the ones discussed in parts to check during installation. This process ensures your smart app’s data aligns with reality.
Test the Sensor’s Accuracy through Direct Observation
Place a known volume of water into a container—such as a measuring cup—and compare the app’s recorded usage. For example, fill a 1-gallon jug and see if the app registers roughly one gallon. If discrepancies persist, consider replacing the sensor or the entire meter. To understand the critical parts you might need, visit troubleshooting parts guide. Performing this test repeatedly can reveal sensor drift or malfunction.
Inspect Installation for Common Faults
Loose or incorrectly positioned sensors can cause inaccurate readings. Follow a systematic inspection, similar to diagnosing during warranty periods, ensuring all components are securely fitted and properly aligned. Visualize the setup, perhaps using an image from warranty coverage tips, to verify correctness. Tighten fittings without over-torquing, which can lead to leaks or sensor displacement.
Calibrate or Replace Faulty Components
If your tests show persistent inaccuracies, calibration might be necessary. Some water meters have adjustment screws or digital calibration options—consult the manufacturer’s instructions or your professional installer. Otherwise, replacing the sensor or meter can restore accuracy. For detailed guidance on part replacement and calibration, review maximizing warranty through proper parts. Ensure you select high-quality, compatible components to avoid recurring issues.
Document and Monitor Over Time
Keep a log of your readings and corrections. Use your smart app to track trends and confirm improvements after adjustments. This process not only verifies accuracy but also provides evidence should you need warranty service, as explained in documentation tips for warranty security. Consistent monitoring helps prevent future misreads caused by sensor drift or environmental factors.
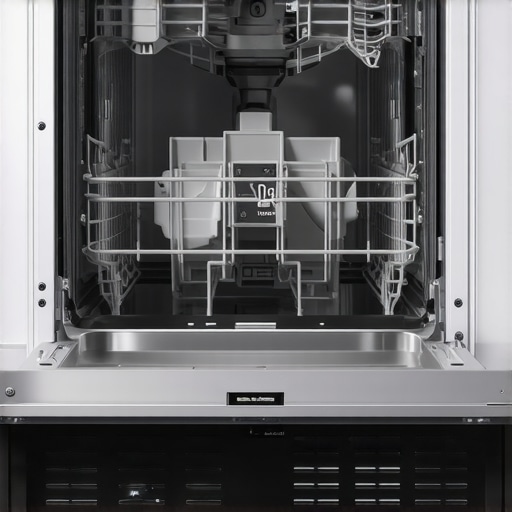
Many homeowners believe that choosing the most advertised parts or following standard installation steps guarantees long-term dishwasher performance. However, in my experience, what most people overlook are the subtle details that can make or break your warranty claims and the longevity of your appliance. For example, a frequent misconception is assuming that third-party parts are always compatible and of equal quality. In reality, selecting non-approved components can void your warranty, especially if they cause damage—something highlighted in expert advice on maximizing warranty coverage. The hidden nuance lies in understanding the specific requirements of your model and adhering strictly to manufacturer-approved parts.
Why does using the wrong part or improper installation jeopardize your warranty even if the part looks compatible?
Because manufacturers often specify certain materials, dimensions, and installation techniques that ensure proper sealing, grounding, and operation. Simple mistakes like tightening a clamp too much or ignoring a mandatory high-loop drain configuration can lead to leaks or damage, which many homeowners don’t realize until it’s too late—leading to rejected warranty claims, as discussed in when to replace parts for optimal performance. Moreover, the myth that all parts are interchangeable ignores the critical differences in water supply connections—the brass fittings, for example, are designed to withstand specific pressure levels and corrosion resistance, as detailed in the brass vs. plastic debate. Failing to recognize these nuances can cause stubborn leaks or component failures, ultimately costing more in repairs and risking warranty invalidation.
Keeping It Working: Tools and Tips for Long-Term Maintenance
Maintaining your dishwasher’s performance over time requires more than just routine cleaning; it demands the right tools and a strategic approach to repair, replacement, and calibration. One essential component I swear by is a high-quality multimeter like the Fluke 117. This device allows me to accurately test electrical components such as control boards and thermostats, ensuring they operate within specifications. Regularly checking the continuity and voltage supply helps prevent unexpected breakdowns and prolongs the unit’s lifespan.
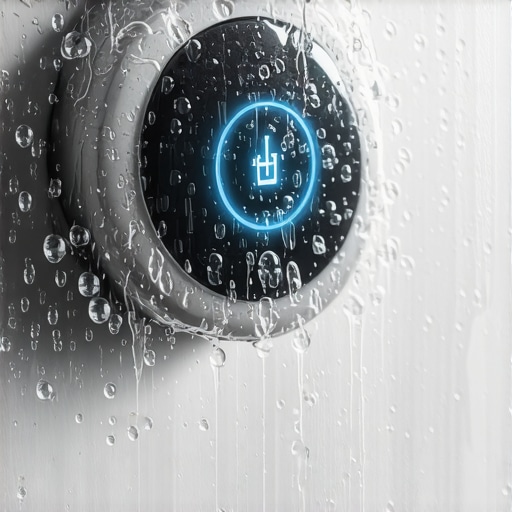
Another indispensable tool is a digital calibration scale. Precise calibration of sensors, especially turbidity sensors, is crucial for optimal operation. I use a portable digital scale to verify the sensor readings against known water samples. If discrepancies are detected, I follow manufacturer calibration procedures, which can often be found in detailed guides like parts to check during installation. Proper calibration prevents false error codes and maintains efficiency.
For physical inspections and adjustments, a set of precision screwdrivers and a torque wrench are vital. Ensuring fittings and mounting bolts are tightened to the correct torque levels avoids leaks and sensor misalignments. Over-tightening can warp plastic tubs, so I use a torque wrench set to manufacturer-recommended specifications. Visual tools like a borescope can also be helpful to inspect hard-to-reach areas such as drain hoses and inlet valves without disassembling the entire unit.
How do I keep my dishwasher running smoothly over time?
Consistent monitoring and preventive maintenance are key. Incorporate regular checks of inlet valves, drain pumps, and filters—cleaning them with vinegar or appropriate cleaning tools to prevent buildup. Monitoring these components with a multimeter and visual inspection helps catch issues early, before they escalate into costly repairs. Investing in quality tools and understanding their proper use can significantly extend your dishwasher’s warranty and overall performance. In the future, I predict that AI-powered diagnostic tools will become standard, providing real-time alerts and detailed troubleshooting reports, further simplifying maintenance tasks.
If you’re serious about long-term performance, I recommend trying advanced calibration techniques and utilizing a multimeter for electrical diagnostics. These steps have saved me countless hours and expenses, and they can do the same for you. Need expert guidance? Don’t hesitate to get in touch via contact us and start your maintenance journey today.
 )
)
Three Unexpected Lessons From My Dishwasher Repairs
First, never underestimate the importance of verifying every part’s compatibility before installation—what looks identical on the surface might not meet manufacturer standards, risking voided warranties. Second, real-world calibration and testing with your tools teach lessons no manual can; trusting sensor readings blindly can be costly. Lastly, consistent documentation of your maintenance efforts and upgrades provides a safety net when warranty claims come into play, turning potential disputes into straightforward validations.
My Toolbox for DIY Success and Confidence
Over the years, I’ve come to rely on a core set of tools that demystify appliance maintenance: a high-quality multimeter, like the Fluke 117, offers precise electrical diagnostics. A digital calibration scale ensures sensors are functioning accurately. Visual inspection kits, including borescopes, help spot unseen issues behind panels without invasive disassembly. These assets, paired with trusted guides—such as parts to check during installation—enable me to troubleshoot confidently and extend my appliances’ lifespan.
Turning Challenges Into Confidence
Remember, the path to mastery isn’t paved with perfection but perseverance. By leaning into the knowledge that smart water sensors are valuable tools—yet imperfect—you empower yourself to make informed decisions. Whether it’s calibrating sensors or selecting the right parts, each step contributes to a more reliable, efficient home. The journey might seem daunting at first, but with the right mindset and resources, you can transform maintenance from a chore into a rewarding part of homeownership. Your next smart upgrade starts today—are you ready to take control?
Have you ever faced a tricky water leak or warranty challenge that turned out to be a simple fix? Share your story below—I’d love to hear how you navigated it!
Related Posts

Why Your Smart App Maintenance Alerts Save You Hundreds Yearly
It was a morning like any other—until I opened my…
How Your Smart Dishwasher Error Log Acts as a Witness for Repairs
Ever stood in your kitchen, dishwasher humming along, when suddenly…
The Impact of Hard Water on Your Smart Sensor Performance
Imagine this: You finally get around to installing that new…