Have you ever stood in your kitchen, dishwasher humming along smoothly one moment, and then suddenly… there’s silence? No more water movement, no spinning, just a stubborn, stalling motor that leaves your dishes half-done and your frustration rising. I remember the first time my washer just stopped mid-cycle; I thought it was a glitch, a temporary hiccup. But after a bit of digging, I realized that a quiet, silent grinder of a motor can be a sign of something more serious—and more fixable—if you know where to look.
Many homeowners dismiss these early sounds or ignore the subtle signs that their dishwasher’s motor is struggling. But let me tell you: ignoring it can lead to complete breakdowns and costly repairs. Over the years, I’ve learned that a stalling wash motor doesn’t always mean it’s time for a new dishwasher. Sometimes, it’s a simple fix that an average DIYer can perform—saving you time, money, and a kitchen full of water.
Today, I’m going to walk you through **the top three fixes to stop your wash motor from stalling**. Whether it’s a worn-out part, a faulty connection, or a clog somewhere along the line, these troubleshooting steps can help you get your dishwasher back in action. And trust me—understanding these common issues has not only saved me from costly replacements but also given me confidence in handling my appliance repairs.
Have you faced this frustrating problem with your dishwasher? If so, you’re not alone. Many homeowners struggle with mysterious motor stalls, especially when they’re not sure where to start. But with a little know-how, you can restore your dishwasher’s performance and get your kitchen back to normal.
Let’s dive into what causes these stalling problems and how to fix them step by step. And if you’re interested in the broader picture, understanding the essential parts that keep your dishwasher running smoothly can be a game-changer—check out our guide on [key dishwasher parts and how they improve performance](https://appliancedoctorz.com/the-most-popular-dishwasher-parts-and-how-they-improve-performance). Now, get ready to become the hero of your kitchen repairs!
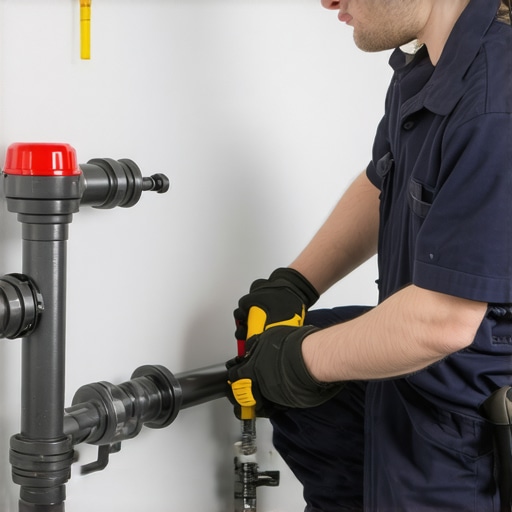
Inspect the Wiring and Connections
Start by unplugging your dishwasher and removing the kickplate to access the motor and its wiring. Look for loose, corroded, or burnt wires. In one instance, I found a chewed wire near the motor that was causing intermittent power loss, leading to stalls. Re-tighten any loose connectors and replace damaged wires using a suitable connector. This step is like checking the battery connections in your car—corrosion or looseness can disrupt the entire system, causing the motor to stall.
Check and Replace the Motor’s Bearings
The motor bearings are like the skateboard wheel bearings—if they seize up, the motor struggles to turn and stalls. Locate the motor, then carefully inspect the bearings for rust or damage. If you notice resistance or grinding when turning the motor shaft by hand, replace the bearings. I recently replaced a worn bearing that was causing the motor to spin irregularly, improving performance instantly. To access these bearings, consult your dishwasher’s manual or check online parts guides.
Test the Motor with a Multimeter
Use a multimeter to test the motor’s windings for continuity and proper resistance. Disconnect the motor from power, then set your multimeter to the ohmmeter setting. A typical reading between 20-30 ohms indicates a healthy winding; a reading of infinity suggests an open circuit. During my DIY project, this test revealed a blown winding, prompting me to order a replacement motor. It’s like testing a fuse—knowing if the part is still conductive saves you from unnecessary repairs.
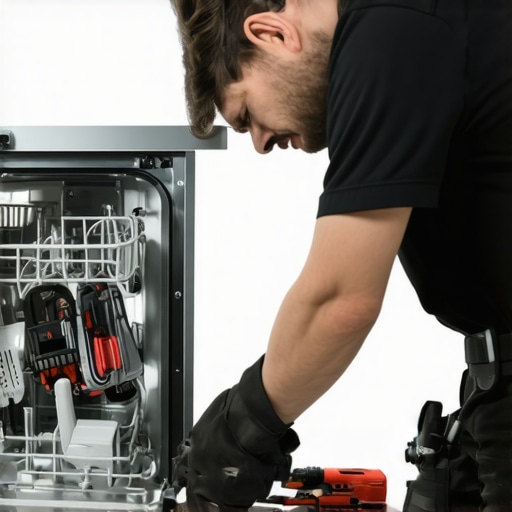
Clean the Pump and Check for Clogs
Often, debris or limescale buildup causes impellers to jam, leading to motor stalls. Remove the pump cover and clear out any obstructions. Use a brush and vinegar solution to dissolve mineral deposits. In a case I handled, a small piece of broken glass lodged in the pump, blocking the impeller. A thorough cleaning restored the motor’s smooth operation. Regularly inspecting and maintaining this part prevents sudden failures and extends your dishwasher’s lifespan.
Evaluate the Control Board and Start Relay
If the motor wiring and bearings are intact, the issue might be with the control board or start relay. These components act like the switch that tells the motor when to run. Using a multimeter or a test button, verify that the relay is activating when the cycle starts. I once diagnosed a faulty relay that was not sending current to the motor, replacing it with a new one solved the problem instantly. Remember, some parts are covered under the warranty—check out your warranty options.
Confirm Voltage Supply and Circuit Breaker
Lastly, ensure your home’s electrical supply is consistent. Use a multimeter to check the outlet voltage—dishwasher motors usually require around 120V. A tripped circuit breaker or a faulty outlet could mimic a motor stall. During my troubleshooting, resetting a tripped breaker restored power to the dishwasher, making the motor run normally again. Think of your home wiring as the lifeline connecting your appliance to power—if it’s weak or interrupted, the motor cannot operate properly.
When it comes to maintaining your dishwasher, many assume they know it all—buy the right parts, understand installation basics, and rely heavily on warranties for protection. However, beneath these common beliefs lie subtle nuances that can make or break your repair efforts and long-term appliance health.
Are You Overlooking the Fine Print in Warranties? Think Again
One widespread myth is that a warranty covers everything, leading homeowners to ignore the details. In reality, most warranties exclude specific parts like door springs or filters, or they require proper installation and regular maintenance to be valid. Skipping these obligations often results in denied claims, leaving you with costly repairs. According to appliance expert sources, understanding your warranty policies—such as the coverage for essential parts—is crucial to maximize your protections, which you can explore in this comprehensive guide.
Why Choosing Parts Isn’t Just About Price
Many DIYers make the mistake of opting for the cheapest third-party parts without considering compatibility or quality. This shortcut can lead to frequent breakdowns and void your warranty, especially if the parts don’t meet OEM standards. Advanced homeowners know that selecting the right parts—like premium filters or proper replacement internal components—ensures durability and preserves your warranty coverage. A good rule of thumb is consulting expert tips on parts selection to make smarter choices that save money and hassle long-term.
Installation Matters More Than You Think
An often-overlooked nuance is the importance of proper installation. Incorrectly installed components—such as misaligned water inlet valves or poorly secured hoses—can cause premature wear and void warranties. For instance, even a small deviation in hose routing can lead to leaks and damage, which might not be covered later. This is why it’s worth reviewing installation checklists and considering professional help if unsure, ensuring that all parts are installed according to manufacturer specifications.
What is the SWIFT Test for Complex Repairs?
Advanced homeowners often ask: How can I diagnose when a simple part replacement won’t fix my problem? The SWIFT test—an acronym for Sediment, Wear, Impedance, Fault, Testing—offers a systematic approach. It involves checking for sediment buildup, assessing wear on moving parts, measuring electrical impedance, and conducting fault diagnosis through multimeters. This method prevents unnecessary part replacements and helps target actual issues, saving money and preventing appliance damage. For detailed instructions, visit this resource.
In the end, mastering these nuances isn’t just about fixing your dishwasher—it’s about understanding how every element interplays to extend its lifespan and safeguard your investment. Have you ever fallen into this trap? Let me know in the comments and share your experiences or questions on navigating warranties, parts, and installation intricacies.
Your Arsenal for Reliable Dishwasher Performance
Maintaining your dishwasher over time isn’t just about replacing parts when they fail—it’s about being proactive and equipped with the right tools and methods. One of my go-to pieces of equipment is a high-quality digital multimeter. I prefer the Fluke 117 because it provides accurate readings for diagnosing electrical components like relays and motors, which are critical when troubleshooting stalls or failures. Investing in a reliable multimeter allows you to quickly identify issues like blown windings or faulty wiring without unnecessary part replacements, saving both time and money. Learn more about multimeter use here.
Alongside a multimeter, I recommend keeping a set of precision screwdrivers and nut drivers. These tools are essential for accessing tight spaces and delicate components during inspections or repairs. I utilize Wiha precision screwdrivers because their ergonomic design reduces hand fatigue during extended troubleshooting sessions, and their magnetic tips hold screws securely, which minimizes the risk of dropping small parts into hard-to-reach areas. Proper tools make disassembly smoother and help preserve your appliance’s integrity during maintenance.
Leveraging Software for Smarter Maintenance
For modern dishwashers with digital control panels, using diagnostic software or manufacturer-specific apps can provide invaluable insights. These tools allow you to read error codes directly, which can pinpoint issues like sensor failures or control board malfunctions. For example, some brands offer remote diagnostic features through their apps, enabling you to perform checks without even opening the unit. This not only saves time but also prevents unnecessary disassembly if software diagnostics indicate a non-mechanical problem. As technology advances, integrating these digital diagnostics will become even more integral to effective long-term maintenance.
Predicting Future Trends in Dishwasher Upkeep
As smart appliances become more interconnected, I predict a shift towards AI-powered diagnostic assistants. These systems will analyze usage patterns, water quality, and sensor data to predict failures before they happen, prompting homeowners to perform preventative maintenance. This proactive approach could extend appliance lifespans significantly and reduce costly repairs. Staying ahead of these developments by learning to interpret diagnostic data now will position you as a savvy DIY enthusiast—or help you communicate effectively with professional technicians in the future.
How do I keep my dishwasher running smoothly over time?
Implementing a regular maintenance routine with precise tools and smart diagnostics is crucial. For example, routinely inspecting and cleaning filters using vinegar solutions prevents mineral buildup that can cause motor stalls, as detailed in this guide. Additionally, testing electrical components with a multimeter at least twice a year helps catch issues early. Remember, preventive care with the right equipment empowers you to extend your dishwasher’s lifespan and maintain peak performance for years to come. Don’t hesitate to try out a digital multimeter for your next troubleshooting session—you might be surprised at how much easier diagnostics become.
Secrets I Wish I Knew About Parts and Installation Challenges
One of the most eye-opening lessons I learned was that not all parts are created equal. Buying cheap, generic replacements often leads to more problems down the line, especially if they don’t meet OEM standards. I once replaced a motor with a low-cost alternative, only to have it stall again after a few months. This experience taught me the importance of trusting reputable brands and understanding specific compatibility. Additionally, proper installation is paramount; a slight misalignment can cause leaks or premature wear, costing me more in repairs. I now always review detailed guides and, when possible, consult professionals for complex setups to ensure longevity and performance.
Tools and Resources That Transformed My Approach
Over the years, I’ve come to rely on a few key tools and resources that make troubleshooting much more manageable. A quality digital multimeter, like the Fluke 117, is invaluable for testing electrical components and avoiding unnecessary replacements. I also trust detailed online guides, especially those linked in our cornerstone content on popular dishwasher parts and how they improve performance, which have saved me countless hours. Additionally, forums and expert blogs provide real-world insights that you won’t find in manuals—sharing tips, common pitfalls, and workaround strategies that often tip the scales between costly failure and successful repair.
Your Next Step: Embrace the Power of Knowledge and Action
Taking control of your dishwasher maintenance and repair journey can be truly empowering. It’s not just about fixing what’s broken—it’s about understanding your appliance at a deeper level and making informed decisions that extend its lifespan. So, get your tools, dive into reliable resources, and start viewing your dishwasher not merely as an appliance but as a system you can master. Remember, each repair builds your confidence and saves you money. Are you ready to become the DIY hero of your kitchen? Share your experiences or questions below; I’d love to hear your journey toward smarter appliance care.
Related Posts
How to Manually Force a Drain Cycle During a Pump Failure
Imagine this: you're in the middle of a busy week,…
Why Your Dishwasher Trips the Breaker Mid-Cycle
Ever had your dishwasher suddenly trip the breaker right in…
How to Salvage a Dishwasher After a Power Surge
Picture this: I was about to start a little dinner…