I remember the first time I installed a dishwasher and confidently tightened the water supply line by hand. A simple task, I thought. But as days went by, I started noticing leaks, drips, and that nagging feeling that I might have made a mistake. That moment of frustration was my lightbulb—realizing that not all hand-tightening is equal and that a tiny oversight could lead to costly damage. Have you ever felt that panic when water starts to seep where it shouldn’t?
Why Hand-Tightening Might Be Your Water Line’s Worst Enemy
When I first tackled plumbing connections, I believed snugging a fitting with just my hands was enough. Turns out, that misconception can cause more harm than good. Over-tightening can distort fittings, crack connectors, or even damage the water inlet valve. Conversely, under-tightening risks leaks that are just as damaging. Striking the right balance is crucial, but how?
Research shows that improper tightening accounts for a significant number of household water leaks, which can lead to substantial water damage and mold growth. The fix? The right tool and technique—something I’ve learned the hard way.
Using a dedicated compression nut wrench or a set of high-quality pliers designed for plumbing can make all the difference. These tools let you tighten fittings just enough to secure a seal without overdoing it. If you’re curious about the detailed mechanics of these connections, I recommend checking out [Understanding Dishwasher Parts](https://appliancedoctorz.com/understanding-dishwasher-parts-a-key-to-effective-maintenance) which explains the role of water inlet valves and fittings.
In the coming sections, I’ll share my tried-and-true tips for using the proper tools that ensure a leak-free connection. Trust me, once you switch from hand-tightening to using the correct tool, your water line’s reliability will vastly improve—and your stress levels will drop.
But before we dive into the nuts and bolts, let’s address a common concern.
Select the Right Tools for a Secure Connection
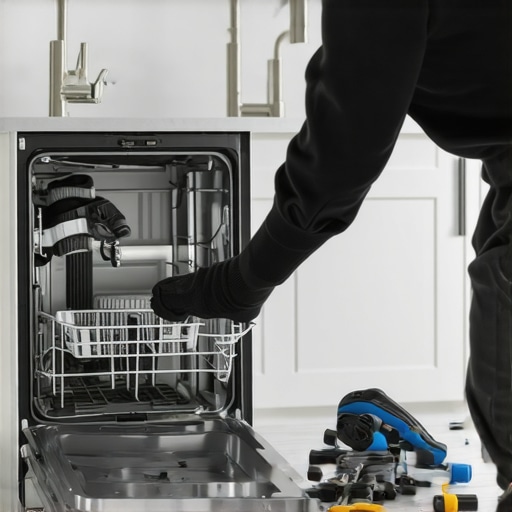
During my last dishwasher install, I realized using the wrong tools was the root of persistent leaks. I replaced a worn-out adjustable wrench with a dedicated compression nut wrench, which allowed me to tighten fittings precisely without overdoing it. Think of it as switching from a hammer to a fine-tipped screwdriver—each tool serves a specific purpose. For more insights on parts, visit Understanding Dishwasher Parts.
Prep and Position the Water Supply Line
Before attaching the line, turn off the water supply and drain any residual water. Position the hose so it has a gentle high loop—imagine the hose as a gentle U-shape, which prevents siphoning and backflow. Secure the hose to prevent any movement during operation; a loose connection is like a leaky faucet—annoying and costly. When connecting, ensure the threads are clean and free of debris, much like ensuring the puzzle pieces fit snugly. For detailed steps, check DIY Dishwasher Installation.
Apply Proper Torque to Fittings
Initially, I hand-tightened the fittings, but I learned this is insufficient for a leak-proof seal. Using the proper torque—just enough to feel resistance—is critical. Think of tightening as threading a screw: too loose, water escapes; too tight, the fitting warps or cracks. Use a torque wrench set to manufacturer specifications; typically, brass fittings require about 20-30 inch-pounds. This precise tightening prevents overtightening, which can distort connectors, similar to crushing a pipe. Visit the Specific Torque Needed for detailed guidance.
Seal and Inspect the Connection
Once tightened, apply a non-permanent thread sealant like Teflon tape or pipe paste to ensure a tight seal. Wrap the tape clockwise around the male threads, similar to wrapping a gift tightly—no slack allowed. Then, tighten the fitting with your tool, stopping at the torque point. After installation, turn on the water and observe for leaks. If water drips or seeps, tighten slightly more or reapply the sealant. Performing this step meticulously is akin to test-driving a new car—detects issues early. For common pitfalls and troubleshooting, see Common Dishwasher Parts.
Document and Test Your Work
Finally, document your installation with photos and notes—useful if the warranty claim is needed later. Run the dishwasher through a cycle, watching the water inlet area for at least 10 minutes. A successful test confirms your connection is tight and leak-free, much like a pilot light’s glow indicating safe operation. Regular inspections prevent costly water damage and maintain efficiency, so set reminders to review periodically. Remember, a secure water line isn’t just about avoiding leaks; it ensures your dishwasher’s performance and longevity. For warranty considerations, explore Dishwasher Parts and Warranty.
Many DIY enthusiasts and even seasoned homeowners often fall prey to misconceptions about dishwasher installation, parts, and warranties. Let’s dig deeper into some nuanced traps that can cost you time and money, despite popular beliefs.
Why does choosing cheaper parts sometimes backfire on your warranty?
Contrary to the common myth that all parts are interchangeable regardless of quality, experts emphasize that using substandard or incompatible components can void your warranty. Manufacturers often specify a particular part type or brand, and substituting these without validation risks non-coverage when issues arise. Always cross-reference your part selections with the manufacturer’s recommendations, as detailed in top tips for selecting the right parts.
Another misconception involves the assumption that warranties cover all repair needs. In reality, warranty policies often exclude damage caused by improper installation or use of non-listed parts, making meticulous installation critical. It’s easy to overlook these clauses, but understanding them can be a game-changer. Dive into understanding dishwasher warranty policies for clarity.
The Oops! you’re likely to make is over-tightening fittings. This fine mistake can distort connectors, crack the inlet valve, or damage internal seals. It’s tempting to tighten until you feel resistance, but the real secret is applying proper torque—usually specified in manufacturer guidelines—using a torque wrench. This prevents crushing the fitting or compromising the seal, which leads to leaks and possible warranty denial. Be wary: overtightening is one of the most common yet overlooked causes of costly damage. For technical guidance, see torque specifications for water connections.
Advanced users ask: How can I ensure my installation adheres to warranty standards without hiring a pro? The answer lies in documenting every step meticulously—from taking photos of your connections to keeping receipts for parts purchased. This evidence will be invaluable if you need to file a claim later. Use these documentation tips to safeguard your warranty rights.
Lastly, a major hidden trap involves the selection and maintenance of replacement parts. DIYers often reuse old hoses or fittings after minor repairs, disregarding the fact that aging components can fail prematurely and void warranties if they cause damage. Always verify part integrity and compatibility before installation. For a detailed breakdown of crucial parts, visit essential parts for troubleshooting.
Remember, mastering the nuances of dishwasher parts and installation isn’t just about avoiding leaks; it directly impacts warranty validity and long-term performance. Have you ever fallen into this trap? Let me know in the comments.
Keep It Running: Essential Tools for Maintenance
Maintaining your dishwasher’s optimal performance requires more than just basic knowledge; it demands the right tools. I personally rely on a high-quality digital multimeter to diagnose electrical issues swiftly. This device allows me to verify the integrity of control boards and sensors, ensuring that a simple glitch doesn’t turn into costly repairs. Additionally, a set of precision torque wrenches set to manufacturer specifications helps me tighten connections properly, preventing leaks caused by overtightening or under-tightening. Understanding dishwasher parts is fundamental to selecting the right tools for each component.
Why a Multimeter Is a Must-Have
When troubleshooting, I often use a multimeter to test the thermal fuse and door switches, which are critical for cycle activation. This is particularly useful for quick diagnostics without needing professional handymen, saving both time and money. The trend in future maintenance is moving towards smart diagnostics, but for now, a multimeter remains an irreplaceable accessory for DIY enthusiasts.
Long-Term Results Depend on Proper Parts and Calibration
Choosing quality replacement parts is vital. I recommend using genuine or OEM components, as they come with warranties and are designed for your specific model. Regular calibration of your tools, especially torque wrenches and multimeters, ensures consistent performance, much like tuning a musical instrument. This ongoing attention leads to fewer leaks, fewer breakdowns, and a longer lifespan for your dishwasher.
How do I maintain my dishwasher over time?
Establish a routine inspection schedule to check hoses, fittings, and filters. Clean components like the spray arm and filter grate regularly to prevent buildup. Document your maintenance activities with photos and notes; this practice can be invaluable if warranty issues arise. Modern appliances benefit from remote diagnostics—keeping software up-to-date enhances troubleshooting efficiency. The future will likely see integrated smart systems that predict failures before they happen, but until then, proactive manual checks are your best defense.
One advanced tip I highly recommend is adjusting the torque settings on your fittings using a digital torque wrench. This small step prevents overtightening, which can cause internal damage and void warranties. For precision, set the torque according to manufacturer guidelines, often around 20-30 inch-pounds for brass fittings. This proactive approach helps maintain a leak-free connection and extends the life of your dishwasher. Explore the correct torque specifications. Give it a try on your next installation, and enjoy the peace of mind that comes with doing it right from the start.
Over the years, I’ve learned that even the simplest dishwasher water line connection can turn into a costly headache if not handled with care. The key takeaway? Never underestimate the importance of proper tightening techniques, the right tools, and quality parts. By applying the lessons I’ve shared, you’ll not only prevent leaks but also extend the lifespan of your dishwasher, saving you time and money in the long run. Remember, a little extra attention to detail during installation pays off immensely—think of it as investing in peace of mind that lasts for years.
Lessons That Changed My Approach to Dishwasher Installations
- Over-tightening can be just as damaging as under-tightening. I once snapped a brass fitting because I wasn’t aware of the torque limits. From that moment, I started using a torque wrench set to manufacturer specifications—huge difference! Learn the correct torque for your fittings to avoid similar mistakes.
- The right tool makes all the difference. Switching from just hand-tightening to a quality compression nut wrench transformed my installation process. Not only did I get a better seal, but I also avoided damaging the fittings. Invest in good tools; your water lines will thank you.
- Choosing quality parts safeguards your warranty. Using OEM or recommended components might cost a little more upfront, but it protects you from voiding warranties down the line. Always double-check compatibility and manufacturer suggestions before buying replacements.
- Document every step. Taking photos and notes during installation can save you a lot of trouble if warranty claims or future repairs are needed. It’s a simple habit that provides peace of mind.
Tools and Resources That Keep Me Confident
- Digital Torque Wrench: Precise tightening without risking damage—crucial for brass fittings. I trust this guide on torque specs.
- High-Quality Compression Nut Wrench: Makes tightening smooth and controlled, preventing over-tightening or leaks. I recommend checking out their selection for durable tools.
- OEM Replacement Parts: Ensuring compatibility and warranty coverage. I always verify parts through trusted sources, which helps in long-term performance.
- Documentation Techniques: Regularly photographing each step and maintaining records. It’s a quick habit but saves time and hassle later.
Take Charge of Your Dishwasher’s Future
Launching into DIY repairs and installations may seem daunting at first, but equipped with the right knowledge and tools, you can confidently ensure a leak-free, efficient dishwasher operation. Think of each successful installation as a small victory—each one brings you closer to mastering your home appliances and protecting your investment. Stay proactive, keep learning, and don’t shy away from taking control of your household systems. The journey to smooth, trouble-free dishwasher performance starts with YOU!
What has been your biggest challenge when installing or maintaining your dishwasher’s water supply? Share your experience below and let’s get the conversation started!
Related Posts

The Cabinet Steam Barrier Most DIYers Skip Until the Wood Rots
I remember the moment clearly — water was quietly dripping…
Why Plastic Tubs Warp if You Do Not Use These Leveling Feet
I'll never forget the moment I opened my dishwasher after…
The Most Overlooked Part During a New Dishwasher Setup
It was late afternoon, and I was elbow-deep in my…