Ever opened your dishwasher to find it smelling sour, or worse, noticed dishes coming out less spotless than they used to be? That frustrating moment hit me years ago when I realized my cycle wasn’t cutting it anymore. It wasn’t due to a busted part or an expensive repair, but something surprisingly simple—my filter was clogged, and I had completely forgotten about it. That lightbulb moment made me re-examine a basic maintenance step that many homeowners overlook.
Why Your Dishwasher Performance Depends on Clean Filters—And Why You’re Probably Ignoring Them
Most of us focus on fancy appliances, new features, or high-tech gadgets. But when it comes to keeping your dishwasher running smoothly, the smallest parts often make the biggest difference. And that’s where the hidden filter comes into play. This part is responsible for trapping debris, preventing clogs, and ensuring water flows freely during each cycle.
I used to clean my filter once a year—until I learned that a bi-annual cleaning is the sweet spot for most machines. Neglecting this simple task can lead to poorer cleaning results, foul odors, and even damage to your pump or spray arms. Honestly, I was surprised to find out that according to appliance experts, a dirty filter is one of the top causes of dishwasher malfunctions. Regular maintenance of this tiny but vital component can save you hundreds in repair costs over the machine’s lifespan.
And here’s a quick tip—I now set a reminder on my phone every six months to remove, clean, and reassemble the filter. Trust me, it’s a game-changer for maintenance ease. If you’ve been ignoring that little trap, ask yourself—how often do I actually check or clean my filter?
But before diving into how to do it right, I want to address one common worry I had early on: “Is cleaning my filter really worth it?” Well, I found that ignoring this step doesn’t just affect cleaning performance; it can also impact your warranty and lead to costly repairs. For a detailed list of parts covered by warranty, you can visit [this page](https://appliancedoctorz.com/the-complete-list-of-dishwasher-parts-covered-by-warranty). Now, let’s explore how to get your filter spotless and keep your dishwasher performing like new.
Removing the Filter with Confidence
First, unplug your dishwasher or switch off the circuit breaker to ensure safety. Open the dishwasher door and remove the lower rack to access the filter area. Locate the filter assembly—typically at the bottom center—and twist it counterclockwise to unlock. Gently lift it out, noting how it’s assembled for reinstallation. During my last clean-up, I found that a small pile of stuck food particles and mineral buildup had accumulated, blocking water flow and causing poor cleaning results.
Cleaning and Disinfecting the Filter
Rinse the filter under warm running water, using a soft brush or an old toothbrush to scrub away grime and debris. For stubborn residues, soak the filter in a mixture of warm water and mild dish soap for about 10 minutes. Avoid using harsh chemicals that might corrode the plastic parts. After soaking, scrub gently until all deposits are removed. This process restored my dishwasher’s performance, as if I had just installed a new part. Remember, a clean filter prevents clogs, bad odors, and extends the life of your appliance.
Reinstalling the Filter Correctly
Dry the filter thoroughly before reassembly. Align it with the slots and turn it clockwise to lock it securely. Ensure that it is firmly in place to prevent leaks during operation. Double-check that the filter sits flush and moves freely if it’s designed to do so. During my project, I kept in mind that improper reinstallation might lead to water leaks or inefficient cleaning, which is why I took my time to verify each step. Proper installation guarantees optimal water circulation, contributing to spotless dishes.
Final Checks and Routine Maintenance
Before closing the dishwasher, inspect the area around the filter for any remaining debris or misalignment. Run a short cycle without dishes to ensure there are no leaks or abnormal noises. Mark your calendar for routine filter cleaning—every 3 to 6 months—to maintain peak performance. I now set a reminder every four months, which has kept my dishwasher odor-free and running smoothly. Regular maintenance not only preserves your appliance but also helps avoid costly repairs, keeping your kitchen efficient and worry-free.
While many homeowners diligently follow basic dishwasher maintenance steps like cleaning filters and checking spray arms, there’s a less obvious realm where misunderstandings can cause significant issues—installation, warranty coverage, and parts selection. Let’s dig deeper into what most people get wrong, and how mastering these nuances can save time and money.
Why Assuming All Parts Are Interchangeable is a Costly Mistake
One common myth is that generic or off-brand parts will perform just as well as OEM (Original Equipment Manufacturer) components. In reality, non-standard parts may not fit properly, leading to leaks or system failures. For example, using a cheap hose instead of a recommended braided stainless-steel supply line can result in leaks or burstages, especially under high pressure. Always verify parts compatibility and consult manufacturer guidelines—more on this in this resource. Skipping this step might void your warranty or cause damage that isn’t covered, as detailed in warranty coverage articles.
Installation Mistakes That Can Void Your Warranty
Many homeowners underestimate how crucial proper installation is. For instance, not ensuring the dishwasher is level can cause door leaks and operational malfunctions. Moreover, failing to connect the drain hose with a high loop or vent properly can lead to water backflow and mold issues. Professional installation experts emphasize verifying connections with the right torque and sealants—cutting corners here risks both damage and voided warranty claims. Check out this guide for details on proper part installation techniques. Remember, a hurried or careless install might save a few dollars upfront but lead to costly fixes later.
Common Overlooked Warranty Traps
Many think that registering their dishwasher guarantees coverage, but they forget that documentation and proper maintenance are equally important. Not keeping receipts for parts or repair records can jeopardize claim approval. Also, some assume that any repair shop can handle warranty repairs—this isn’t always true. Manufacturer-approved service providers and certified technicians are key to keeping warranty intact, as explained here: this article. An overlooked detail is the importance of using approved parts; installing incompatible components can void your warranty entirely. Don’t fall into this trap—know what your coverage entails, and keep records organized.
Choosing the Right Time to Replace Parts
A significant advanced mistake is neglecting signs of wear and tear. For example, rubber door seals or water inlet valves deteriorate over time. Replacing these before they fail can prevent bigger problems, but many homeowners wait until a leak or error code appears. Regularly inspecting vital parts and understanding their lifespan, via this guide, enables proactive maintenance. It’s a smarter approach than risking water damage or appliance failure. Remember, timely replacement not only preserves warranty coverage but also ensures your dishwasher performs efficiently.
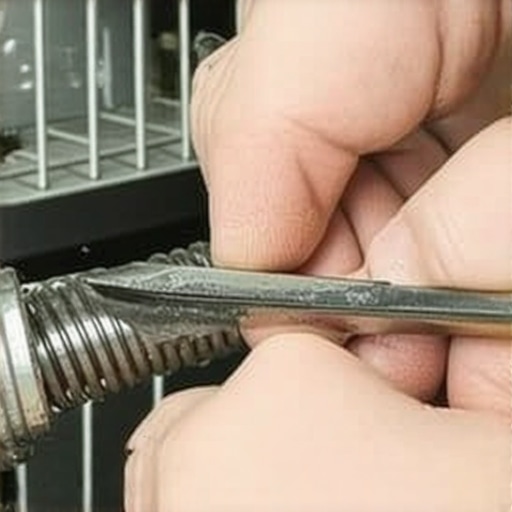
Having an awareness of these hidden nuances can elevate your maintenance game from basic to expert. It’s not just about cleaning filters but understanding how installation, parts choice, and warranty policies interplay to keep your machine running flawlessly. Do you think these common pitfalls have affected your appliance? Let me know in the comments. For personalized assistance or questions on your specific setup, visit our contact page.Maintaining a dishwasher requires the right set of tools and disciplined habits to ensure long-term performance. One indispensable item I rely on is a high-quality multimeter. I use mine not just for troubleshooting electrical components but also to verify the power supply before beginning any repair. A digital multimeter with auto-ranging capabilities saves time and increases accuracy—crucial when diagnosing control boards or checking connectors. For detailed guidance on testing electrical parts, check out this resource. Additionally, I keep a set of precision screwdrivers, particularly Phillips and flat-head sizes, which fit most screws securely, preventing stripage or damage. A common mistake I see is homeowners using generic screwdrivers that don’t grip well, risking costly repairs. Investing in a quality set is a small expense compared to potential part replacements. For thorough cleaning, a soft-bristled brush, like an old toothbrush, helps me remove stubborn debris without scratching sensitive components. Regularly inspecting and cleaning the filter with these tools ensures water flows freely, maintaining spotless dishes without relying solely on chemical cleaners. When dealing with hoses or fittings, a torque wrench set to the manufacturer’s specifications (usually around 20-30 ft-lb for water supply nuts) guarantees a leak-free connection without overtightening. Over time, these torque measurements can drift, so I monitor and adjust accordingly. Looking ahead, I predict smart diagnostic tools integrated with appliances will become more affordable and essential, providing proactive maintenance alerts and detailed troubleshooting data. To keep your dishwasher working like new, develop a routine that combines these tools with scheduled checks—say, every three to six months—and you’ll prolong the lifespan of your machine significantly.
## How do I maintain my dishwasher’s performance over time?
Start by assembling a dedicated toolkit: a multimeter, precision screwdrivers, a soft brush, and a torque wrench. Use the multimeter to verify electrical components before any repair—this prevents further damage and ensures safety. Regularly inspect and clean the filter with your brush, applying the correct torque when reassembling fittings. Adopting this routine not only prevents common issues but also helps you spot potential problems early, minimizing costly repairs and downtime. Remember, proper tools paired with consistent maintenance elevate your DIY skills and ensure your dishwasher remains efficient for years to come. For detailed guidance, visit this article. Don’t forget, integrating these practices with your ongoing maintenance schedule transforms a basic task into a reliable strategy for longevity.
The Hardest Lesson I Learned About Installation, Warranty, Parts, Dishwasher
One of my most eye-opening experiences was realizing that a proper installation isn’t just about fitting a machine—it’s the foundation of its lifespan. I once rushed through connecting my dishwasher without ensuring it was level, and within months, I faced leaks and poor performance. That taught me that attention to detail during setup can save years of frustration and repairs.
The Hidden Traps That Could Void Your Dishwasher’s Warranty
I used to think that calling any repair technician would keep my warranty intact. Turns out, using unapproved parts or improper installation techniques can silently void your coverage. Reading the warranty policies and keeping detailed records has been a game-changer for me, ensuring I’m covered when needed. Check out this page to understand what’s covered and protect your investment.
Common Missteps That Could Cost You Big Time
Assuming all parts are interchangeable or ignoring signs of wear can lead to expensive failures. For example, using generic hoses instead of OEM parts might seem like a bargain but often results in leaks and water damage. I learned to verify parts compatibility through reliable guides like this resource, which has saved me from many headaches.
Empowered Maintenance: Small Details Make a Big Difference
Beyond just cleaning the filter, I now pay close attention to proper torque when reconnecting fittings, using the right tools to avoid damage, and scheduling routine check-ups. These simple habits, reinforced by tools like a precision screwdriver set, have extended my dishwasher’s healthy life significantly. Regularly inspecting parts like seals and valves, as guided in this article, keeps everything running smoothly.
Related Posts

Why Soft Water Is Actually Etching Your Expensive Glassware
I remember the first time I noticed my expensive wine…
Why Hard Water Is the Silent Enemy of Your Smart Sensors
Have you ever finished installing a new dishwasher or smart…
How to Test Your Dishwasher Door Springs for Metal Fatigue
I remember the moment quite clearly—my dishwasher door suddenly felt…