I remember the first time I struggled with my dishwasher installation. Everything seemed straightforward—until I reached the water connection. The plastic elbow I initially used started to leak after just a few months, causing a soggy mess under my cabinets and a headache I didn’t need. That moment was a lightbulb for me: traditional plastic fittings may seem convenient but can turn into costly problems down the road.
Finding the Long-Lasting Solution
Discovering the durability of brass fittings changed my perspective entirely. The little investment of around $8 in a brass elbow has saved me from repeated repairs and the frustration of water leaks. It’s amazing how such a small part can make a huge difference in the long-term performance of your dishwasher plumbing. Today, I want to share with you why upgrading to a brass elbow is worth considering and how it might just save you some serious trouble.
Is Plastic Really Worth the Hype?
I admit, I was skeptical at first. Plastic fittings seem so easy and cheap. But early on, I made a mistake I see many DIY enthusiasts make—ignoring the importance of quality parts during installation. By neglecting to research and select high-quality fittings, I set myself up for future leaks and possible water damage. If you want to avoid falling into the same trap, I recommend checking out our guide on parts to check during installation for long-term performance.
Here’s the thing—your dishwasher’s longevity depends heavily on those little connections. Choosing robust, corrosion-resistant materials like brass can make all the difference. Learn more about how to maximize your warranty coverage and protect your investment with warranty tips here.
Start with the Right Tools and Parts
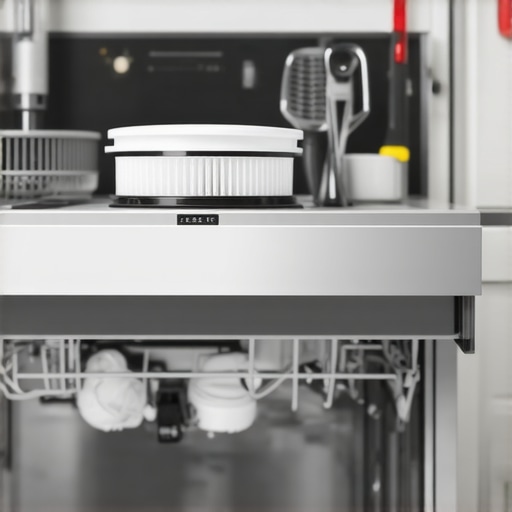
Before diving into your dishwasher installation, gather essential tools like a adjustable wrench, Teflon tape, and a bucket to catch water drips. Choose high-quality brass fittings over plastic ones; they resist corrosion and provide a secure seal. I vividly recall a time I attempted to reuse an old water supply line, which led to a slow leak. Replacing it with a brass elbow from the start saved me hours of cleanup.
Prepare Your Space for a Seamless Setup
Clear the area around your installation spot. Turn off the main water supply and disconnect the existing hose. It’s like preparing a workspace before a big project—clean, dry, and free of obstructions ensure efficiency. When I installed my first dishwasher, neglecting this step made the initial connection messy and frustrating.
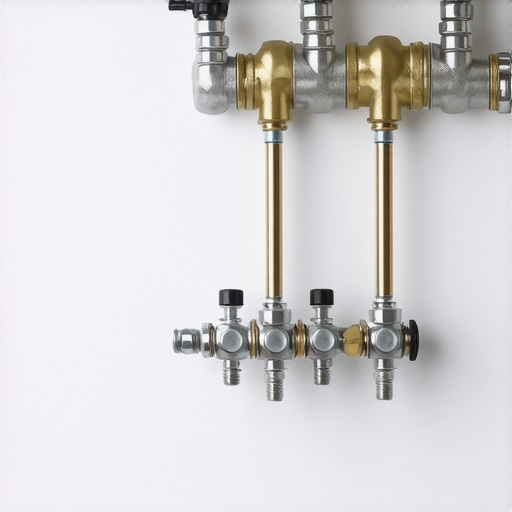
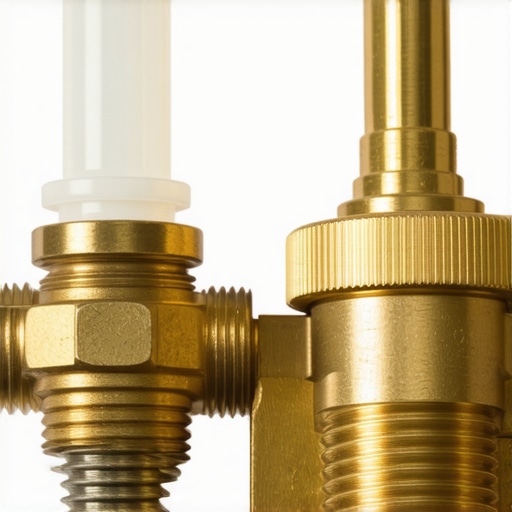
Secure the Water Supply Connection
Apply Teflon Tape Correctly
Wrap Teflon tape clockwise around the male threads of your brass fitting. This prevents leaks and ensures a tight seal. I learned this mistake firsthand—skipping this step resulted in water seeping after a few cycles. A quick wrap, about 2-3 layers, makes all the difference.
Connect the Water Line
Screw the water supply hose onto the brass fitting by hand, then tighten with an adjustable wrench. Do not over-tighten; think of it like securing a lid—you want it snug but not crushing. Over-tightening, especially plastic fittings, can cause cracking or leaks down the line. Using a specific water line tool can help achieve the perfect torque, preventing future issues.
Attach Drainage with Care
Ensure the drain hose is high-looped—this prevents siphoning and backflow, much like a U-shaped pipe. Secure it with a clamp to prevent slipping during operation. Remember to check if your drain connection is sturdy to avoid messy overflows. I once installed the drain hose too loosely, and it spilled water onto my floor during the next cycle.
Test Your Connections Thoroughly
Turn on the water and run a short cycle to check for leaks. Observe all connection points. If water appears, tighten fittings incrementally—think of tightening as fine-tuning. Using a leak detection solution or a paper towel around fittings helps spot slow drips early. This step saved me from a flood that could have damaged my cabinets.
Document the Installation for Warranty Purposes
Take photographs of each connection step. Keep receipts of high-quality parts. Proper documentation can be crucial if your manufacturer requests proof of correct installation to honor warranty claims. I found that well-documented installations expedited warranty service when a component failed unexpectedly.
Many DIY enthusiasts believe that choosing the right parts and following basic steps guarantees a successful dishwasher installation. However, even seasoned homeowners often overlook nuanced details that can lead to warranty disputes or long-term performance issues. One prevalent misconception is assuming that a quick, cheap plastic fitting is sufficient—a mistake that can result in leaks and water damage over time. Experts emphasize that understanding the intricacies of compatible parts, especially regarding corrosion resistance and proper sealing, is crucial for durability. Another overlooked aspect is the significance of thorough documentation; failing to record installation steps and parts can complicate warranty claims, especially if your manufacturer requires proof of correct setup. Additionally, many neglect the importance of verifying that all connections meet manufacturer torque specifications, risking both leaks and damage to components. An advanced mistake involves underestimating the impact of water pressure and flow rate compatibility, which can prematurely wear out internal parts or cause operational failures. Have you ever fallen into this trap? Let me know in the comments. To avoid costly errors, consult comprehensive guides such as understanding warranty policies and diagnosing parts during warranty periods. Mastering these nuances not only safeguards your investment but also ensures optimal performance and peace of mind.
Gear Up with Precision Tools for Long-Term Reliability
Investing in the right equipment makes all the difference. I personally vouch for a high-quality adjustable wrench, like the GearWrench 81223 Flex Head, because its ergonomic grip and full-range articulation enable me to tighten fittings securely without risking damage. Additionally, a digital multimeter, such as the Fluke 117, helps me test electrical components swiftly, ensuring safety and functionality. Over the years, consistent use of these tools has prevented many potential issues, especially in complex installations where wiring and electrical connections are involved.
Master the Art of Regular Maintenance and Inspection
Routine checks prevent minor problems from escalating. I recommend setting a monthly schedule to examine water hoses for signs of wear or leaks, especially at connection points. Applying a small amount of dielectric grease to electrical contacts can reduce corrosion, extending their lifespan. During each inspection, I also verify the tightness of brass fittings—this proactive approach averts expensive repairs down the line. Keep in mind, early detection of issues like worn-out parts or calcium buildup can significantly extend the life of your dishwasher.
Leverage Advanced Software for Diagnostics
Modern dishwashers often have integrated diagnostic tools accessible via their control panels. I use the manufacturer’s app or internal diagnostic modes to identify error codes quickly. Additionally, I utilize a specialized software like HomeAssistant with custom integrations to monitor cycle patterns and alert me to anomalies, which is especially useful for smart appliance tracking. Looking ahead, the trend points toward greater automation and predictive maintenance, where AI algorithms could analyze usage data to recommend preventative measures—saving users time and money. To stay ahead, I suggest exploring these digital diagnostic methods now, as they are setting the standard for future appliance care.
How do I keep my dishwasher performing at its best over time?
Regularly inspecting and maintaining key components—like water supply lines, electrical contacts, and filters—are critical. Use high-quality tools for tightening fittings; for example, employing a torque wrench set to manufacturer specifications ensures you avoid over-tightening brass fittings, which can cause leaks or cracking. Supplement these efforts with software diagnostics to detect issues early. Remember, documenting your maintenance routine not only helps in troubleshooting but also strengthens your warranty claims, as detailed records prove your proactive approach. For more comprehensive guidance, review our warranty tips here.

How I Nearly Sabotaged My Dishwasher with Cheap Parts
One of the most eye-opening lessons I learned was that splurging a little on quality fittings, especially brass elbows, can prevent costly water damage. Cutting corners with plastic fittings almost cost me a refurbish bill; now I know better.
The Craft of Secure Connections That Last
Properly applying Teflon tape and tightening fittings within recommended torque settings has been a game-changer. Small tweaks like these stopped leaks and gave me peace of mind, proving that attention to detail counts more than I once thought.
The Power of Documentation for Your Dishwasher’s Future
Taking photos during installation and keeping receipts for parts isn’t just bureaucracy—it’s a lifesaver if warranty issues arise. It’s a simple step that can accelerate repairs and protect your investment.
Insider Wisdom: Lessons From a DIY Enthusiast
- Never underestimate the value of high-quality tools; they make a difference in tight spaces and delicate fittings. My adjustable wrench and digital multimeter are now my best friends during maintenance.
- Routine inspections, like checking for wear on hoses and verifying electrical connections, keep your dishwasher running smoothly and prevent surprises.
- Beware of reusing old hoses; a quick replacement with durable, braided stainless-steel lines can save you months of stress.
- Understanding your dishwasher’s warranty policies through dedicated resources can save you from rejected claims—know what your coverage entails before any mishap occurs.
Gear Up for Long-Term Success
Invest in essential tools like a torque wrench, leak detector, and quality fittings. They might seem like small expenses now, but their benefits multiply over years of reliable service. Trusted brands like GearWrench and Fluke have never let me down, and I trust their durability and precision.
Stay Proactive with Smart Maintenance Habits
Regularly inspecting water lines and electrical contacts, plus using software diagnostics when available, can catch problems early. Documenting these checks turns your routine into a formidable defense against unexpected failures.
What No One Tells You About Long-Term Performance
Beyond the basics, mastering the nuances—like setting the correct water hardness and understanding your model’s specific needs—can extend your dishwasher’s lifespan. Taking the time to learn these details is an investment that pays back in appliance longevity.
Future-Proof Your Dishwasher Skills Today
Embracing the power of digital diagnostics and staying informed about warranty policies can make all the difference. Start small, stay consistent, and you’ll be surprised how much smoother your experience becomes. For comprehensive guidance on parts and warranties, check out this resource.
Take Action and Keep Your Appliance in Peak Form
Remember, your proactive approach to installation, maintenance, and understanding warranty terms can save you from costly surprises. Embark on this journey with confidence—you’ve got the tools and resources now to make it a success.
Have you ever faced a tricky part during dishwasher installation? Share your stories or ask questions below—let’s learn together!
Related Posts
The $15 Part That Fixes a Dishwasher That Won’t Drain
It was a morning like any other, until I opened…
The $12 Valve That Saves Your Kitchen From a Slow Leak
One evening, I walked into my kitchen and noticed a…
The Difference Between a $5 Plastic Valve and the Brass Fitting You Actually Need
It was late on a Saturday afternoon when I finally…