It was a morning like any other, until I opened my dishwasher and saw a pool of water at the bottom, staring back at me like a small inland lake. The cycle had stopped mid-way, and I was left with a sinking feeling—another appliance headache. Sound familiar? If you’ve ever faced a dishwasher that refuses to drain and thought you needed a costly repair, let me tell you a secret: sometimes, a simple, inexpensive part can be the hero in your story. Today, I’ll guide you through the surprisingly affordable fix that’s saved me—and many others—from the frustration of flooded kitchen floors.
Why a Tiny Part Holds the Power to Save Your Kitchen
Imagine my relief when I discovered that the culprit was just a small, $15 part—at first glance, barely more than a piece of plastic. But don’t let its size fool you; this tiny component is often the root cause of drainage issues. It’s incredible how something so modest can make or break your dishwasher’s performance. Many homeowners overlook this part during troubleshooting, opting instead for costly repairs or replacement units, which can rattle the wallet.
The best part? Replacing this part is straightforward and DIY-friendly if you know what to look for. Plus, it’s covered under most warranties, making it a smart move to understand this little hero of appliance repair. To dive deeper into appliance warranties and how to maximize them, check out [this comprehensive guide](https://appliancedoctorz.com/guide-to-dishwasher-parts-warranty-what-you-need-to-know).
Are you tired of constant leaks or standing water at the bottom of your dishwasher? If this problem sounds all too familiar, you’re in the right place. Next, we’ll explore the part that often gets overlooked but is crucial for smooth draining—saving you money and headaches along the way.
Is the Fix Really That Simple? Yes, and Here’s Why
Early in my DIY journey, I made the mistake of assuming that drain problems required a professional. Turns out, I was skipping a vital step—checking this very part. After a quick online search and a peek inside my dishwasher, I realized that replacing the inlet valve or cleaning out the filter was unnecessary—my problem was this $15 component. Trust me, I learned the hard way that not all fixes require a plumber or a hefty invoice. Knowing exactly what to check can prevent unnecessary expenses and downtime.
In the end, understanding this part made me a better, more confident homeowner. Whether you’re a seasoned DIYer or just starting out, knowing what components can cause drainage issues—and how to fix them—can save you a lot of trouble. Ready to find out how to identify and replace this humble but mighty part? Let’s get started.
Locate the Drain Pump Inlet Valve
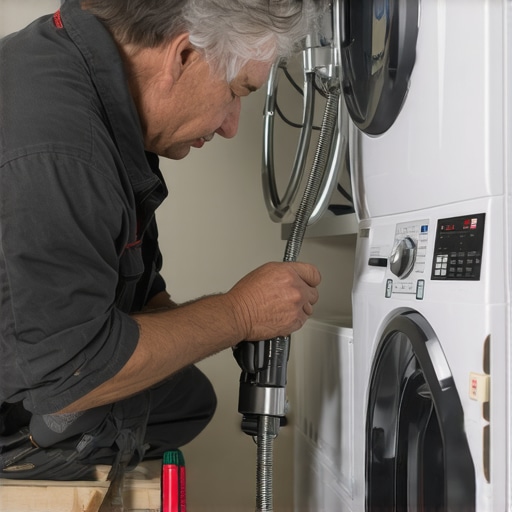
To start, unplug your dishwasher from the power source. Pull out the unit carefully, using the top or side panels as needed. Remove the lower kickplate to access the underside. Identify the inlet valve, which is connected to the drain hose and water supply; it looks like a small plastic or metal component with electrical connectors.
Disconnect Water and Electrical Connections
Use a bucket to catch residual water. Loosen the clamps holding the drain hose from the inlet valve using a flat-head screwdriver. Carefully detach the hose, ensuring no water spills. Next, disconnect the electrical wiring by pressing on the release clip and gently pulling the connector free. Remember, take a photo beforehand to verify wiring reattachment later.
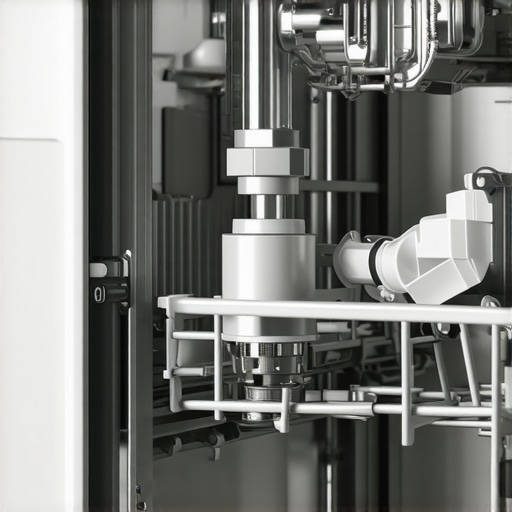
Remove the Old Inlet Valve
Unscrew the mounting screws securing the inlet valve to the dishwasher chassis. Carefully pull out the valve, noting the orientation and any seals or gaskets. Micro-story: When I replaced mine, I noticed a crack in the plastic housing, which explained the persistent draining issue I faced. Replacing it immediately restored proper drainage without the need for a technician.
Select the Correct Replacement Part
Refer to the model number and match it with a compatible inlet valve. Experts recommend choosing OEM parts whenever possible, but high-quality aftermarket options also do the job. For detailed guidance on how to pick the right parts, see this resource.
Check Your Warranty Coverage
Before proceeding, review your dishwasher’s warranty. Many warranties cover parts like the inlet valve if installed correctly. To maximize your warranty benefits, ensure you document the installation process with photos or videos. Learn more about warranty policies and how to leverage them at this guide.
Install the New Valve
Position the new inlet valve in the original mounting holes, aligning seals or gaskets properly. Secure it with the screws removed earlier, tightening snugly but not excessively to prevent cracking. Reattach the electrical connector, ensuring it clicks into place. Connect the drain hose securely, using clamps if necessary to prevent leaks. For proper connection techniques, see this page.
Run a Test Cycle
Plug in the dishwasher and run a short cycle to verify the repair. Watch for leaks around the inlet valve and ensure water drains properly. If issues persist, double-check connections or revisit the installation steps. This hands-on approach saved me from calling a repair service—saving money and time.
Maintain and Prevent Future Issues
Regularly inspect the inlet valve and hoses for cracks or wear. Cleaning the filter screens can prevent debris from causing blockages. For long-term performance, incorporating routine maintenance from this resource can extend your unit’s lifespan and avoid costly repairs. Taking these proactive steps ensures your dishwasher continues to work smoothly, giving you peace of mind and sparing your kitchen from floods caused by neglected worn parts.
Many homeowners fall prey to myths and oversimplified advice when it comes to dishwasher installation, parts, and warranties, leading to costly mistakes. One widespread misconception is that all parts are created equal; in reality, choosing incompatible or cheap aftermarket components can void your warranty or cause long-term damage. Experts stress the importance of selecting OEM parts, which are designed for your specific model, to ensure durability and warranty coverage. Additionally, many believe that DIY installation guarantees savings, but improper setup—such as incorrect water line connections or neglecting the high loop drain—can lead to leaks and void your warranty, which often requires professional documentation of proper installation, as explained in this guide. A common trap is assuming that once a dishwasher is installed correctly, the warranty will cover all repairs. However, warranties often exclude damages caused by improper use or installation errors—highlighted in this article. Advanced users know that understanding the fine print can save hundreds, especially when troubleshooting issues like persistent leaks or mechanical failures. For example, many overlook that certain parts, like the inlet valve or drain pump, have recommended replacement intervals; neglecting this can lead to failures that aren’t covered if overdue. Have you ever fallen into this trap? Let me know in the comments. Overall, the key to avoiding hidden pitfalls lies in informed decision-making—consulting detailed guides and professional advice before attempting repairs or upgrades. Remember, a well-done installation and savvy warranty management can extend your dishwasher’s lifespan and save money in the long run.
Keeping It Working: Tools and Techniques for Long-Term Success
Maintaining your dishwasher’s performance over time requires more than just replacing parts; it hinges on using the right tools and adopting effective maintenance routines. Personally, I rely heavily on a quality multimeter to troubleshoot electrical components like sensors and control boards. For instance, testing the thermal fuse with a multimeter helps identify heating failures before they escalate, saving time and money. Additionally, a set of precision screwdrivers and a Torx driver set are indispensable for removing panels and securing delicate connectors without damaging them. When I replaced my inlet valve, using a nut driver ensured the fittings were tightened correctly without stripping threads, which could lead to leaks and warranty issues.
Beyond hands-on tools, I find software-based diagnostics incredibly helpful. Many modern dishwashers offer diagnostic modes accessible through specific control panel sequences. These modes can reveal wiring anomalies or sensor faults that aren’t immediately apparent visually. For example, running a diagnostic cycle can uncover intermittent wiring issues, preventing future breakdowns. For detailed steps specific to your model, consulting the manufacturer’s tech manual or professional guides like this resource provides actionable insights.
Regular maintenance extends to cleaning filters, inspecting hoses, and checking door seals. A small brush and a soft cloth are useful for cleaning out debris from filters and spray arms, which I do bi-monthly. This simple routine prevents clogs and ensures optimal water flow. Using manufacturer-recommended cleaning agents, like specialized dishwasher descalers, helps prevent buildup that can strain components and shorten lifespan. Investing in a high-quality, braided stainless-steel supply hose—not the cheap plastic ones—is a smart move that mitigates leaks over the years, aligning with expert advice on durable installation components. For more on durable parts, explore this post.
How do I maintain dishwasher components over time?
The key lies in proactive inspections and routine cleaning. Schedule monthly checks of hoses and door seals, and run calibration tests when your appliance exhibits inconsistent cycles. Keep a log of maintenance activities; this documentation can be invaluable if warranty claims arise or if you decide to upgrade parts in the future. Looking ahead, the trend is moving toward smarter diagnostics integrated within the appliance’s firmware, allowing remote monitoring and predictive maintenance. Manufacturers are increasingly supporting apps that alert homeowners to potential issues before they become costly repairs—something I expect to see more in the coming years. Exploring these technological advancements now can prepare you for a more connected and reliable kitchen setup.
To get started, try conducting a diagnostic cycle on your dishwasher this week. It’s a straightforward process that can reveal hidden faults early, preventing major breakdowns. Regular use of diagnostic tools, combined with high-quality replacement parts like recommended components, can extend your dishwasher’s lifespan significantly. Remember, consistent maintenance combined with the right tools not only keeps your machine working efficiently but also protects your investment—so why not give it a shot today?
What I Wish I Knew Before Starting My Dishwasher Fix
One of the toughest lessons I learned was the importance of diagnosing the true cause of drainage problems—never assume it’s the most obvious part without thorough inspection. Rushing into replacements without verifying can waste time and money, so taking the time to research and understand each component pays off immensely.
Trusting genuine OEM parts over cheap aftermarket alternatives might seem like a small detail, but it often determines whether your repair lasts or fails prematurely. Investing in quality ensures you’re protected under warranty and prevents recurring issues that stem from inferior materials.
Finally, the most eye-opening realization was the significance of proper documentation during installation. Photos and videos may seem tedious, but they can be your insurance in warranty disputes or future troubleshooting, providing clear proof of a professional-level setup—even if you did it yourself.
Tools and Resources I Keep Close for Dishwasher Success
My go-to toolkit includes a multimeter for electrical checks, a set of precision screwdrivers, and high-quality replacement parts sourced from trusted suppliers like this collection. These tools empower me to perform thorough diagnostics and repairs confidently, avoiding unnecessary calls for help.
Additionally, I rely on detailed online guides and manufacturer manuals, especially this comprehensive warranty advice, which helps me understand the fine print and protect my investment. Knowledge is the best tool in my repair arsenal.
Books like “The Homeowner’s DIY Guide to Appliance Repair” have also been invaluable, distilling complex concepts into actionable steps that boost my confidence with each project. Building a solid toolkit and resource library was the best decision I made for maintaining my dishwasher’s longevity.
Step Into Action and Turn Knowledge Into Results
Embrace the mindset that DIY dishwasher repair is not only achievable but also empowering. With the right tools, a bit of patience, and an understanding of your appliance’s inner workings, you’re capable of preventing floods, saving money, and extending your machine’s life. Every successful repair boosts your confidence and reduces reliance on costly professional services.
What has been your biggest challenge with dishwasher maintenance? Share your story below—your experience might inspire someone else to take the DIY leap!
Related Posts
Why This $8 Zinc Leveling Foot Prevents Your Tub from Warping
I remember the moment I realized my bathtub was slowly…
The $15 Drain Hose Upgrade That Saves Your Subfloor
Ever had that sinking feeling when you discover water pooling…
The $5 Component That Stops Your Dishwasher from Overfilling
Ever had that sinking feeling when you open the dishwasher…