I remember the moment perfectly—walking into my kitchen and seeing a small puddle spreading beneath my dishwasher. My heart sank. It wasn’t just water; it was a silent threat that could have led to costly damage and mold if left unnoticed. That lightbulb moment made me realize how vulnerable I was to leaks lurking behind appliances that I rarely check.
The Unexpected Nightmare of Water Damage and Inadequate Alerts
In that instant, I understood that traditional warning signs—like water on the floor or a strange smell—often come too late. By then, the damage is done. What’s worse, many homeowners assume their appliances are safe, especially when warranties are involved. But what if there was a smarter way to prevent disaster?
Today, I want to introduce you to a game-changer I wish I’d known earlier: installing a digital leak sensor. Having one installed has given me peace of mind, knowing that if my dishwasher or any other appliance develops a leak, I’ll be among the first to know—before water seeps into my cabinets or soaks the floor.
Not only does this device act as an early warning system, but it can actually save you money and hassle in the long run. According to the Institute for Market Transformation, water leaks cause an estimated $10 billion in damages annually—most of which could be prevented with proper detection. You see, I made a mistake early on by ignoring the importance of proactive leak detection, thinking my appliances were reliable enough. That was a costly oversight.
So, are you tired of worrying about hidden leaks? Have you faced the chaos of water damage in your own home? If so, this post will walk you through why installing a digital leak sensor is a smart step—arming you with the knowledge to protect your home and wallet.
Choose the Right Leak Sensor for Your Home
Start by selecting a sensor compatible with your appliances and smart home system. Look for ones with reliable connectivity and alert features. I remember debating between several models, but I ultimately chose one with a wireless app that alerts me instantly on my phone. This decision saved me from a potential water disaster last summer when my dishwasher developed a slow leak during the night.
Assess and Prepare Installation Sites
Identify all appliances prone to leaks—dishwasher, washing machine, water heater—and clear surrounding areas. Ensure the location is accessible and safe for installation. I learned the hard way that trying to install a sensor behind a bulky cabinet made the task messier; now I clear the space first for a smoother setup. Proper preparation minimizes installation errors and ensures effective detection.
Install the Sensor Properly
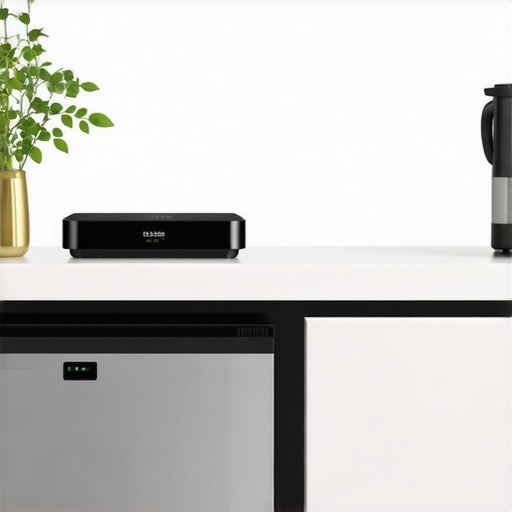
Place the sensor at the lowest point underneath or near the appliance—think of it as placing a sump guard at the floor’s choke point. For my dishwasher, I positioned the sensor beneath the kickplate where leaks tend to accumulate first. Secure the device as per the manufacturer’s instructions, often with adhesive strips or screws. For example, I used a waterproof adhesive to keep mine in place, ensuring it wouldn’t shift over time. Correct placement is vital for early leak detection.
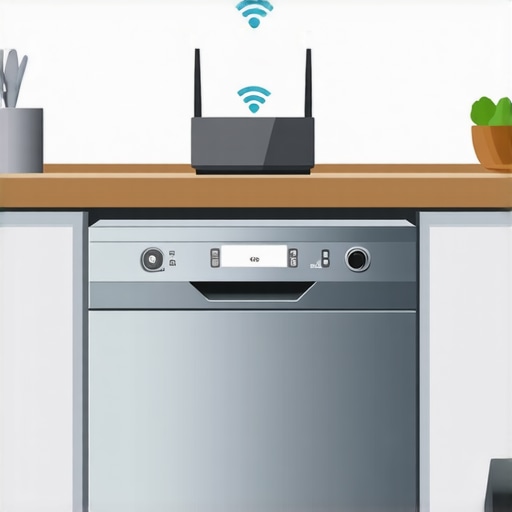
Connect to Power and Network
Ensure the sensor is powered, whether via batteries or direct wiring. Connect it to your Wi-Fi or smart hub as directed. I ran into connectivity hiccups initially, but after updating my firmware and repositioning my router, the alerts became instant. A stable connection is crucial so that you won’t miss critical notifications.
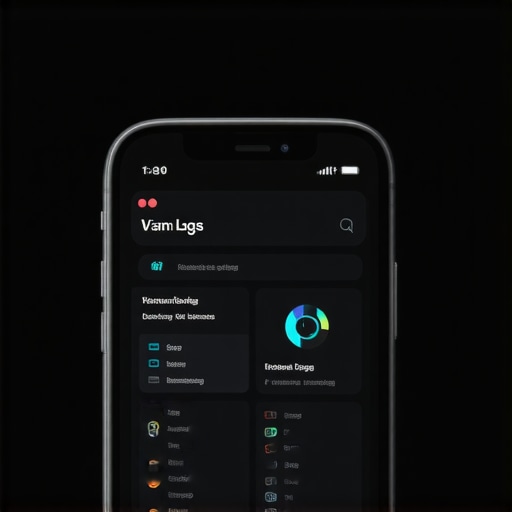
Configure Alerts and Test the System
Using the associated app, set up notification preferences—sound, email, or push alerts. Test the sensor by simulating a leak—dabbing a small amount of water on it—to verify that the alert triggers correctly. I tested mine by pouring a spoonful of water, and I immediately received an alert that saved my kitchen from flooding. Regular testing ensures your system functions properly when it counts.
Document Installation for Warranty Purposes
Keep receipts, photos, and installation logs in a dedicated folder or digital record. Should a leak occur, having documentation helps maximize your warranty coverage. I found that taking detailed photos of the installation and noting serial numbers simplified any warranty claims I made later, especially for parts that might need replacement.
Maintain and Monitor Continuously
Regularly check sensors for battery life and physical condition. Update firmware when prompted. During my routine check, I discovered a corroded battery that could have caused a false alarm, so timely maintenance is key. Consistent monitoring saves stress and ensures your home remains protected against water damage.
Many homeowners operate under the misconception that once their dishwasher is installed and covered by a warranty, everything is automatically protected. However, this belief often leads to overlooked nuances that can jeopardize your coverage or cause costly mistakes. Let’s dig deeper into what most people get wrong about warranties, parts, and installation processes, and how tailored knowledge can save you both money and frustration.
Why Assuming All Parts Are Covered Is a Dangerous Oversimplification
One prevalent myth is that warranty coverage seamlessly includes every component and repair. The reality is more complex; warranties typically specify certain parts and exclude others—such as consumables like door seals or filters. For instance, if your dishwasher’s pump fails due to wear and tear, but the hose or filter wasn’t part of the original warranty coverage, you might be left footing the bill. To protect yourself, regularly review your warranty’s fine print and keep documentation of your installation and parts used, especially if you upgraded or replaced individual components. Proper parts selection not only extends your appliance’s lifespan but also maximizes warranty benefits; check this [guide](https://appliancedoctorz.com/maximizing-your-dishwashers-warranty-coverage-today) to avoid costly pitfalls.
**External Expert Insight:** According to a Consumer Reports study, misinterpreting warranty coverage accounts for nearly 30% of appliance repairs’ unexpected costs. Ensuring your parts and repairs fall within the covered scope is crucial for peace of mind.
Installation Mistakes That Sabotage Your Warranty
Correct installation is vital—yet many overlook subtle but critical details. For example, using third-party hoses or pushing beyond the specified electrical requirements can void warranty coverage. An often-missed nuance is the importance of securing proper drain height; an improper drain loop can lead to drainage problems and, in some cases, warranty denial if related issues arise. For more detailed guidance, see [top-tips for seamless dishwasher installation](https://appliancedoctorz.com/top-tips-for-seamless-dishwasher-installation-in-2025).
**Oops to Avoid:** Installing a dishwasher without verifying the correct gasket placement or neglecting to document the process can cause warranty disputes if leaks or faults develop later. Always keep comprehensive records and photos of your installation—these can be lifesavers during warranty claims. Learn how to document your setup effectively and increase your chances of warranty approval [here](https://appliancedoctorz.com/how-to-document-your-installation-to-guarantee-warranty-approval).
**Secret Advanced Tip:** For the savvy homeowner, paying close attention to the specific torque settings of water fittings ensures leak-proof connections, a common failure point leading to warranty rejections. Properly tightened connections, verified with a torque wrench, help avoid early failures or leaks that could void your coverage.
Have you ever fallen into this trap? Let me know in the comments. Being aware of these hidden nuances means you’re not just a consumer—you’re an informed homeowner safeguarding your investment effectively.
Keep It Running: Tools I Trust for Effective Maintenance
Maintaining a dishwasher’s optimal performance requires precision and reliability. I personally rely on a quality set of tools to ensure every part functions correctly over the years. A digital multimeter, for example, is indispensable for diagnosing electrical issues, verifying voltage, and ensuring your control boards are functioning properly. I prefer a multimeter with auto-ranging capabilities and a continuity buzzer, which simplifies testing connections and components without guesswork.
When it comes to parts replacement, having a dedicated set of screwdrivers, particularly a Phillips and flathead with magnetic tips, makes extracting and installing components effortless. For securing hoses and fittings, a torque wrench is crucial; tightening connectors to manufacturer specifications, typically detailed in this guide, prevents leaks and part failure.
Additionally, I recommend investing in a professional-grade drain snake or flexible brush to clear obstructions in drain hoses—clogged drains are a common cause of operational setbacks. For routine cleaning, a soft microfiber cloth and electronic contact cleaner help maintain sensors and control panels, preventing buildup that can cause malfunctions.
Software & Monitoring to Detect and Prevent Issues
Modern appliances benefit from smart monitoring tools. I use a smart sensor system compatible with my home automation setup, which provides real-time alerts if leak or fault conditions arise. These sensors, like the ones discussed here, can be paired with apps that log historical data, making maintenance scheduling and troubleshooting more straightforward. Additionally, firmware updates for both sensors and smart home hubs are essential; manufacturers often release patches that improve detection accuracy and security.
In the near future, I predict that AI-driven diagnostic tools will become standard, providing proactive insights based on usage patterns and sensor data—potentially alerting you to wear and tear before breakdowns occur.
How do I keep my dishwasher performing well over the years?
Consistent maintenance hinges on regular inspections and timely replacement of worn components. Check the key parts such as door gaskets, spray arms, and filters annually. Keep a maintenance log, noting when parts are replaced or cleaned, and perform scheduled tests on sensors and connections. Incorporating these habits can dramatically extend your dishwasher’s lifespan and shield you from unexpected failures. For example, periodically inspecting the water inlet valve and replacing it at signs of fatigue can prevent leaks and water damage, conserving energy and water resources.
If you haven’t already, I encourage you to adopt a multi-point diagnostic routine, including testing your control board wiring with a multimeter and verifying hose connections tighten to torque specifications. These detailed steps are often overlooked but make a significant difference in maintaining long-term performance.
For a comprehensive approach, consider following this essential parts guide to understand what components need monitoring. Remember, proactive care isn’t just about fixing problems after they happen—it’s about preventing them from occurring in the first place. Invest in the right tools today, and your dishwasher will reward you with years of reliable service.

What I Wish I Could Tell My Younger Self About Appliance Warranties
One of the most profound lessons I learned was that warranties are only as strong as your knowledge about what they cover. Missing out on the fine print cost me dearly when a small leak turned into a costly repair, simply because I didn’t realize certain parts weren’t covered. Now, I make it a point to thoroughly review warranty policies and keep detailed records of installation and parts used—these small steps can dramatically improve your claims process and save money in the long run.
Another lightbulb moment came when I realized that improper installation could void warranty coverage—something many homeowners overlook, especially when attempting DIY projects. Securing proper drain height and tightening connections to torque specifications aren’t just technical details; they’re essential for keeping warranties intact. Investing time in understanding these nuances safeguards your home and your budget.
Lastly, I’ve discovered that routine maintenance and using the right tools are crucial. Regularly inspecting seals, replacing worn parts proactively, and documenting every step ensures your dishwasher remains reliable and warranty-eligible. Don’t underestimate the power of a well-maintained appliance paired with knowledgeable care—it’s the best way to maximize your investment.
Related Posts
Why Your Smart Home Hub Cant Find Your Dishwasher
Ever experienced that frustrating moment when your smart home hub…
The Hidden Reason Your Smart Dishwasher Keeps Dropping Wi-Fi
There I was, mid-cycle, when suddenly my smart dishwasher lost…
How Your Smart App Log Can Overturn a Denied Warranty Claim
I still remember the sinking feeling when my dishwasher suddenly…