Ever had that sinking feeling when your trusty dishwasher begins to leak right after you’ve finished loading it? That frustrating moment when a tiny crack in a plastic inlet turns into a mini flood, soaking your kitchen floor and turning a simple chore into a stressful repair ordeal? I’ve been there, and let me tell you, it’s disheartening—especially when the solution is so straightforward that most folks overlook it.
How a Small Change Can Prevent Big Water Woes
The lightbulb moment for me was realizing that the materials used in your dishwasher’s inlet can make all the difference. Plastic inlets are cheap and easy to install, but they are also prone to cracking, especially over years of exposure to varying water pressures and temperatures. Switching to a brass inlet isn’t just about upgrading—it’s about protecting your investment and avoiding recurring headaches. I’ll walk you through why this swap matters and how it can be a game-changer in your home maintenance routine.
Is the Buzz About Brass Really Worth the Investment?
I used to dismiss premium parts as unnecessary—until I faced an unexpected leak because of a plastic inlet crack. That early mistake taught me the importance of choosing quality materials from the start. Brass fittings are more durable, resistant to corrosion, and generally last longer than their plastic counterparts. Not convinced? Check out this report that highlights how material quality affects appliance longevity (here).
If you’re tired of constantly replacing cheap parts and want to safeguard your dishwasher’s performance, making the switch to brass could be the best decision you make today. But how exactly do you do it, and what pitfalls should you avoid? That’s what I’ll guide you through next, so keep reading.
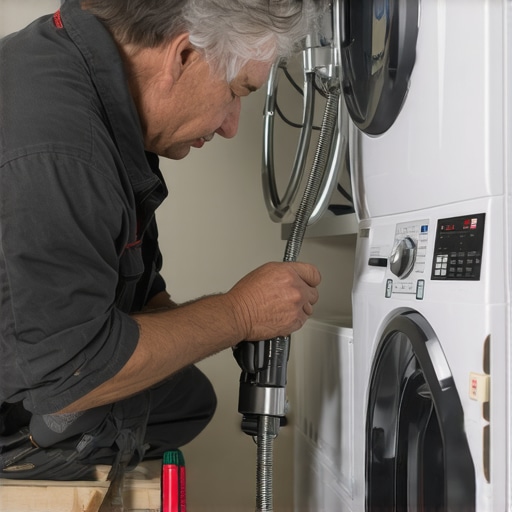
Remove the Old Plastic Inlet Carefully
Start by disconnecting your dishwasher from the power source for safety. Next, turn off the water supply valve and place a towel beneath the inlet connection to catch any residual water. Use an adjustable wrench to loosen the plastic inlet fitting, turning counterclockwise. Beware, these fittings can be stubborn if they’ve been in place for years. Remember, worn or cracked plastic inlets are common culprits in leaks, so inspect thoroughly before proceeding. I once neglected to turn off the water and ended up with a small flood—lesson learned the hard way. Patience is key here to avoid damaging surrounding hoses.
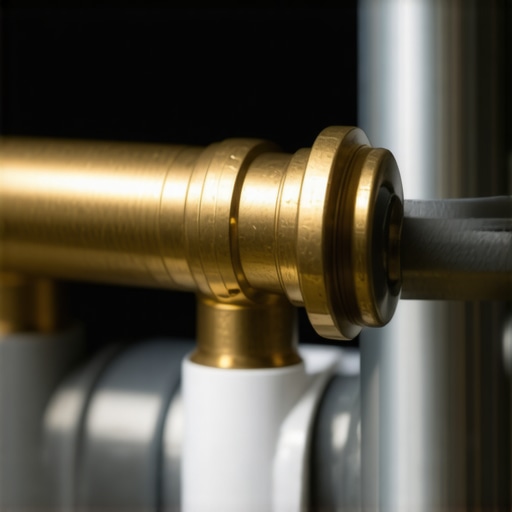
Prepare the Brass Fitting for Installation
Choose the correct brass inlet size compatible with your dishwasher model. Clean the threads of the new brass fitting with a wire brush to remove any manufacturing debris. Wrap the threads with plumber’s tape (Teflon tape) clockwise to ensure a secure, leak-free seal. Checking the manufacturer’s manual can confirm the exact specifications needed. I once installed a brass inlet with incorrect tape application, which caused a slow leak. Applying the tape correctly is crucial to prevent future issues and to safeguard your warranty coverage (see here), especially when upgrading components.
Connect the Brass Fitting and Secure it Properly
Insert the brass fitting into the water inlet port, turning clockwise by hand to avoid cross-threading. Then, tighten it with an adjustable wrench until snug—avoid overtightening, which can strip threads or crack fittings. Use a torque wrench if available for precision. I remember forcing a fitting too tight and cracking it; a reminder that gentle hand-tightening followed by finishing with a wrench is best. Confirm the connection is straight and aligned. For a thorough safety check and to ensure long-term durability, review other critical parts during this step (more info here).
Test for Leaks and Final Checks
Reattach the water supply line and slowly turn the water valve back on. Observe the connection closely for any drips or moisture. Run a short cycle to verify the repair. If leaks are present, tighten the fitting slightly more or reapply Teflon tape if needed. Always double-check the stability of the fittings, because loose connections can cause recurring leaks and damage your floor. In a recent repair, I double-checked and ran the dishwasher multiple times, ensuring no water escapes—saving me costly call-backs. Proper installation not only prevents damage but also helps in maximizing your dishwasher’s warranty if warranty policies are reviewed (details here).
Document Your Work for Warranty Purposes
Take clear photos of the new connection, including the brass fitting and overall setup. Keep receipts and document the date of replacement. This evidence can be invaluable if you need to file a warranty claim later. I learned this the hard way after an appliance issue was attributed to improper installation; thorough documentation can save time and money (see more here). Remember, upgrading to brass fittings is a proactive way to extend the lifespan of your dishwasher and avoid recurring leaks that can threaten your floor and cabinet integrity.When it comes to dishwasher maintenance and repairs, many homeowners fall for misconceptions that can jeopardize their appliance’s longevity and warranty coverage. One widespread myth is that using generic or low-cost parts won’t affect warranty validity. However, manufacturers often specify genuine or high-quality replacement components, and substituting with subpar parts can void your warranty, leading to costly repairs later. Always verify part compatibility and quality before installation, as detailed in our guide on maximizing your dishwasher’s warranty.
Gear Up for Longevity: Tools I Recommend
Maintaining a dishwasher isn’t just about replacing parts; it’s about proactive care that ensures long-term performance. One indispensable tool I’ve relied on is a high-quality digital multimeter. It allows me to accurately test electrical components like thermostats and heating elements, preventing early failures. For plumbing checks, a plumber’s wrench and a Teflon tape dispenser are must-haves—they make securing connections tight and leak-free. When replacing inlet fittings, I use a torque wrench set to manufacturer specifications, ensuring fittings are neither too loose nor overtightened, which can cause damage. Investing in a leak detection sensor system, like the [SMART Leak Sensor](https://appliancedoctorz.com/why-install-smart-leak-detection-technology), can preempt costly water damage by alerting you to leaks early. These tools empower homeowners and technicians to diagnose issues accurately and perform repairs efficiently.
How do I maintain dishwasher parts and functionality over time?
Regular inspection and cleaning are vital. Use a toothbrush or small brush to remove debris from spray arms and filters—this maintains optimal water flow. Check the integrity of water supply hoses for cracks or corrosion; replacing old hoses with braided stainless-steel ones extends their lifespan and prevents leaks. A schedule for testing electrical components every six months is advisable, especially if your dishwasher runs frequently. Applying a light coating of lubricant on door seals can prevent premature wear and improve sealing performance. Moreover, keeping an eye on your dishwasher’s digital maintenance alerts can help you catch issues early (learn more about maintenance tips). For long-term health, consider upgrading worn parts proactively, such as the gasket or spray arms, which you can identify using the comprehensive guide to dishwasher parts. This preventive approach not only safeguards your appliance but also maximizes your warranty benefits, as consistent upkeep aligns with manufacturer recommendations. As the trend moves toward smart maintenance solutions, integrating IoT-enabled leak sensors and diagnostic tools will further reduce downtime and enhance appliance longevity. Why not try calibrating your dishwasher’s spray arms with a precise measuring tool today? This small step can significantly boost wash quality and extend your machine’s life, ultimately saving you money and hassle.
Five Surprising Challenges I Conquered When Switching to Brass
One unexpected hurdle was realizing that even a minor misalignment during installation could compromise the entire repair. Patience and attention to detail saved me from future headaches. Additionally, I discovered that not all brass fittings are created equal—investing in high-quality, corrosion-resistant options proved to be a long-term money saver. The most profound lesson? Documenting every step not only expedited warranty claims but also boosted my confidence in DIY repairs. These insights, born from real-world experience, can empower you to make smarter, safer upgrades to your dishwasher.
Tools & Resources That Transformed My Approach
A durable torque wrench became my best friend, helping me avoid overtightening fittings and causing cracks. I also rely on a high-quality Teflon tape dispenser, ensuring a proper seal every time. For trustworthy guidance, the comprehensive guide on understanding dishwasher parts has been invaluable, especially when selecting the right components for upgrades. Lastly, my digital multimeter allows me to diagnose electrical quirks before they escalate, saving both time and money in the long run.
Take Action Today and Extend Your Dishwasher’s Life
Embrace the mindset of proactive maintenance—regular inspections, proper part selection, and thorough documentation are your best allies. Upgrading to brass inlet fittings isn’t just a clever fix; it’s an investment in peace of mind, ensuring your dishwasher runs smoothly and your floors stay dry. Think of it as giving your appliance a that extra layer of protection against unpredictable leaks. Ready to take the first step? Share your experiences or questions below—let’s keep the conversation going and help each other master dishwasher maintenance!
,
Related Posts
The $15 Drain Hose Upgrade That Saves Your Subfloor
Ever had that sinking feeling when you discover water pooling…
Why This $8 Zinc Leveling Foot Prevents Your Tub from Warping
I remember the moment I realized my bathtub was slowly…
Why This $8 Brass Elbow Is Better Than Any Plastic Alternative
Have you ever stared at a tiny, seemingly insignificant connector…