One evening, I walked into my kitchen and noticed a damp spot on the floor that I had overlooked for days. It was a tiny, almost invisible drip somewhere behind my dishwasher. I had ignored it, chalking it up to usual wear and tear, until I realized – this seemingly insignificant leak could cause major damage and drain my wallet fast. That lightbulb moment led me down a rabbit hole of DIY fixes, and I discovered a simple, inexpensive part that could have prevented the disaster from the start—the elusive but mighty $12 valve.
Why the Little Valve Can Be a Kitchen Saviour
Ever felt overwhelmed by the fear of water damage or the cost of repairs when your dishwasher springs a leak? You’re not alone. I’ve been there. The good news is, there’s a small but powerful component that often gets overlooked—yet its proper installation and maintenance can keep your kitchen dry and your wallet intact. Today, I’ll share how the humble $12 valve can protect your home from slow leaks that tend to sneak up over time. Trust me, a few dollars and a bit of know-how can make all the difference in avoiding costly replacements and potential warranty headaches. Want to know how to incorporate this tiny but effective part into your setup? Keep reading, and I promise you’ll walk away with the tools to better safeguard your kitchen.
Is This Valve Really Worth the Hype?
I’ll admit, early on, I dismissed the idea that such a small part could have a big impact. My mistake was rushing through my initial install without paying attention to this critical component. As a result, I faced a slow but persistent leak that took weeks to discover, leading to water damage behind my cabinets. If I had taken a moment to research and understand the importance of the valve—as explained in detail at this guide—I could have saved myself a lot of stress and money. It’s a common mistake among DIYers to overlook these small parts, yet doing so could cost you big time.
Now, I focus on sharing how a simple valve replacement or correct installation process can prevent these issues entirely. Have you faced a slow leak that seemed to appear out of nowhere? Trust me, local experts support the idea that paying attention to these details is crucial for long-term performance. According to statistics, water damage from leaks tops $11 billion annually in the US alone, with slow leaks often going unnoticed until they cause serious harm (source). This is why understanding and properly installing this $12 valve is so vital.
In the next sections, I’ll walk you through how to identify, install, and maintain this essential component—arming you with practical knowledge to keep your kitchen safe, dry, and running smoothly. Ready to become a DIY hero and protect your home from the hidden dangers of slow leaks? Let’s dive into the details!
Prepare Your Workspace and Gather Necessary Tools
Start by clearing the area beneath your dishwasher, ensuring you have enough room to work comfortably. Gather essential tools such as channel-lock pliers, adjustable wrenches, screwdrivers, and a bucket to catch any water spills. Having everything ready prevents unnecessary pauses once you begin.
Turn Off Power and Water Supply
Before touching any dishwasher parts, switch off the power at the circuit breaker to avoid electrical hazards. Shut off the water supply valve connected to your dishwasher. Confirm the water is fully off by opening the hose slightly to drain any residual water, preventing messes during installation.
Disconnect the Dishwasher from Water and Power
Carefully disconnect the water inlet line from the existing valve using adjustable pliers. Place a bucket or towel beneath to catch any remaining water. Next, remove the disconnect the electrical connections, typically secured with screws or clips, to safely detach the unit for easier access.
Access the Inlet Valve Area
Remove the panels or brackets protecting the inlet area, usually secured with screws. Carefully maneuver the dishwasher slightly forward to reach the inlet connection without causing damage. Document the wiring and hose connections to assist with correct reassembly.
Remove the Old Valve and Inspect Hoses
Loosen the clamps securing the inlet hose to the valve and remove the old valve. Examine the hoses for cracks or signs of wear, replacing them if necessary. Take note of any debris or mineral buildup that could impact the new valve’s functionality.
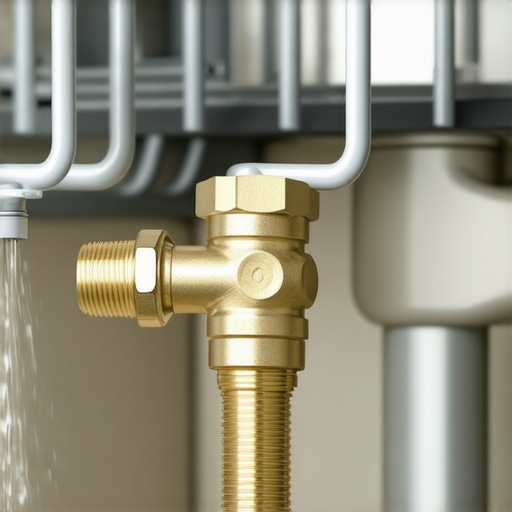
Install the New $12 Valve
Connect the new valve to the water inlet line, ensuring a tight fit to prevent leaks. Use the recommended compression fittings and tighten them securely with your hand, then finish with pliers for a snug fit. Consult this guide for selecting quality parts that enhance long-term performance.
Secure Electrical Connections and Test
Reattach the electrical wiring to the new valve, making sure each connection is firm. Turn the water supply back on and check for leaks around the fittings. Restore power to the dishwasher and run a short cycle to verify proper operation. Watch closely for leaks or unusual sounds indicating installation issues.
Final Checks and Reassembly
Once satisfied with the test run, reattach any panels or brackets removed earlier. Ensure all hoses and wires are properly secured and out of the way of moving parts. Clean up the workspace, and keep an eye on the unit over the next few cycles for any signs of leaks or malfunctions.
During this process, avoid common pitfalls like over-tightening fittings, which can damage the valve or hoses, or neglecting to turn off power and water, risking injury or water damage. Proper installation not only prolongs your dishwasher’s life but also preserves your home’s value. Remember, consulting detailed resources such as this guide can provide additional insights. Regular maintenance, including inspecting and replacing the valve when necessary, is key to preventing slow leaks and costly repairs down the line.
Breaking the Myth: More Expensive Parts Are Always Better
Many assume that opting for premium, high-priced components guarantees durability and warranty compliance. However, in my experience, choosing parts that suit your specific machine, like the correct parts for your dishwasher, is far more critical. Overpaying for what you don’t need can lead to unnecessary costs and potential compatibility issues, risking voiding your warranty. Remember, quality isn’t just about price but about matching the part to your appliance’s model and specifications.
Beware of Over-Tightening Fittings During Installation
A common mistake is tightening fittings too much, believing it prevents leaks. This overconfidence can damage both the fitting and the hoses, leading to leaks or even component failure. Proper torque, using the right tools like a appropriate compression fittings, is essential. It ensures a secure seal without risking damage, and helps maintain warranty coverage, as improper installation is often a reason for warranty denial. Keep this in mind when replacing valves or connecting supply hoses.
Advanced Viewer Question: How Can Ignoring Small Parts Void a Strong Warranty?
Many assume that warranties cover only major failures, but neglecting small but vital components like inlet valves or filters can unexpectedly void your coverage. Experts emphasize that adherence to proper installation and maintenance of all parts, no matter how minor, is crucial. For instance, failing to replace a worn-out wearing parts can cause damage to other system components, jeopardizing your warranty claims. Being meticulous in replacing or monitoring these parts is a strategic move for long-term warranty security.
Further, many overlook the importance of documentation. A thorough record of parts used, installation steps, and maintenance routines can be your best defense if warranty disputes arise. Resources like this comprehensive guide explain how detailed logs and receipts can support your case, especially during warranty inspections or denied claims. Do you track your maintenance activities? If not, consider starting today — it can save you money and peace of mind.
In summary, paying attention to the nuances—like matching the right parts, applying correct torque, and maintaining detailed records—can significantly impact your appliance’s performance and your warranty success. Don’t fall into the trap of oversimplifying the installation process or neglecting minor components. Think of these small details as the foundational elements that keep your dishwashers running smoothly and your warranty intact. Want to delve deeper into how to avoid common mistake pitfalls? Visit this resource for expert tips.
Keep Your Dishwasher Running Like New with the Right Tools
Maintaining your dishwasher isn’t just about replacing parts—it’s about using the right equipment to diagnose, repair, and optimize its performance over time. I personally rely on a quality digital multimeter, like the Fluke 115, to accurately check electrical components such as thermostats and control boards. Its precision helps avoid unnecessary replacements and ensures safety during repairs. For plumbing tasks, I always use a set of corrosion-resistant stainless steel braided hoses; these not only last longer but also handle higher water pressure, reducing the chance of leaks that could compromise your warranty here. Additionally, a set of precision screwdrivers with insulated handles allows me to safely remove panels and secure connections without damaging sensitive electronics.
Commonly Overlooked Maintenance Tools
One item I can’t live without is a turbidity sensor cleaning kit. Keeping this component free from mineral buildup ensures optimal cycle performance and prevents errors that could void your warranty here. An ultrasonic cleaner is also invaluable for thoroughly removing scale and debris from spray arms and filters, extending their lifespan and maintaining cleaning efficacy. Regularly inspecting and cleaning these parts with these tools saves money and keeps your dishwasher operating at peak efficiency.
Future Trends in Dishwasher Maintenance
Looking ahead, I anticipate smart diagnostic apps integrated with repair tools will become mainstream, allowing homeowners to perform complex troubleshooting via smartphone. This trend will further democratize maintenance, reducing reliance on costly professional service. As technologies evolve, I predict that IoT-connected sensors will continuously monitor key components, alerting users long before failures occur—giving unprecedented control over appliance longevity.
How do I Maintain My Dishwasher Over Time
Establishing a routine inspection schedule—monthly checks of spray arms, filters, and hoses—significantly prolongs the life of your appliance. Use a good flashlight and a mirror to access tight spots, and don’t forget to verify electrical connections for signs of wear. Incorporating preventive maintenance with your tools, like running a descaling cycle with commercial cleaning solutions or vinegar, also prevents mineral buildup that can impair operation. For more detailed tips, check out this comprehensive guide.
Practicing these habits, combined with correct tools, offers peace of mind and protection for your investment. Remember, investing in quality equipment and routine maintenance isn’t just about avoiding costly repairs; it’s about ensuring your dishwasher continues to serve your household efficiently. Try integrating a digital multimeter or ultrasonic cleaner into your maintenance routine—these tools make a significant difference. Want to take your upkeep a step further? Explore advanced troubleshooting methods to stay ahead of potential problems before they escalate.

The Hardest Lesson I Learned About dishwasher,parts,installation,warranty
Early in my DIY journey, I underestimated the importance of seemingly minor components, like the $12 valve. Ignoring this led to persistent leaks and warranty headaches, reminding me that even the smallest parts can hold the key to long-term success.
3 Myths About dishwasher,parts,installation,warranty That Held Me Back
I once believed that premium parts were always worth the investment, but I learned that compatibility and proper installation matter more. Also, I thought over-tightening fittings safeguarded my repairs, only to realize it caused damage and leaks, jeopardizing warranty coverage.
What Experts Won’t Tell You About dishwasher,parts,installation,warranty
Many professionals emphasize careful documentation and understanding your appliance’s specific needs. Overlooking small but vital parts, like the inlet valve, can void warranties, even if the primary component seems sound. Knowledge is power, especially when it comes to safeguarding your investment.
My Essential Toolkit for dishwasher,parts,installation,warranty
Tools like a digital multimeter, ultrasonic cleaner, and stainless steel braided hoses have revolutionized my maintenance routine. They help me diagnose issues accurately and ensure durable, warranty-friendly installations, saving money and frustration over time.
Your Turn to Protect Your Dishwasher’s Future
Taking the time to understand, maintain, and properly install parts like the humble valve can prevent costly surprises and extend your appliance’s lifespan. Don’t wait for leaks to appear—be proactive and empower yourself with knowledge and the right tools. How will you change your approach to dishwasher maintenance today? Share your thoughts below and let’s learn together.
Related Posts
The $20 Valve That Stops Your Dishwasher from Siphoning
It happened to me during a busy weekend—my brand-new dishwasher…
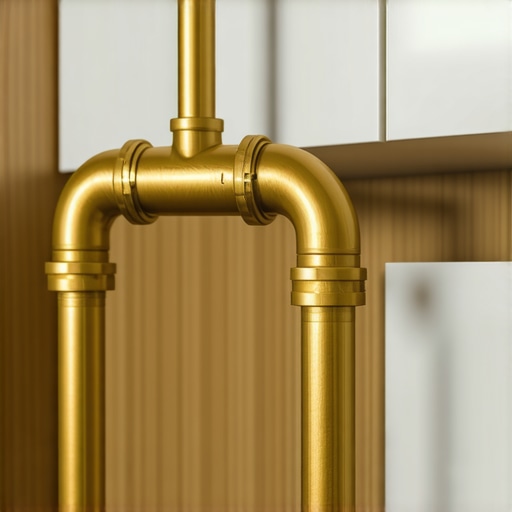
The $12 Brass Elbow That Stops Silent Cabinet Leaks
I remember the moment quite vividly—standing in my kitchen, water…

The Difference Between Factory and Third-Party Replacement Racks
It was a typical Tuesday morning when I opened my…