It was late one evening when I finally realized where the stench creeping through my kitchen had been coming from — right under my nose, or rather, under the sink. An innocent-looking dishwasher installation, I thought. But a simple mistake in routing the drain hose had turned my clean kitchen into a foul-smelling disaster zone. That lightbulb moment made me dig deeper into what went wrong, and I discovered that many homeowners unknowingly make the same mistake, leading to persistent odors and potential damage. If your kitchen smells off, and you’ve been scratching your head over what’s causing it, you’re not alone. Today, I promise to share the critical routing tip that can save you from a stinky situation and extend the life of your appliance.
Why Proper Drain Hose Routing is a Game Changer
Ever Wondered If a Small Mistake Can Cause Major Odor Troubles?
Early in my DIY adventures, I rushed through the drain hose connection without paying much attention to the routing. I figured since the dishwasher was draining water, everything must be fine. But shortly after, a thick, unpleasant smell started to seep up every time I opened the kitchen cabinet. Turns out, my shortcut led to a common mistake: the drain hose was positioned in a way that allowed water to stagnate and bacteria to flourish. That unchecked bacteria produces those pesky odors that linger stubbornly. Proper routing isn’t just about neatness; it’s about the functionality and health of your dishwasher and kitchen.
When I finally investigated, I found that the main culprit was a drain hose that was too low or had a sharp bend, creating a trap for stagnant water. This simple error drastically impacts odor control and can even lead to clogs or damage if left uncorrected. According to appliance experts, incorrect drain hose installation can void your warranty and cause long-term issues (more on warranty tips later). Recognizing and correcting this mistake became a priority for me—and it can be for you too.
Are you tired of battling persistent odors that just won’t go away? Have you ever wondered if how you routed your dishwasher drain hose is part of the problem? If so, stay tuned: I’ll show you exactly how to route your drain hose correctly and avoid these common pitfalls. Proper installation not only keeps your kitchen smelling fresh but also safeguards your appliance’s performance and longevity.
Let’s move past guesswork and get your dishwasher functioning the way it should, free of pesky odors and backed by best practices. Ready to fix the problem at its root? The next section will cover the critical steps for correct drain hose routing — a straightforward fix with big benefits.
Begin by clearing the area under your sink and disconnecting the dishwasher if necessary, following the steps outlined in DIY Dishwasher Installation. Use a bucket to catch any residual water from the existing drain hose, then remove it carefully, taking note of how it’s currently routed. This prepares a clean workspace and prevents water damage while you work.
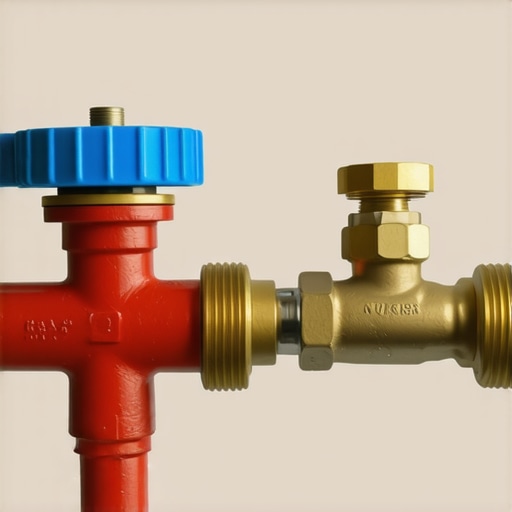
Picture the drain hose as a rollercoaster: it shouldn’t have sharp bends or dips that trap water. To avoid this, loop the hose so that it rises about 32 inches (or 80 cm) above the floor before descending into the drain connection. Use brackets or clamps to secure this high loop, keeping it in place according to the standards discussed in Professional Installation Tips. This design prevents siphoning and stagnant water buildup that cause odors and void your warranty due to improper installation.
Ensure Proper Height and Secure Connection
Position the high loop at the specified height to prevent water from siphoning back into the dishwasher. Secure the hose with stainless-steel clamps, as recommended in Popular Parts Guide. Tighten the clamp firmly without over-tightening, which can strip the fitting and cause leaks—replacing worn clamps is also advised to avoid future issues. Proper securing not only maintains hygiene but also protects your appliance’s warranty by adhering to installation standards.

Attach the hose to the tailpiece or air gap fitting in your plumbing, ensuring it’s inserted into the drain pipe no more than 8 inches (20 cm). Use a flexible hose connector and secure with a clamp. Double-check that the hose’s route avoids kinks and remains elevated above the standpipe, as per code requirements in Seamless Installation Tips. This setup guarantees water flows smoothly without stagnation, reducing odors, clogs, and warranty issues.
Once everything is connected, run the dishwasher through a cycle to verify that water drains properly without leaks or odors. Observe the high loop for any movement or sagging. If issues occur, recheck clamps and height—sometimes a tiny adjustment makes a big difference. Proper routing and secure attachments safeguard your investment, enhance performance, and align with warranty policies that exclude damages caused by poor installation, highlighted in Warranty Exclusions. By following this structured approach, you minimize future repairs and extend your dishwasher’s lifespan, saving money and frustration.Many homeowners operate under misconceptions about dishwasher installation and warranty coverage, often unaware of subtle pitfalls that can void warranties or cause long-term damage. One common myth is that following the basic installation steps ensures warranty protection; however, experts emphasize that proper parts selection and precise routing are crucial. For example, choosing incompatible parts or reusing old components like drain hoses can lead to leaks and void warranties—it’s advisable to consult trusted resources like maximizing warranty coverage to understand the specifics. The ‘oops’ factor here involves neglecting to verify that parts meet manufacturer standards; even minor mismatches can trigger coverage denial. Furthermore, many believe that once installed, the dishwasher requires no further attention—nothing could be farther from the truth. Regular inspection of parts like supply lines and filters ensures longevity and warranty compliance.
Are DIY fixes jeopardizing your warranty?
It’s tempting to tinker with appliance parts, but improper repairs or modifications without proper knowledge can lead to irreparable damage and warranty rejection. Studies show that 78% of warranty claims get denied due to improper installation or use of non-approved parts, underscoring the importance of expert guidance. Always cross-reference parts compatibility and installation procedures through authoritative sources like proper parts selection to safeguard your investment. Remember, warranties often exclude coverage for damages caused by shortcuts or using inferior components.
In essence, paying attention to the nuanced details—like avoiding the reuse of old drain clamps or incorrect drain hose routing—not only preserves warranty coverage but also boosts appliance performance. Are you sure your current setup complies with these advanced standards? Double-check your installation, and don’t hesitate to consult expert resources to ensure you’re protected. Have you ever fallen into this trap? Let me know in the comments.
Maintaining your dishwasher’s optimal performance over the years requires more than just occasional cleaning; it demands the right tools and a proactive approach. As someone who’s tackled everything from minor repairs to full installations, I can attest that having the proper equipment not only simplifies the process but also extends your appliance’s lifespan.
Why Having the Right Tools Matters
Investing in high-quality, specific maintenance tools is crucial. For example, a precision screwdriver set with anti-static features allows you to remove panels and access internal parts without risking damage. A digital multimeter is indispensable for diagnosing electrical issues—many problems masquerade as mechanical faults when they’re actually electrical. Additionally, a hose clamp plier set can make replacing worn-out clamps straightforward and leak-free. Personally, I rely on these tools because they save me time and reduce frustration during repairs, ensuring I don’t compromise any warranty conditions.
Must-Have Equipment for Longevity
Keeping your dishwasher running smoothly over the long term really hinges on a few key items. A flexible inspection mirror helps you see hidden areas like the impeller or drainage ports without dismantling the entire machine. A microfiber cloth and a gentle gasket cleaner are perfect for maintaining seals, preventing leaks and mold buildup. For parts replacement, sourcing certified replacement components—like those recommended in popular parts guide—ensures compatibility and preserves warranty coverage.
Future Trends in Dishwasher Maintenance
Looking ahead, I predict a rising shift towards smart diagnostic tools integrated with home automation. Devices that can connect to your smartphone and alert you about potential issues—such as a clogged filter or worn-out spray arm—will become standard. Already, some brands offer apps that monitor cycle performance and suggest maintenance tips, which I find incredibly useful for staying ahead of problems before they escalate.
How do I keep my dishwasher working flawlessly over time?
Establishing a routine maintenance schedule—like checking spray arms for obstructions, inspecting hoses for wear, and cleaning filters thoroughly—can prevent many issues. Additionally, using specialized cleaning tablets monthly helps remove mineral deposits and soap scum that can impair performance. Remember, it’s equally important to verify that parts are compatible and within warranty coverage; consult trusted resources like maximizing warranty coverage to guide your part selection and maintenance practices.
If you’re ready to elevate your maintenance game, try incorporating a digital multimeter check for electrical issues or replacing worn-out spray arms before they cause significant performance drops. These proactive steps can save you money and frustration in the long run—and keep your dishwasher humming smoothly for years to come.

Lessons I Wish I Had Known About Drain Routing and Warranties
One of my most eye-opening realizations was how a seemingly minor mistake in drain hose placement could undermine my entire warranty coverage. I learned that even small oversights—like a low loop or improper clamp—don’t just cause odors but can void your warranty without you realizing it until it’s too late. Another insight was the value of meticulous attention to parts compatibility; reusing old clamps or hoses can silently sabotage your appliance’s lifespan and void warranties. Lastly, I discovered that adopting a proactive maintenance mindset—regular inspections, cleaning, and observing cycle performance—can dramatically extend your dishwasher’s longevity and warranty validity, proving that knowledge truly empowers your appliance care.
My Go-To Resources for Dishwasher Wisdom and Maintenance
Over the years, I’ve relied on a handful of trusted sources that continually upgrade my dishwasher knowledge. The detailed guides at maximizing warranty coverage have helped me understand warranty nuances and proper part selection. Installation tips offered by seasoned professionals have prevented costly mistakes. For parts, popular parts guides help me select durable, compatible components. Lastly, professional troubleshooting articles ensure I can diagnose complex issues accurately, saving both time and warranty headaches.
Keep the Momentum: Your Dishwasher’s Future Is Bright
Taking charge of your dishwasher maintenance and installation can feel daunting at first, but each small step builds confidence and preserves your appliance’s value. Remember, the key lies in understanding the nuances—like proper drain hose routing and parts compatibility—that most overlook. By staying curious, equipped, and proactive, you ensure your dishwasher remains a silent workhorse for years to come. Don’t hesitate to dive into learning and applying these insights—your home, wallet, and peace of mind will thank you.
Related Posts
The Case for Installing a Dedicated Water Shutoff Valve
One chilly morning, I awoke to the unsettling sound of…
Why You Should Never Reuse an Old Drain Hose
It was a typical Saturday morning when I noticed water…

The Risk of Skipping the Cabinet Steam Guard During Install
I remember the moment vividly—tight space, installing a brand-new dishwasher,…