
It was a Sunday afternoon when I first noticed the unsettling wobble of my dishwasher. What started as a minor annoyance soon became a sinking feeling—I feared it might be warping, or worse, breaking down completely. In my quest to fix it, I realized a crucial mistake I had made early on: neglecting proper professional leveling. That lightbulb moment changed my approach entirely.
Getting the Balance Right: A Critical Step
Many DIY enthusiasts or even seasoned homeowners overlook the significance of precise leveling when installing or maintaining a dishwasher. It’s tempting to think just setting it on the ground and pushing it into place will suffice. But, without proper leveling, the entire frame faces undue stress, which, over time, can lead to warping—a costly and inconvenient problem that no one wants to deal with.
My experience taught me that professional leveling isn’t just about making sure the machine stands straight; it’s about preventing long-term damage. If you’ve ever faced persistent leaks, weird noises, or uneven cycles, poor leveling could be to blame. And the good news? Correcting it early on can save you from expensive repairs down the line.
Skeptical About Its Importance? Here’s the Real Deal
I admit, I was once skeptical myself. I thought, “How big of a difference can a tiny bubble in the leveling feet really make?” Turns out, a lot. I learned that even a slight imbalance can cause undue stress on the frame, leading to warping and operational issues. Early on, I made the mistake of ignoring the manufacturer’s instructions, which emphasized proper leveling, and it nearly cost me more than just a repair bill. For a thorough guide on how to properly level your dishwasher, you might want to check out top tips for installation.
Understanding these basics is essential. Proper leveling aligns the load, prevents unnecessary strain on components, and ultimately extends your dishwasher’s lifespan. So, if this sounds familiar, don’t worry—help is on the way. In the next sections, I’ll walk you through practical steps to ensure your dishwasher’s frame remains in tip-top shape for years to come, all while avoiding those costly long-term issues.
Ready to dive into the details? Let’s make sure your dishwasher is perfectly balanced from the start, starting with the right tools and techniques.
,
Gather Your Tools Before You Start
Start by assembling a reliable level, preferably a bubble or digital type, along with a socket wrench or pliers for adjusting the leveling feet. Having these tools ready prevents interruptions mid-process, which can cause misalignment.
Position the Dishwasher Correctly
Place the dishwasher in its designated spot, ensuring all connections—water, power, and drain—are loosely fitted, so you can make adjustments later. Think of it like setting the foundation for a house; you need the base perfect before finalizing the fixtures.
Adjust the Front Legs with Precision
Locate the adjustable feet at the front of the unit. Use the wrench to turn clockwise to raise or counterclockwise to lower each foot until the top surface is perfectly level. Remember, small increments make a big difference—aim for a bubble centered in the vial for bubble-type levels.
Micro-Story: My First Try
Once, I made the mistake of rushing this step. I thought I could eyeball it—big mistake. The dishwasher was slightly tilted, which caused water to pool in one corner and triggered an error. After carefully leveling it with a spirit level and tightening the feet, I noticed the cycles became smoother and leak issues disappeared.
Confirm the Horizontal and Vertical Alignment
Use the level across the top and side edges to verify both axes. If the bubble isn’t centered, make further adjustments. Consider placing wedges or shims if the floor is uneven—these are like risers for your furniture, but designed for appliances.
Secure the Connection Points
Once the dishwasher sits perfectly level, tighten all mounting brackets and connection fittings. Properly secured parts prevent vibrations and shifting over time—imagine your dishwasher as a steady ship, sailing smoothly through cycles without rocking.
Final Test Before Covering Up
Run a short cycle to observe the operation. Check for leaks, unusual noises, or movement. If any issue appears, revisit the leveling process. Think of this as test-driving a car before taking it on a long trip—vital for peace of mind.
Additional Tips for Success
Always consult your manufacturer’s instructions for specific leveling requirements. Some models have special features or adjustable weights that require particular attention. For detailed guidance, visit top tips for installation.
Address Floor Irregularities Effectively
If your floor is uneven, incorporate shims or adjustable pads. This approach is like leveling a camera on an uneven tripod—it ensures the shot (or in this case, the dishwasher’s operation) remains steady and efficient.
Maintain Your Leveling Over Time
Remember, floors can settle or shift, so periodically check your dishwasher’s level, especially if you notice issues like noise or vibration. Think of it as tuning your guitar—regular tweaks keep everything sounding perfect and functioning smoothly.
Many homeowners believe that once a dishwasher is installed correctly, little else can go wrong. However, even experienced DIYers often fall into traps when it comes to understanding the intricacies of parts, warranties, and installation nuances. Let’s dig deeper into some of these overlooked aspects that can make or break your appliance’s performance and longevity.
Myth: All Parts Are Created Equal and Warranties Cover Everything
It’s a widespread misconception that any replacement part will do, and that warranties handle all repairs seamlessly. In reality, reputable brands often use proprietary parts designed specifically for their models, which impacts both performance and warranty claims. For instance, choosing generic or non-approved parts can void your warranty or lead to compatibility issues. To navigate this, familiarize yourself with the essential parts every dishwasher owner should know about, and always verify if your replacement parts are covered under your warranty. Avoid the trap of assuming cheaper parts are a bargain; they can lead to more costs in the long run due to frequent failures or voided warranties.
Advanced Mistake: Ignoring the Subtle Differences in Installation Techniques
Many assume that installing a dishwasher is a straightforward process, and that following basic instructions suffices. But, nuances such as the precise positioning of water inlet valves, drain connections, or leveling adjustments can significantly affect performance and warranty validity. For example, improper drain hose routing, like ignoring the proper length or sagging placements, causes drainage issues and potential backflow problems. Professional installation often includes checks of these finer details, ensuring adherence to local plumbing codes and manufacturer specifications—details that DIY might miss.
Analyzing these subtleties can prevent common pitfalls like leaks, poor cycles, or early component failure. To get it right, review the detailed installation tips for 2025 and consider consulting a professional for complex setups.
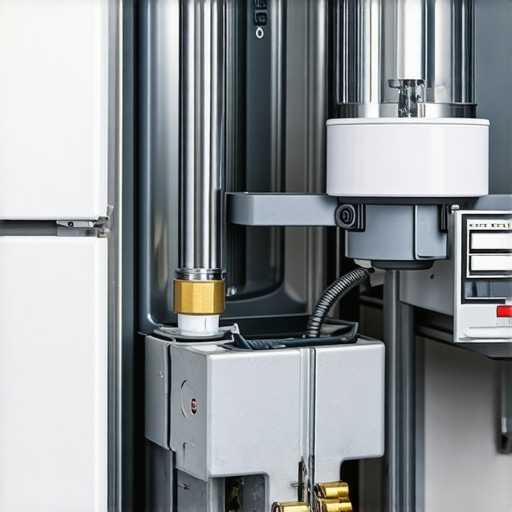
*Prompt: Illustration of an advanced dishwasher installation showing correct drain hose routing, leveling, and water inlet connection.*
Why Proper Parts and Installation Technique Matter for Your Warranty and Performance
Experts emphasize that correct parts selection and precise installation aren’t just about immediate operation—they safeguard your warranty and prolong appliance life. Manufacturers often specify certain parts and installation procedures, and deviation from these can result in denied warranty claims, especially during the critical warranty period. For example, using incompatible inlet valves or failing to secure mounting brackets properly can lead to leaks or mechanical failure, which aren’t covered once the warranty expires.
To reinforce your knowledge, review the most durable water hoses and ensure all installation procedures align with manufacturer instructions. Being vigilant about these details can save you from costly repairs and warranty disputes.
Have you ever fallen into this trap? Let me know in the comments. Proper understanding of these nuances enables better maintenance and saves money. Remember, a well-maintained dishwasher isn’t just about replacing parts—it’s about understanding their role at a deeper level.
Tools I Recommend for Long-Term Dishwasher Care
Maintaining your dishwasher’s performance requires more than just the right attitude—it demands reliable, precise tools. First and foremost, I swear by a high-quality digital angle gauge. Unlike traditional bubble levels, a digital gauge provides exact measurements, ensuring your appliance is perfectly leveled, which is critical for preventing warping or leaks. I personally use the digital angle gauge from Starrett because of its accuracy and durability. Besides leveling tools, a set of adjustable wrenches and a hex driver set are indispensable for adjusting feet and securing connections efficiently. I also recommend keeping a multimeter with a temperature probe on hand; it helps diagnose heating element issues without tearing the machine apart. Predicting future trends, I believe smart diagnostic tools will become standard, integrating seamlessly with your smartphone to prevent breakdowns before they happen.
How Do I Maintain My Dishwasher Over Time?
Consistent maintenance revolves around regular inspections and cleaning. Schedule a quarterly check of water inlet filters and spray arms to prevent clogs. Use a soft brush to clear debris and mineral deposits, which can reduce water flow and cleaning efficiency. Regularly run a cleaning cycle with vinegar or commercial descalers specifically designed for dishwashers—these help remove limescale buildup that can impede heating and water distribution. For a guided approach, I rely on detailed diagnostics from expert diagnostic tools, which streamline troubleshooting and save time. To prolong your dishwasher’s lifespan, consider installing a water softener in areas with hard water; this reduces mineral deposits and preserves internal components. Remember, small regular habits maintain efficiency and reduce repair costs. Engage in an annual professional inspection to catch subtle issues like worn-out door gaskets or compromised wiring—ignoring these can lead to costly repairs later. My last tip is to keep an eye on the dishwasher’s cycle times and water temperature settings, which directly influence performance and warranty validation. Using advanced monitoring tools now personalizes your maintenance routine and elevates your appliance’s longevity. Don’t forget, maintaining your dishwasher isn’t just about immediate fixes—it’s about creating a comprehensive care strategy. Try calibrating your temperature sensor monthly with a simple multimeter check; this ensures optimal cleaning and energy efficiency. For detailed instructions, see our guide on understanding dishwasher parts. Taking these extra steps now guarantees your appliance stays reliable for years to come.
The Little Lessons That Changed My Perspective
One unexpected realization was how profoundly proper parts selection influences long-term performance. Using manufacturer-approved components not only protects your warranty but also ensures your dishwasher operates at peak efficiency. I once thought that generic parts would suffice, but after a few costly repairs, I learned that cutting corners on parts is a false economy. Additionally, I’ve discovered that minor tweaks during installation—like securing connections tightly and following exact leveling procedures—can prevent a cascade of future problems. These lessons underscore the importance of detail-oriented care, which most homeowners overlook until frustration hits.
Another insight was how small misalignments can silently cause wear and tear. A slightly off-level dishwasher might seem trivial but can lead to warped frames or uneven spray arms, reducing cleaning performance over time. Routine maintenance, such as periodically checking connections and adjusting leveling if floors settle, can dramatically extend the lifespan of your appliance. Embracing these insider tips transforms routine maintenance from a chore into a preventive strategy that saves you money and stress in the long run.
Tools and Resources I Trust for Dishwasher Care
For precise leveling and diagnostics, I rely on a high-quality digital angle gauge, like the Starrett digital gauge. It provides accuracy that surpasses traditional bubble levels, ensuring your dishwasher sits perfectly every time. When it comes to parts, I often turn to durable supply hoses and proprietary components recommended by manufacturers, which safeguard warranties and operational longevity. For troubleshooting, professional diagnostic tools have been game-changers, allowing me to identify issues early and avoid unnecessary repairs. Investing in these tools and resources has empowered me to maintain my dishwasher confidently and effectively.
Choose Your Path: Take Action Today
Remember, mastering dishwasher maintenance is less about complex skills and more about consistent care and informed choices. By applying these insider insights and leveraging trusted tools, you’re setting yourself up for years of trouble-free operation. Whether you’re installing a new unit or troubleshooting an existing one, taking deliberate steps now can save you from costly headaches later. Your dishwasher is an essential part of your home—treat it with the attention it deserves, and it will reward you with reliable service for years to come. Don’t wait for problems to occur; start implementing these tips today and experience the difference firsthand.
What’s the most unexpected issue you’ve encountered with your dishwasher, and how did you resolve it? Share your story below!
.
Related Posts

Why you should never use a standard extension cord for your appliance
I will never forget the smell of melting plastic wafting…

Why Professional Leveling Prevents Costly Door Seal Failures
I vividly remember the day my dishwasher started leaking right…

How to Document Your Professional Install for Future Insurance Claims
I vividly remember the sinking feeling when my brand-new dishwasher…