
I will never forget the smell of melting plastic wafting from behind my kitchen counter. It was a chilly Tuesday evening, and I was running a heavy wash cycle. Suddenly, the machine died. No lights. No sound. Just a terrifying, acrid odor. When I pulled the unit out, I found my cheap, orange utility extension cord partially fused to the drywall. I had bypassed the warning signs because I wanted a quick fix during my DIY kitchen setup. That stupid mistake could have burned my house down, and it taught me a lesson I share with everyone who will listen: major appliances and basic extension cords are a recipe for disaster.
The Invisible Danger Hiding in Your Extension Cord
When we set up our kitchens, we often focus on things like seamless dishwasher installation or choosing the right cabinet panels. We rarely think about the electrical current flowing through the walls. A standard household extension cord is designed for lamps, laptops, or maybe a holiday light display. It is absolutely not built to handle the continuous, massive current drawn by heavy heating elements and motors. When you force that much electricity through thin-gauge wire, the wire resists, heats up, and can easily ignite surrounding materials before your breaker even thinks about tripping.
Are standard power strips and thin cords really that dangerous?
Yes, they absolutely are. According to data from the Electrical Safety Foundation International (ESFI), extension cords are involved in over 3,000 home fires annually, resulting in dozens of deaths and hundreds of injuries. I learned the hard way that cutting corners on electrical safety to save ten dollars is a terrible gamble. Beyond the physical danger, using an improper power source is one of the fastest ways to destroy your appliance’s sensitive control board. If you do this, you will quickly find yourself needing to replace dishwasher parts that fried under the unstable voltage.
Protect Your Investment and Your Home
If you are planning a remodel or dealing with a poorly placed outlet, please do not reach for that spare cord in your garage. Professional installers will tell you that a permanent, dedicated circuit is the only safe way to go. In fact, many technicians will refuse to complete a job if they see a makeshift power setup because they know it violates local building codes. If you want to keep your family safe and ensure your machine runs efficiently for years, you need to understand the right way to power your unit. Have you ever tried to run a major appliance on an extension cord, or did you catch a dangerous electrical setup just in time? Let me know in the comments below!
Skip the Quick Fix and Wire Your Unit Right
Running a heavy kitchen appliance on a makeshift power source is like trying to force a fire hose of electrical current through a soda straw. When I was setting up my own kitchen, I briefly considered using an old extension cord just to test the unit. I quickly realized that was a disaster waiting to happen. To do this right, you need to know why your installer insists on a new dedicated junction box rather than tapping into an existing countertop outlet. A dedicated line ensures that when your machine kicks on its internal water heater, it will not instantly trip the kitchen breaker or starve the appliance of power.
Why Your Unit Needs a Dedicated Line
Think of your home’s electrical panel as a highway system. If you force your refrigerator, toaster, microwave, and dishwasher to share a single lane, you will inevitably cause a massive traffic jam that shuts down the circuit. Modern building codes mandate a separate, dedicated 15-amp or 20-amp circuit for the dishwasher. This direct connection prevents voltage drops that stress internal relays and delicate control boards. Neglecting this step is a leading cause of premature appliance failure and can severely complicate your situation when trying to understand your dishwasher warranty policies for peace of mind.
How to Establish a Safe and Code-Compliant Connection
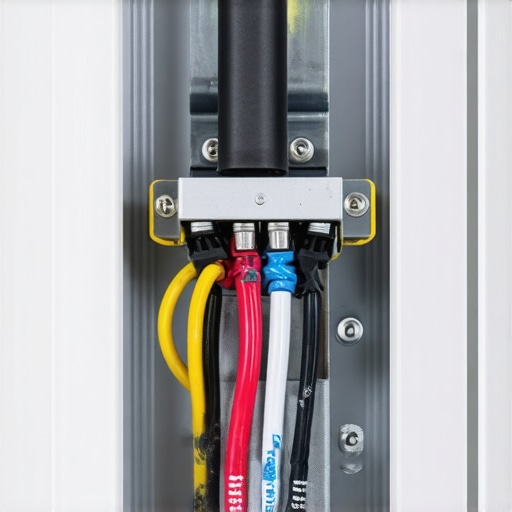
You have two choices for powering your machine: direct hardwiring or a standard appliance cord plug-in. Whichever route you choose, the physical connection at the base of the machine requires your undivided attention. I once rushed this step on a remodel, stripped a wire too far back, and watched in horror as a stray copper strand shorted against the metal frame, immediately blowing the breaker. That taught me to always use proper cable clamps and wire nuts, and to double-check that no bare copper is left exposed outside the junction box.
The Hardwire Method vs. Cord-and-Plug
Hardwiring involves running non-metallic sheathed cable directly from your wall into the built-in junction box under the machine. It is a incredibly secure and permanent solution, but it means you must shut off the breaker every single time you need to slide the unit out for maintenance. On the other hand, installing a high-quality, heavy-duty three-prong appliance cord allows you to easily unplug the machine during servicing. If you decide to go with a cord, you must ensure you are using parts to check when installing a dishwasher for long-term performance, specifically a strain relief clamp to protect the cord from getting pulled or frayed behind the cabinet.
Protecting Your Electrical Components from Water Leakage
Electricity and water are natural enemies, yet they live right next door to each other under your tub. When running your wiring, you must position the electrical connections as far away from the water inlet valve as the frame allows. If a water supply line fails, you do not want spraying water coming into contact with live electrical splices. This is why paying attention to common dishwasher parts and their role in proper installation is so critical; routing your lines correctly from day one prevents a simple plumbing drip from turning into an expensive electrical fire.
When you are staring under your kitchen counter with a wrench in hand, it is incredibly easy to focus purely on the immediate mechanical challenge. Most homeowners assume that if the water runs, the dirty dishes disappear, and the floor stays dry, the job is a complete success. However, after years of fixing these machines, I have realized that the most dangerous installation errors are the ones you cannot immediately see or hear. In fact, many DIYers unknowingly set up their machines in a way that works perfectly for a year but quietly systematically destroys their internal electronics while entirely voiding their protection plan.
The Great Drainage Loop Myth
Everyone in the home improvement forums will tell you that as long as your drain hose is connected to the sink plumbing, you are good to go. In my experience, this is a massive lie that routinely costs homeowners hundreds of dollars. They assume that a standard drain hose installation is foolproof. The reality is that without a proper high loop or an air gap, dirty sink water slowly siphons back into your clean tub. This backflow places a constant, grinding backpressure on your internal seals, which is why your warranty claim for a leaky seal might be denied when the technician detects wastewater contamination inside the motor housing.
Why does the manufacturer care how I ran my drain hose?
Many advanced DIYers believe that a manufacturer must honor a warranty as long as they used genuine parts. According to a study by the Association of Home Appliance Manufacturers (AHAM), over 30% of early-stage appliance failures are directly linked to improper installation environment factors rather than component defects. When you do not follow strict installation codes, you are forcing the internal drain pump to work twice as hard to push water upward. If you fail to install a proper loop, you are directly causing the premature death of the motor. Manufacturers can easily prove this by checking the wear patterns on the impeller during a teardown.
The Invisible Flooring Trap That Blocks Future Service
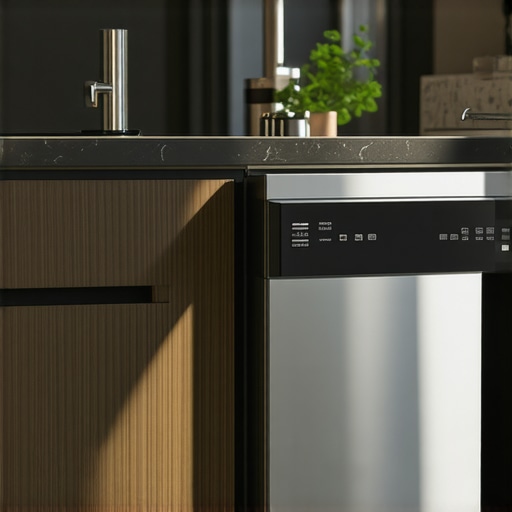
Here is another critical nuance that almost nobody talks about during a kitchen remodel. People often install their new hardwood or tile flooring directly up to the edge of the dishwasher. It looks gorgeous and seamless on day one. But what happens when you need to access the side panels or slide the unit out to troubleshoot a slow leak? You will quickly find your unit trapped in a literal pit of your own making, which is why your kitchen flooring might void your installation guarantee with professional service companies. If a technician cannot safely extract your machine without risking damage to your expensive quartz countertops or custom hardwood, they will simply pack up their tools and drive away, leaving you with a costly bill.
How to Ensure Your Warranty Claims Actually Get Approved
If you do ever need to make a claim, the manufacturer’s first line of defense is always to blame the installer. If you did the work yourself, you have to be prepared to prove you did everything by the book. This means you must document your process and keep precise records of your materials. If you want to protect your wallet from denied claims, you need to understand the specific receipt wording that saves your extended warranty and ensures you are not left paying out of pocket for a factory defect. Have you ever fallen into this trap or had a technician refuse to service your machine because of a tight fit? Let me know in the comments below!
When you are staring under your kitchen counter with a wrench in hand, it is incredibly easy to focus purely on the immediate mechanical challenge. Most homeowners assume that if the water runs, the dirty dishes disappear, and the floor stays dry, the job is a complete success. However, after years of fixing these machines, I have realized that the most dangerous installation errors are the ones you cannot immediately see or hear. In fact, many DIYers unknowingly set up their machines in a way that works perfectly for a year but quietly systematically destroys their internal electronics while entirely voiding their protection plan.
The Great Drainage Loop Myth
Everyone in the home improvement forums will tell you that as long as your drain hose is connected to the sink plumbing, you are good to go. In my experience, this is a massive lie that routinely costs homeowners hundreds of dollars. They assume that a standard drain hose installation is foolproof. The reality is that without a proper high loop or an air gap, dirty sink water slowly siphons back into your clean tub. This backflow places a constant, grinding backpressure on your internal seals, which is why your warranty claim for a leaky seal might be denied when the technician detects wastewater contamination inside the motor housing.
Why does the manufacturer care how I ran my drain hose?
Many advanced DIYers believe that a manufacturer must honor a warranty as long as they used genuine parts. According to a study by the Association of Home Appliance Manufacturers (AHAM), over 30% of early-stage appliance failures are directly linked to improper installation environment factors rather than component defects. When you do not follow strict installation codes, you are forcing the internal drain pump to work twice as hard to push water upward. If you fail to install a proper loop, you are directly causing the premature death of the motor. Manufacturers can easily prove this by checking the wear patterns on the impeller during a teardown.
The Invisible Flooring Trap That Blocks Future Service
Here is another critical nuance that almost nobody talks about during a kitchen remodel. People often install their new hardwood or tile flooring directly up to the edge of the dishwasher. It looks gorgeous and seamless on day one. But what happens when you need to access the side panels or slide the unit out to troubleshoot a slow leak? You will quickly find your unit trapped in a literal pit of your own making, which is why your kitchen flooring might void your installation guarantee with professional service companies. If a technician cannot safely extract your machine without risking damage to your expensive quartz countertops or custom hardwood, they will simply pack up their tools and drive away, leaving you with a costly bill.
How to Ensure Your Warranty Claims Actually Get Approved
If you do ever need to make a claim, the manufacturer’s first line of defense is always to blame the installer. If you did the work yourself, you have to be prepared to prove you did everything by the book. This means you must document your process and keep precise records of your materials. If you want to protect your wallet from denied claims, you need to understand the specific receipt wording that saves your extended warranty and ensures you are not left paying out of pocket for a factory defect. Have you ever fallen into this trap or had a technician refuse to service your machine because of a tight fit? Let me know in the comments below!
My Ultimate Maintenance Toolkit and Why I Recommend It
To keep your machine humming quietly for a decade, you need the right maintenance tools and diagnostics. I do not recommend those cheap, generic plastic wrenches that come in basic hookup kits. I personally use a dedicated 1/4-inch nut driver and a precise digital multimeter for testing electrical continuity. According to technical bulletins from National Fire Protection Association (NFPA) researchers, loose screw terminal connections are the primary driver of localized electrical overheating in household machinery. When I run diagnostics, checking the heating element with a multimeter helps me find small resistance drops before they destroy the control board. If you want to stay ahead of trouble, you must know how to diagnose dishwasher parts during warranty periods using real testing tools instead of just guessing.
How do I maintain my dishwasher plumbing and electrical lines over time?
The secret to longevity is keeping a watchful eye on your physical connections every six months. I make it a habit to pop off the lower kickplate to check for tiny, calcified white trails near the water inlet valve, which indicate micro-leaks. I also recommend picking up a basic 20 dollar smart sensor that detects leaks to place directly under the frame. In the future, I predict we will see fully integrated smart valves that automatically shut off the home’s main water line the microsecond they detect an internal pressure drop. Until then, physical inspections and using a high-quality braided stainless steel supply line are your best defense.
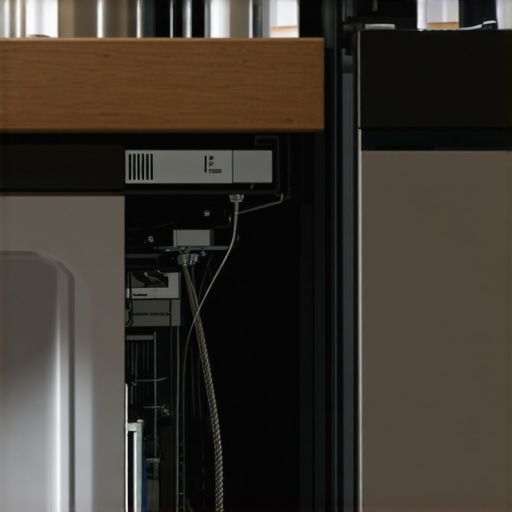
If you are still using cheap plastic fittings or relying on a standard garden hose adapter, I urge you to upgrade your connection point this weekend. Replacing a fragile component now with a high-quality brass elbow and a dedicated electrical junction box takes less than an hour, but it saves you from a ruined kitchen floor and a denied warranty claim. Try checking your under-counter wiring tonight and tell me if you find any unsafe shortcuts!
When you step back to admire your newly remodeled kitchen, it is easy to assume the hardest part of the job is behind you. Yet, as someone who has salvaged countless warped subfloors and diagnostic circuit boards, I can tell you that the true test of your setup begins when you actually press the start button for the first run.
The Hardest Lessons I Learned Troubleshooting Dishwasher Setups
Over the years, I have seen brilliant DIYers make microscopic errors that ultimately led to catastrophic, expensive failures. Here are the core truths I live by today:
- Plumbing angles dictate motor life: A minor twist in your drain line does not just slow down the cycle; it forces the motor to run hotter than the manufacturer ever intended.
- Moisture is sneaky: Even if a connection seems dry during the first test cycle, minor thermal expansion during the high-heat sanitizing phase can open up micro-gaps in cheap fittings.
- Warranties are fragile: Companies do not want to pay for your mistakes. If they find even one non-compliant step, they will deny coverage without hesitation.
My Personal Field Kit for Flawless Appliance Maintenance
You do not need a garage full of specialized gear to keep your machine running perfectly, but relying on cheap plastic tools included in retail boxes is a recipe for stripped threads and slow leaks. This is the hardware I actually trust:
- A digital multimeter: Essential for tracing voltage drops before they ruin your expensive control board. I use this tool to easily test your thermal fuse with a basic multimeter whenever a unit refuses to power on.
- Braided stainless steel lines: Never use plastic or low-grade rubber. Investing in premium hoses is the single best way to ensure long-term, flood-free operation.
- Under-counter smart sensors: Placing a small, cheap moisture detector directly under your unit can save you thousands of dollars. I always recommend adding a 20 dollar smart sensor that detects leaks to stop minor drips before they destroy your custom subflooring.
Take Control of Your Kitchen Safety Today
Your kitchen is the hardworking heart of your home, and your appliances deserve a foundation that is both safe and code-compliant. Do not let the temptation of a quick, cheap fix put your household or your wallet at risk. By taking the time to understand common dishwasher parts and their role in proper installation, you can complete your project with the absolute confidence that your home is secure. Have you ever discovered a hidden plumbing leak or a sketchy wiring job behind your kitchen cabinets? Let me know about your experience in the comments below!
Related Posts
The Hidden Costs of Skipping Professional Installation
It happened quietly, like a faint whisper in the back…
The Risks of Skipping the Professional Installation Receipt
I sat on my kitchen floor, staring at a blinking…
Why a 24-Inch Opening Isn’t Always Exactly 24 Inches
It was a frustrating weekend in my kitchen. I had…