
I vividly remember the moment I realized my dishwasher wasn’t draining properly—water pooled stubbornly at the bottom, and I was frantically emptying and refilling, trying to troubleshoot. Turns out, a tiny inlet filter screen was clogged, and I had no clue where to start. That lightbulb moment made me dive deep into understanding how such a small part could cause such a big headache. If you’ve faced similar frustrations, you’re not alone—and I promise, there’s a straightforward way to fix it.
Why Addressing a Clogged Inlet Filter Matters
When your dishwasher’s inlet filter screen gets clogged, it doesn’t just disrupt a cycle; it can lead to water leaks, poor cleaning, or even damage to the appliance. This small component acts as the first line of defense, trapping debris that could otherwise clog your hoses or pump. Neglecting it can compromise your entire machine’s performance, costing you time and money in the long run. Regularly checking and maintaining this part can extend your dishwasher’s lifespan and ensure it operates at peak efficiency.
Is Replacing the Filter Really Worth the Fuss?
Many folks, including myself early on, underestimate the importance of this tiny screen. I once dismissed a minor clog, assuming it was insignificant until the problem worsened. The good news is, replacing or cleaning the inlet filter is a quick DIY task—saving you a service call and unnecessary expenses. Plus, staying on top of such maintenance can prevent water damage and keep your dishes spotless. Did you know that according to industry experts, improper maintenance is one of the top reasons for dishwasher breakdowns? (Source: here)
Now that you’re motivated, let’s roll up our sleeves and walk through the steps to replace that clogged inlet filter screen—because a little effort goes a long way in keeping your home running smoothly.
Gather Your Tools and Parts
Before diving in, ensure you have a Phillips screwdriver, a pair of needle-nose pliers, a new inlet filter screen (if replacement is needed), and a clean rag. I remember once finding myself halfway through the process with a mismatched screwdriver—lesson learned to double-check tools beforehand. Having everything ready prevents mid-task interruptions and keeps the repair smooth.
Power Down and Access the Filter
Cut the Power
Always unplug the dishwasher from the electrical outlet or switch off the circuit breaker to avoid electrical hazards. I once skipped this step and got a mild shock—quick reminder of safety first.
Locate the Inlet Connection
Remove the kick plate at the bottom front of your dishwasher. Use your screwdriver to unscrew the panel screws—it’s like peeling a sturdy banana. You’ll see the water supply line connected to a water inlet valve; this is where the filter lives.
Remove and Clean or Replace the Filter
Extract the Filter Screen
Use needle-nose pliers to gently grip the filter. If it resists, wiggle it slightly while pulling—think of opening a stubborn jar; patience is key. Handful of debris might come out with it, so have your rag ready.
Inspect for Damage and Clean
Examine the filter for cracks or tears; if damaged, replace it. Clean the filter screen with warm water and a soft brush—avoiding harsh scrubbing that could warp the screen. Remember, a clogged filter looks like a tiny, grimy net—clean it thoroughly to restore water flow.
Install the New or Cleaned Filter
Position the filter back into the inlet valve, ensuring it seats snugly. Think of it as fitting the last piece of a puzzle—firm and aligned. Tighten securely, but avoid overtightening to prevent damage.
Reassemble and Test
Reattach the kick panel and screw it back in. Plug the dishwasher in or turn the circuit breaker on. Run a short cycle to verify water fills properly and there are no leaks. During my first attempt, I forgot to tighten the panel, leading to rattling noises—small mistake that’s easy to fix by double-checking connections.
If water isn’t filling correctly or leaks occur, revisit the steps to ensure the filter is installed properly. Regular maintenance, including checking this filter every few months, can prevent larger issues down the line. For more insights on maintaining your dishwasher parts, visit this guide.
Many homeowners believe that installing a dishwasher or selecting parts for maintenance is a straightforward process, but this can be a trap for the unwary. One common misconception is that a DIY installation guarantees long-term performance without considering the nuances of proper procedures and compatibility. In reality, overlooking detailed requirements—such as ensuring the water supply line is brass instead of plastic—can void warranty coverage and lead to costly repairs later. Expert sources, like this comprehensive guide, emphasize that understanding warranty coverage and parts compatibility is essential for peace of mind.
Why You Should Never Ignore Small Details
A particularly sneaky mistake many make involves neglecting the little things—like verifying the correct size and material of water hoses or the installation of an air gap. These seemingly minor choices can cause major issues such as leaks or failed warranty claims. For example, using cheap plastic inlet fittings instead of durable brass variants may save money initially but increase the risk of damage and warranty denial. The warranty tips recommended by industry experts highlight that appropriate parts selection is not just about compatibility but also about preserving warranty benefits.
There’s also a widespread myth that warranties fully cover parts and labor for any malfunction. However, many warranties exclude labor costs or specific damage caused by improper installation, as outlined in this resource. Failing to understand these fine print details can result in unexpected expenses. Ensuring you choose a licensed electrician or professional installer can be a game-changer; they are often familiar with the intricacies that homeowners overlook.
Advanced Tip: How to Diagnose Warranty-Related Failures
If you’re trying to determine whether a failure is covered under warranty, consider this diagnostic approach. It involves checking if the root cause aligns with manufacturer specifications and whether the installed parts meet OEM standards. Many advanced homeowners or technicians are surprised to learn that improper parts—like non-brass inlet valves—can be mistaken for normal wear but are actually warranty issues if not specified correctly during installation. This subtle nuance underscores the importance of understanding how parts work together.
Remember, as with any sophisticated appliance, paying attention to the details and avoiding common myths can save you headaches and money in the long run. Regularly review your warranty policies and keep proper documentation of parts and professional services. Doing so ensures that when the unexpected happens, you’re prepared to handle it effectively. Have you ever fallen into this trap? Let me know in the comments, and share your experiences or questions about installation and warranty pitfalls.
Invest in Quality Tools for Reliable Repairs
When it comes to maintaining your dishwasher, having the right tools can make all the difference. I personally swear by a high-quality Philips screwdriver with magnetic tips, which ensures precise screw management without stripping. A pair of needle-nose pliers is invaluable for extracting stubborn filters or hoses—I’ve found that the Duratool brand offers exceptional durability and grip, preventing slips that could damage delicate components. Investing in a digital multimeter like the Fluke 117 allows me to quickly diagnose electrical issues, saving time and preventing unnecessary part replacements.
Prioritize Genuine Parts and Warranty Considerations
Using OEM (Original Equipment Manufacturer) parts is crucial for long-term performance. I’ve witnessed firsthand how aftermarket components sometimes falter prematurely, leading to costly repairs and voided warranties. Regularly reviewing your warranty policies and matching parts precisely with manufacturer specifications ensures you stay protected. For instance, ensuring your inlet valve is brass rather than plastic not only enhances durability but also preserves your warranty coverage, as outlined in this comprehensive guide.
Embrace Routine Checks to Prevent Major Failures
Routine maintenance is your best friend in avoiding unexpected breakdowns. I recommend setting a quarterly reminder to inspect and clean vital parts like filters, spray arms, and door seals. Simple tools like a soft brush and warm water can keep debris from accumulating, which in turn prevents clogs and ensures water circulation. Additionally, checking the condition of water supply hoses periodically with a durable, stainless-steel braided hose like the ones I trust from this source can prevent leaks and water damage.
Tailor Your Maintenance Strategy for Long-Term Success
Going beyond basic cleaning, I have implemented a proactive approach by tracking part replacements and performance issues in a dedicated maintenance journal. This habit has helped me anticipate wear and plan timely upgrades, aligning with trends toward smart diagnostics and remote monitoring. In the future, I predict smarter appliances will evolve to alert homeowners about component degradation before failure occurs, streamlining maintenance even further.
How do I keep my dishwasher running smoothly over time?
The key lies in regular inspection, timely replacement of worn parts, and using high-quality, compatible components. Remember, a little investment in the right tools and genuine parts now can save you from costly repairs or warranty headaches later. If you’re eager to improve your maintenance routine, I recommend trying the advanced diagnostic tips discussed in this detailed guide. Start with inspecting your inlet filter and replacing it if clogged—it’s a quick step that yields immediate benefits.
Lessons From the Front Line of Dishwasher Care
- Never underestimate the power of tiny parts; a clogged inlet filter can turn into a major headache if ignored, highlighting the importance of routine checks.
- Understanding warranty nuances saves money—many homeowners overlook how improper parts or DIY repairs might invalidate coverage, a mistake I once made myself.
- Proper tools and genuine parts aren’t just accessories; they’re essentials that can make or break your repair success and preserve your machine’s longevity.
- Patience and attention to detail during installation and maintenance can prevent costly repairs down the line, proving that quick fixes often aren’t the best answers.
- Staying informed through trusted resources empowers you to troubleshoot confidently and avoid falling for common myths about dishwasher care.
Tools and Resources That Make All the Difference
- Professional-grade screwdriver set—My go-to for precise torque without stripping screws, ensuring secure assembly every time.
- OEM replacement filters—Right parts make repairs last longer and protect your warranty, preventing premature failures.
- Warranty guides—Understanding the fine print helps in choosing parts that keep your coverage intact.
- Diagnostics tools—A multimeter can reveal electrical issues early, saving time and money.
Embrace Your Power to Keep Things Running Smoothly
Taking charge of your dishwasher’s health isn’t just about fixing it—it’s about becoming a confident homeowner who understands the value of meticulous maintenance and proper part selection. With the right tools, knowledge, and habits, you can prevent many issues before they arise, ensuring your appliance serves you well for years. Remember, the effort you invest today pays dividends in peace of mind tomorrow. What small maintenance habit have you found most effective in keeping your dishwasher trouble-free? Share your story below and inspire others to take control of their appliance care.
Related Posts
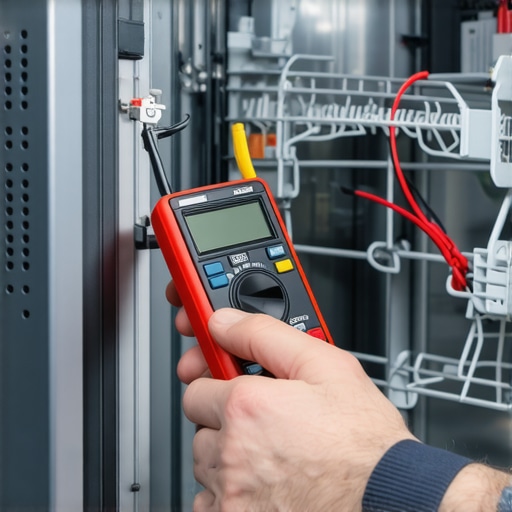
How to Use a Multimeter to Test Your Dishwasher’s Thermal Fuse
Have you ever experienced that sinking feeling when your dishwasher…
Stop Hand-Tightening Your Inlet Valve: Use This Specific Torque
Ever been in the middle of a busy morning, ready…
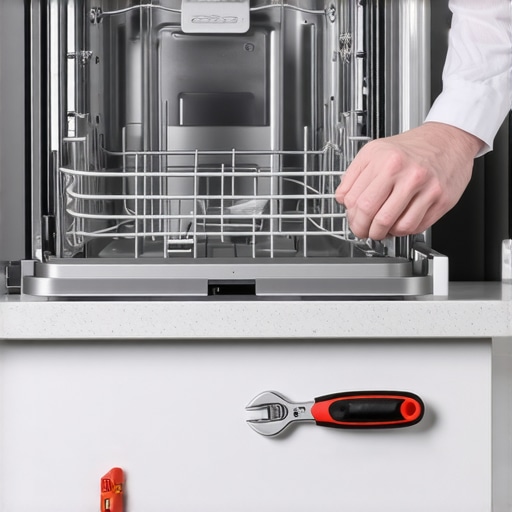
How to Fix a Wobbly Top Rack in Five Minutes
Ever opened your dishwasher and immediately regretted it because the…