
There was a morning not long ago when I opened my dishwasher, only to be greeted by a loud squeal and a cycle that would never finish. Frustration crept in as I realized I didn’t have the right spare parts on hand, forcing me to scramble at the worst possible moment. That lightbulb moment made me realize something crucial: every dishwasher owner should keep a small toolkit of replacement parts handy. It’s not just about avoiding inconvenient breakdowns; it’s about taking control of your appliance and saving money in the long run.
Why Keeping Replacement Parts Close Is a Smart Move
Over time, even the most reliable dishwashers will encounter wear and tear. Components like door gaskets, spray arms, filters, and even control boards can fail unexpectedly. When that happens, waiting for a technician or rushing to the store can turn into a costly and time-consuming ordeal. But if you have the essential parts ready, a quick DIY fix can be a game-changer. Not only does this minimize downtime, but it also ensures you’re not overpaying for unnecessary service calls or parts marked up at retail stores.
From personal experience, I’ve learned that a proactive approach to maintenance can extend your dishwasher’s lifespan and improve performance. For example, replacing a worn spray arm can restore water coverage and give your dishes a thorough clean. Understanding your appliance’s common failure points and having the right replacements can make all the difference.
Is Stocking Spare Parts Really Worth All the Fuss?
Initially, I thought I could just call a professional when something broke. Turns out, that often means waiting days, especially during busy seasons. Plus, DIY fixes are surprisingly straightforward once you know what parts to use and how to install them correctly. To build your own mini parts arsenal, start by familiarizing yourself with the most common dishwasher components. I recommend checking this comprehensive guide that details what every owner should keep on hand.
Early in my own experience, I mistakenly bought cheap, incompatible parts from unreliable sources, leading to more problems. That taught me the importance of sourcing high-quality replacements and understanding warranty coverage. For more insights on protecting your investment, you can explore this installation checklist.
Having a few key parts ready means I can address minor issues myself—saving money and gaining peace of mind. So, do you face unpredictable breakdowns or costly repairs? If so, it’s time to consider what parts you should always keep nearby. Stay tuned, because I’ll walk you through the essential replacements every dishwasher owner should have in their toolkit.
Identify the Faulty Component and Gather the Right Tools
First, confirm which part is causing issues. For example, if dishes are not drying properly, the problem might be with the heating element or moisture sensor. Use your dishwasher’s manual or understanding dishwasher parts guide to identify and locate the suspect component. Next, assemble a basic toolkit: screwdrivers, pliers, a multimeter for testing electrical parts, and replacement parts sourced from a reliable supplier to avoid compatibility issues like I experienced when I bought cheap parts that failed quickly. Having the right tools and quality parts is crucial for a smooth repair.
Disconnect Power and Water Supply Before Starting
Always unplug the machine and turn off the water supply to prevent accidents. Think of this step like turning off your home’s main electricity before working on wiring—it’s about safety first. For detailed safety procedures, consult DIY installation safety tips to avoid damaging your appliance or injuring yourself.
Remove and Access the Faulty Part Carefully
Remove the panel or components obstructing access, which varies by model. Use your manual or common replacement techniques guide for step-by-step instructions. Remember, some parts are fragile—like door gaskets or control boards—so handle them gently to prevent additional damage. During my repair, I once broke a clip because I used too much force—learning to handle parts delicately saves time and money.
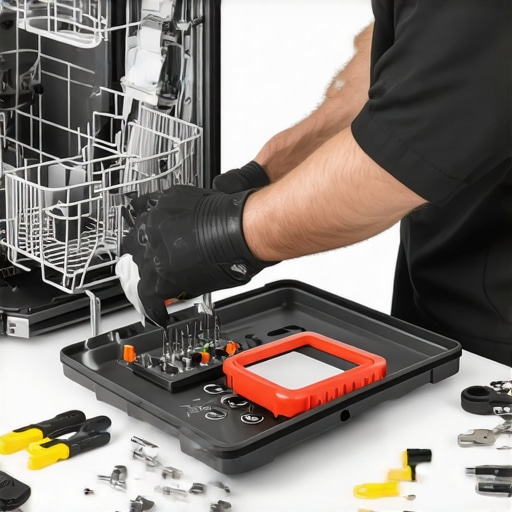
Insert an image here showing a technician carefully removing a dishwasher panel and locating internal components. This visual guide clarifies the process and helps prevent accidental damage.
Test the Part Before Final Reassembly
Before sealing everything back up, test the new part. For electrical components like the control board or sensors, use a multimeter to verify continuity. For heating elements, check resistance according to the specifications. This step ensures your repair is effective and helps avoid reinstalling faulty parts, which could void warranty coverage or cause further damage. Consulting the installation checklist can guide you through proper testing procedures and proper part installation, which is vital when aiming for warranty compliance or preventing future failure.
Reassemble and Keep Documentation for Warranty
Carefully reassemble the dishwasher, reversing removal steps. Secure all panels and fittings tightly, but avoid over-tightening to prevent cracking. Once reassembled, restore power and water, then run a short cycle to confirm proper operation. Keep detailed records—take photos of the replaced parts, save your purchase receipts, and note the date of repair. Proper documentation, such as photographs and dates, can be invaluable if you need to file a warranty claim later or prove your maintenance efforts. Learn more about how to maximize your warranty coverage at warranty maximization tips.Many homeowners believe that purchasing cheap replacement parts or skipping professional installation saves money, but in reality, these shortcuts often lead to bigger expenses down the line. A prevalent myth is that all dishwasher parts are interchangeable; however, using incompatible or low-quality components can cause internal damage and void your warranty, as highlighted in this comprehensive guide. Additionally, some assume that warranties cover all damages, but many policies exclude issues caused by incorrect installation or third-party parts, emphasizing the importance of understanding your warranty coverage and its limitations.
Common pitfalls include neglecting to verify the authenticity of replacement parts—counterfeit items not only fail prematurely but may also void warranty claims. As experts warn, sourcing parts from reputable suppliers and consulting installation guides, like top installation tips, can help avoid these costly mistakes.
A nuanced aspect many overlook is the significance of proper documentation after repairs. Keeping detailed records, including serial numbers, purchase receipts, and photographs, can be crucial when filing warranty claims. This proactive approach ensures that you are prepared if issues arise, aligning with advice found in warranty management resources.
Make sure you aren’t falling into these common traps by scrutinizing your repair and installation processes. Remember, knowledge is your best tool to maximize the lifespan of your dishwasher and protect your investment. Have you ever fallen into this trap? Let me know in the comments.
Equip Yourself with Precision Tools for Longevity
Maintaining your dishwasher requires more than just intuition; it demands specific, high-quality tools that can handle delicate components without causing damage. I personally rely on a precision screwdriver set with interchangeable bits, which allows me to access various panels and screws snugly fitting different models. A digital multimeter is essential, not only for testing electrical parts like sensors and control boards but also for diagnosing intermittent faults that are otherwise tricky to detect. I’ve found that investing in a quality multimeter with auto-ranging capabilities significantly reduces test time and increases diagnostic accuracy.
When it comes to parts replacement, I only buy from reputable suppliers that provide compatibility information and warranty support. Using high-quality, OEM-certified parts ensures durability and retention of your warranty.
How do I keep my tools in top shape over time?
Regularly clean your tools, especially the blades and contacts on your multimeter, to prevent corrosion. Store them in a dry environment and check their calibration periodically. For electrical testing equipment, I suggest using a calibration device annually to maintain measurement accuracy. Modern toolkits are increasingly integrated with digital guides and troubleshooting apps—consider connecting your multimeter or inspection camera via Bluetooth to access real-time diagnostics and tutorials, simplifying repairs and preventing misdiagnoses.
Future of Dishwasher Maintenance Tools
As technology advances, expect maintenance tools to become more intelligent and connected. From smart diagnostic apps to AI-powered troubleshooting, the future will empower homeowners to perform complex repairs with confidence. Embracing these innovations now can save you time and money down the line, while also ensuring your appliance continues to perform optimally.
Make Your Maintenance Routine Smarter Today
If you’re serious about prolonging your dishwasher’s lifespan, start by integrating a smart installation checklist and maintaining your tools regularly. I recommend testing your control board with a multimeter, as described in this step-by-step guide, to catch issues early and avoid costly repairs. Take action now and make your maintenance process more precise, efficient, and future-ready.
The Hardest Lesson I Learned About dishwasher,installation,parts,warranty
One of my most eye-opening experiences was realizing that even a small oversight—like using incompatible replacement parts—could invalidate my warranty and lead to additional costs. It taught me the importance of sourcing authentic, high-quality components and understanding the fine print of warranty policies. Now, I always double-check part compatibility and keep detailed repair records to protect my investment.
3 Myths About dishwasher,installation,parts,warranty That Held Me Back
Initially, I believed that all parts were interchangeable and that any DIY repair would void my warranty. Both are misconceptions. Proper installation and authentic parts are crucial, and knowing your warranty terms ensures you get the protection you deserve. Investing in trustworthy sources and education made a significant difference.
What Experts Won’t Tell You About dishwasher,installation,parts,warranty
Professionals often keep quiet about how critical proper documentation and part sourcing are for warranty claims. They know that overlooked details—like keeping receipts and photos—can save you money and hassle later. Embracing this insider knowledge empowers you to handle repairs confidently and safeguard your appliance.
My Essential Toolkit for Longevity
I rely on a precision screwdriver set, a reliable digital multimeter, and high-quality replacement parts from reputable suppliers. These tools and resources make DIY repairs straightforward and reduce the risk of damage. For top-notch parts, I trust OEM-certified components that come with warranties—ensuring durability and warranty compliance. Keep these essentials handy to tackle most common dishwasher issues effectively.
Where to Go from Here
Start by reviewing the comprehensive warranty and parts guide to understand your rights and options. Then, assemble your toolkit, consult trusted sources like replacement techniques, and schedule regular maintenance check-ups. Taking these proactive steps ensures your dishwasher performs optimally for years to come.
Your Turn to Try
Now that you have these insider lessons and tools, are you ready to confidently perform your own dishwasher repairs? What’s holding you back from upgrading your DIY skills? Let me know below and share your experiences or questions!
.
Related Posts
The $6 Plastic Drain Plug That Kills Your Pump
It was a quiet Saturday morning when I heard that…
The $8 Brass Elbow That Outlasts Any Plastic Alternative
I remember the first time I struggled with my dishwasher…
The Difference Between a $5 Plastic Valve and the Brass Fitting You Actually Need
It was late on a Saturday afternoon when I finally…