
It happened to me just last week. I was finally finishing dinner when suddenly, I noticed water slowly creeping up from my kitchen sink. At first, I thought it was just a minor clog, but then I saw it—this unmistakable backflow of dirty water sitting stubbornly in the sink basin, battling against my efforts to clear it. That lightbulb moment hit me hard: I had overlooked something simple yet crucial to prevent this mess.
Why Unclogging the Drain Isn’t Enough
Every homeowner who installs a dishwasher or has a busy kitchen knows that sink water backing up is more than just an annoyance—it’s a health risk and a potential plumbing disaster. Many people try to fix this by periodically cleaning the drain or using chemical uncloggers, but those are only band-aid solutions. What really makes a difference is a little-known trick involving your drain hose that keeps water flowing away from your sink and prevents nasty backflow issues.
Is a Drain Hose Trick Really Worth the Effort
I admit, I was skeptical at first. Before I learned this simple hack, I had spent hours on costly repairs, convinced I needed to replace my plumbing entirely. But early on, I made a mistake: I didn’t properly secure the drain hose, which allowed air to bypass the intended water flow path. That mistake cost me months of frustration.
Since then, I’ve been dedicated to sharing this knowledge, because preventing sink backflow isn’t just about fixing the problem—it’s about understanding it. If you’ve faced the same recurring headaches, you’re not alone. And the good news? With a few easy adjustments, you can put an end to this issue for good.
Now, let’s dive into the step-by-step solution that transformed my kitchen. Trust me, you’ll want to see how a tiny tweak can save you from future messes and health hazards.
Secure the Drain Hose Correctly to Prevent Backflow
My first attempt at fixing my kitchen sink backflow was to tighten the hose clamp, but I overlooked the high loop—an essential step. During my messy experiment, I pulled the hose up higher under the sink, creating a loop at least 32 inches above the drain connection, which acts as a siphon break. This simple adjustment drastically reduced water backup and prevented foul odors from returning. To do this, disconnect the dishwasher from power and water, then carefully detach the drain hose. Use a sturdy zip tie or a proper clamp to secure the hose so it makes a high loop—this prevents dirty water from siphoning back into your sink. Make sure the hose is supported to stay in place, avoiding sagging that could defeat the purpose.
Use a High Loop for Gravity Assistance
Think of the high loop as a mountain pass for water—water can only flow downhill, so elevating the hose prevents it from flowing back. When installing, keep the loop at least 32 inches above the drain to ensure gravity does its job. During my fix, I used metal brackets attached to the cabinet wall to hold the hose securely in place—this kept the loop intact even when tugging or cleaning under the sink. Proper routing of this hose minimizes the chance of air bypassing the trap, which causes backflow. For more detailed guidance on efficient hose routing and securing techniques, check out this guide on dishwasher parts and installation best practices. Additionally, ensuring your hose is free of kinks and obstructions is critical for proper water flow. If you’ve ever experienced a lingering smell or water backup, your high loop might be the culprit. When I implemented this fix, I noticed an immediate difference—no more messy backs or foul odors. To secure the hose, avoid using unreliable materials like electrical tape; instead, opt for approved clamps or brackets to ensure longevity and safety. Regularly inspect the hose and its supports to confirm it remains elevated and unobstructed over time. Remember, a well-secured high loop isn’t just an aesthetic detail—it’s a vital component in maintaining a healthy, mess-free kitchen. For comprehensive tips on selecting the right parts and installation techniques, visit maximizing your dishwasher’s warranty through proper parts.Many homeowners believe that simply installing a dishwasher correctly is enough to guarantee long-term performance and warranty coverage, but in my experience, that’s a misconception that can lead to costly mistakes. One common myth is that all replacement parts are created equal—however, choosing OEM (Original Equipment Manufacturer) parts over generic or third-party options can dramatically influence your warranty validity. According to appliance expert advice, using non-approved parts may void your warranty and even cause further damage, as highlighted in this guide on proper installation parts. Another area many overlook is installation nuances; even a minor misstep—like improper securing of hoses or neglecting the high loop—can invalidate warranty claims during water-back issues or leaks. It’s vital to understand that warranties often exclude damages resulting from improper setup, so investing in professional installation isn’t just about convenience—it’s about protection.
Why do most warranties fall short when it comes to parts and installation?
This is a question I get asked frequently. The reality is, most warranties are designed to cover manufacturer defects but typically exclude damages caused by improper maintenance, like neglecting to replace rubber hoses before they crack or using incompatible parts that cause the system to malfunction. Industry experts point out that only a thorough understanding of your dishwasher’s technical specifications and proper compliance with installation guidelines can prevent voiding your coverage. For instance, this comprehensive overview emphasizes the importance of matching parts precisely and following the manufacturer’s instructions.
Here’s a tip: regularly inspect your dishwasher’s parts—such as door gaskets and spray arms—since wear and tear is often mistaken for manufacturer defect. Neglecting these minor issues can turn into major repairs that are not covered by your warranty. Always verify that installed parts are authentic and rated for your specific model—using generic parts might save money upfront but could cost you dearly when warranty claims are denied. To stay ahead, consider documenting your installation process and keeping receipts, which can be vital during warranty disputes. Want to dig deeper? Check this article on when to replace parts for best performance.
In summary, understanding the nuances between proper parts selection, meticulous installation, and warranty limitations can save you from a lot of headaches. Don’t fall into the trap of believing that a quick fix or bargain parts will suffice—your warranty coverage depends on it. Have you ever fallen into this trap? Let me know in the comments or reach out for expert advice through this contact form. Your dishwasher’s longevity and your peace of mind depend on it!
Keep Your Dishwasher Running Like New with the Right Tools
Maintaining your dishwasher’s efficiency over time requires more than just regular cleaning. Having the right tools on hand can make all the difference. I personally rely on a high-quality multimeter, which allows me to troubleshoot electrical issues quickly and accurately. This tool helps me verify voltage supply and test components like thermostats and heating elements without guesswork. Additionally, a precise screwdriver set with insulated handles ensures safe and effective removal of panels and screws, especially in tight spaces where slipping could cause damage or injury. I also recommend a detailed parts diagram specific to your dishwasher model, which can be found online or through manufacturer resources; this simplifies identifying and replacing faulty components. Using the correct tools not only speeds up repair times but also helps avoid accidental damage, ultimately extending your appliance’s lifespan.
Looking ahead, automation and smart diagnostics are likely to become standard in dishwashers, guiding homeowners through maintenance steps via integrated apps or voice assistants. Staying prepared with current tools now positions you for easier upgrades and troubleshooting in the future.
How do I maintain my dishwasher’s performance over time?
Regular maintenance, including inspecting and replacing wear parts like door gaskets and spray arms, ensures optimal operation. It’s also vital to keep filters clean—check out this guide for detailed instructions. Scheduling periodic checks of electrical connections and hose integrity helps prevent common issues that can void warranties or lead to costly repairs. Investing in diagnostic tools and maintaining a tidy, clutter-free environment around your appliance promotes long-term health and performance. Remember, staying proactive with your dishwasher’s maintenance is crucial for avoiding unexpected breakdowns and ensures it continues to deliver spotless dishes for years to come. Don’t hesitate to reach out for personalized advice—visit our contact page to get expert insights tailored to your setup.
Lessons Hidden in Plain Sight About Making Your Dishwasher Last
Discovering that a simple high loop in your drain hose can prevent years of backflow problems taught me a crucial lesson: often, the most effective solutions are surprisingly straightforward, but we overlook them amidst complex repair guides. I learned the importance of secure, correctly routed hoses not just from manuals but from real-world experience, emphasizing the value of hands-on knowledge over generic advice. Additionally, my journey revealed that understanding your appliance’s specific parts—like the critical differences between OEM and universal components—can mean the difference between maintenance success and costly failures. The key insight? Never underestimate the power of meticulous installation and ongoing inspection; small details protect your warranty and ensure longevity. Embracing these lessons transformed my approach, turning an everyday chore into a confident mastery of appliance care.
Related Posts
The Correct Way to Tighten a Compression Fitting Without Stripping It
I'll never forget the moment I watched a seemingly simple…
The Mounting Bolt Error That Causes Excessive Machine Vibration
Ever had that sinking feeling when your dishwasher starts to…
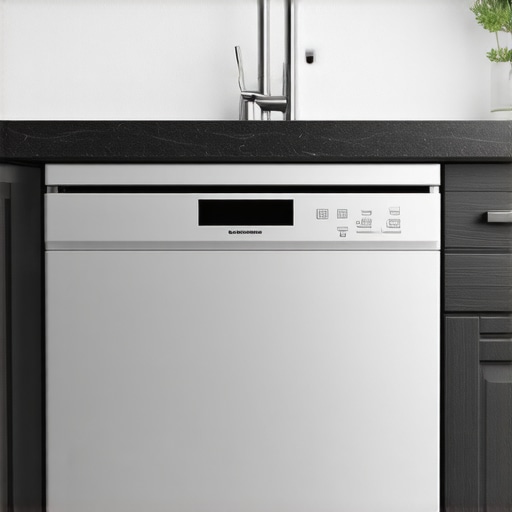
Why Your Dishwasher Needs a High-Loop More Than a Fancy Filter
I'll never forget the day my dishwasher started leaking for…