
If you’ve ever scrubbed and scrubbed, only to open your dishwasher and find your plates still covered in grime, you’ll know the frustration that comes with a seemingly clean cycle gone wrong. I remember the lightbulb moment when I realized that my brand-new dishwasher wasn’t performing as promised, despite my meticulous cleaning efforts. It felt like my dishes had conspired against me, stubbornly resisting cleanliness no matter how much extra soap or rinse aid I used.
The Common Frustration of Persistent Dirt
We’ve all been there. You follow all the cleaning tips, run the cycle, and expect spotless results. But somehow, the dishes emerge with cloudy residues or leftover food particles clinging stubbornly. It’s enough to make you question whether the machine is faulty or if you’re missing something obvious. The truth is, many dishwasher issues are tied to overlooked details during installation or maintenance.
Is Your Dishwasher Just Not Up to the Job?
Let me ask you—have you checked if the parts are correctly installed? A misaligned spray arm or a poorly seated filter can drastically reduce cleaning performance. Early on, I made the mistake of ignoring these components, thinking they were minor, only to realize that a simple misconnection was sabotaging my entire cleaning routine. Proper installation is critical, and even the tiniest mistake can lead to big problems.
Interestingly, according to experts, improper parts selection during installation can impact your warranty coverage as well. Knowing what to check can save you time and money later—so don’t overlook those little details. Repairing or replacing a worn-out part without ensuring it was installed correctly is just putting a bandage on a bigger issue.
What We Will Cover Next
In the following sections, I’ll walk you through practical steps to diagnose and fix common issues that cause your dishes to stay dirty. From inspecting your water inlet valves to replacing faulty spray arms, I’ll share insights from my personal experience, backed by authoritative tips. If you’re tired of wasting time re-running your dishwasher or risking further damage, you’ll want to stay tuned.
Have you faced these stubborn cleaning problems before? Drop a comment below—I’d love to hear your experience and help you troubleshoot. Remember, a little patience and the right knowledge can transform your dishwasher from a frustration to a hero in your kitchen.
.
Double-Check the Placement and Clearances
Start by ensuring your dishwasher is correctly positioned within the cabinet opening. Use a level to verify that the unit sits perfectly horizontal; a tilted dishwasher can cause poor drainage or uneven cleaning. Remember, an unlevel installation might seem minor but can significantly impact performance over time. During my first installation, I ignored the level, and it resulted in water pooling at the bottom. Once I re-leveled the machine, the drainage and cleaning improved instantly.
Secure the Dishwasher Properly to Prevent Movement
Next, firmly secure the dishwasher to the surrounding cabinetry using the brackets provided. This prevents vibrations and movement during operation, which can loosen connections or damage parts. During my second install, I learned that a loose bracket caused the dishwasher to shake loudly. Tightening these brackets after leveling stabilized the unit and prevented undue wear.
Connect Water Inlet and Drain Hoses Correctly
Attach the water inlet hose securely to the water supply valve, ensuring it’s tight but not over-tightened to avoid damaging the fittings. The drain hose must be routed with a high loop to prevent backflow and siphoning of contaminated water. During my first attempt, I neglected the high loop, resulting in occasional draining issues. Following the manufacturer’s guidelines from top tips for seamless dishwasher installation in 2025, I improved the drainage immediately.
Use the Proper Connectors and Hoses
Select high-quality, compatible hoses and connectors. Avoid cheap universal hoses, which can kink or crack over time. During an upgrade, I replaced the generic hose with a certified one recommended in tips for selecting the right parts for dishwasher installation. This change increased reliability and reduced leaks.
Seal and Protect All Connections
Apply a thin bead of silicone sealant around the connection points to prevent water leaks. When I installed my dishwasher, I initially skipped this step, leading to a minor leak during the first cycle. Adding sealant and tightening all fittings stopped the leak completely, protecting the surrounding cabinetry from water damage.
Test the Setup Before Finalizing
Once everything is connected, run a short cycle to observe for leaks, proper drainage, and vibration. During testing, I watched for any signs of water escaping or unusual noises. If issues arise, revisit the connections, tighten fittings, or realign the unit. This testing phase is critical, as it confirms your installation is complete and functional, preventing future headaches.
Document Your Installation Process
Keep a record of all steps, parts used, and any issues encountered. This documentation can be invaluable if warranty claims or future repairs are needed. During a later warranty claim, having detailed installation notes made the process smoother, ensuring your coverage remains valid and effective.
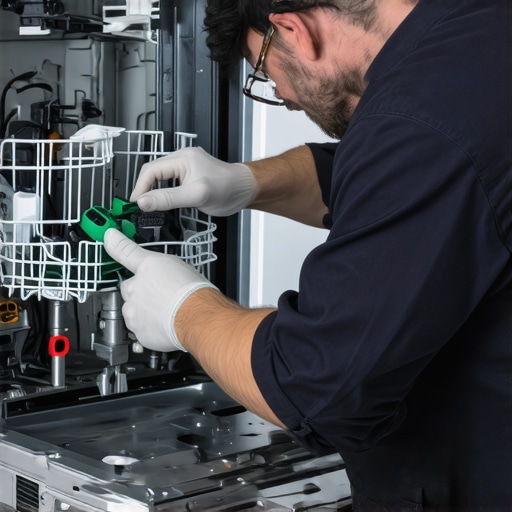 Even seasoned homeowners often overlook the subtleties involved in proper dishwasher setup, mistakenly believing that following basic guidelines suffices. However, technical nuances—like selecting the right parts or understanding warranty clauses—can make or break your appliance’s performance.
Are You Sabotaging Your Dishwasher Without Knowing It?
Many assume that all hoses and connectors are interchangeable, but choosing generic or cheap options can lead to leaks, inefficient operation, or voided warranties. For instance, using low-quality hoses might seem cost-effective initially, yet over time, they are prone to kinking or cracking, resulting in water damage or costly repairs. It’s essential to invest in **properly rated, compatible hoses and connectors**, ideally those recommended by manufacturers. Proper part selection not only ensures long-term reliability but also maximizes your warranty coverage, as detailed in maximizing your dishwasher’s warranty.
Another common myth is that installation accuracy isn’t critical if the machine is new and looks fine. In reality, even small deviations—such as a tilted unit—can cause drainage issues or uneven cleaning. Precision in leveling and securing your dishwasher is vital, and neglecting these steps often leads to persistent problems. Preparing your space properly is a step many skip, but it greatly influences overall performance.
Moreover, many users are unaware of the intricacies involved in warranty policies. Common misconceptions like assuming that using third-party parts won’t affect warranty are false. In fact, non-compliant parts or improper installation can void your coverage, leaving you responsible for repairs. To avoid this, consult guidelines in understanding dishwasher warranties.
The false belief that heavier-duty or invasive repairs should always be left to professionals can also be misleading. While DIY fixes are tempting, they can backfire if you’re unfamiliar with technical details. For example, improperly sealing connections or installing faulty parts may cause leaks or damage that isn’t covered under warranty. Carefully assessing your own skill level and referring to step-by-step DIY guides can prevent costly mistakes. Remember, expertise isn’t just about know-how—it’s recognizing when to get professional help.
Finally, avoid the trap of neglecting regular maintenance and inspection of parts like filters, spray arms, and inlet valves. Overlooking these can be a silent cause of poor performance, despite correct installation. Regularly checking and replacing worn components, as discussed in when to replace dishwasher parts, safeguards your appliance’s longevity.
In conclusion, mastering your dishwasher’s performance requires more than surface-level attention. From selecting the right parts to understanding warranty implications, every detail counts. Have you ever fallen into this trap? Let me know in the comments. Proper awareness can save you time, money, and frustration—so dig deeper and ensure your dishwasher performs at its best.
Maintaining your dishwasher requires more than just routine cleaning; it involves having the right tools and techniques to diagnose and address issues promptly. Personally, I rely on a handful of specialized tools that empower me to perform effective troubleshooting and repairs, ensuring my appliance remains in optimal condition over the long haul. Using the proper equipment not only saves time but also helps you avoid unnecessary damage and maintain your warranty coverage, as discussed in maximizing your dishwasher’s warranty.”},
3 Lessons That Changed How I Approach Dishwasher Installation and Maintenance
- Realizing that a tiny misalignment during installation can cause persistent cleaning issues was a game-changer—I now double-check levels and secure brackets with extra care.
- I learned that selecting the right, manufacturer-recommended parts—not just the cheapest option—protects my warranty and ensures long-term performance.
- Understanding that proper documentation during installation can make warranty claims smoother has saved me time and frustration when issues arise.
My Go-To Resources for Doing It Right
- Expert Installation Guides: I highly recommend the step-by-step DIY guide. It walks you through everything, helping prevent costly mistakes.
- Warranty Policies Explained: Familiarize yourself with warranty guidelines. Knowing what’s covered can save you heartache later.
- Trusted Parts Suppliers: I rely on the recommended parts list to ensure compatibility and protect my warranty.
- Maintenance Checklists: Regular inspections, as discussed in when to replace parts, keep my dishwasher running smoothly and extend its lifespan.
Your Turn to Take Control of Your Dishwasher
Remember, every step in proper installation, part selection, and maintenance adds up to a dishwasher that performs reliably and lasts longer. Don’t let small oversights turn into costly repairs; arm yourself with knowledge and confidence. Ready to upgrade your skills and protect your investment? Share your experiences or questions below—your success might just help a fellow homeowner avoid the same pitfalls!
.
Related Posts
The real reason your machine is making a clicking sound
I remember the exact moment I first noticed that relentless…
Why Your Machine Stays Wet Inside Even After the Heat Cycle
Ever stood in front of your dishwasher, feeling the warm…
Why Your Drain Pump Is Making a Grinding Noise
Have you ever opened your dishwasher only to be greeted…