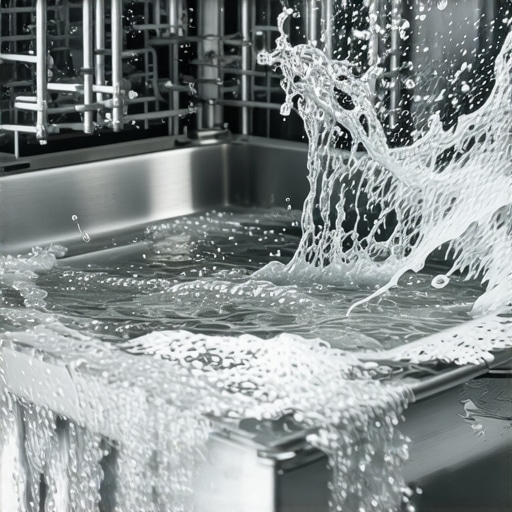
Have you ever opened your dishwasher only to be greeted by a loud grinding noise coming from the drain pump? I remember the first time it happened to me—my heart sank. It was right in the middle of a busy weekday evening, and suddenly, my quiet kitchen was filled with an unsettling grinding sound. Panic started to set in as I worried about costly repairs or even replacing the whole unit. But the more I looked into it, the more I realized I wasn’t alone. Many homeowners face this problem, and surprisingly, it’s often something you can fix yourself with a bit of patience and know-how.
Why Your Drain Pump Might Be Grinding
The first lightbulb moment for me was understanding that a grinding noise isn’t just a sign of impending doom—it’s often a clue. Typically, it points to debris trapped in the pump, worn-out bearings, or a failing motor. These issues, if left unaddressed, can lead to more serious (and expensive) damage down the line. That’s why it’s so important to pay attention to these sounds early on. Addressing the root cause can save you a lot of trouble—and money.
Is Repairing the Drain Pump Actually Worth It?
I used to think that calling in a technician was the only option. However, I quickly learned that many drain pump issues are DIY-friendly. Before jumping to conclusions, I recommend checking out your warranty coverage and understanding the parts involved. You can find detailed guides on dishwasher parts and warranty specifics. It’s also vital to avoid common mistakes like reusing old hoses or skipping inspection of crucial components, which can void your warranty or cause further damage. A mistake I made early on was ignoring clogged filters—lesson learned!
So, if that grinding sound sounds all too familiar, stay tuned. I’ll walk you through the steps to diagnose and fix the issue, sharing tips from my personal experience. Not only will you save money, but you’ll also gain confidence in maintaining this vital appliance. Now, let’s get into what causes that grinding noise and how to fix it—because your dishwasher deserves a little neighborly TLC too.
Disconnect Power and Prepare Your Workspace
Before starting any repairs, turn off the dishwasher and unplug it from the power source. Move the unit away from the wall to access the bottom easily. Wearing gloves and safety glasses is advised to protect against sharp edges and debris.
Access the Drain Pump
Remove the lower panel or kickplate of your dishwasher by unscrewing the screws with a screwdriver. Locate the drain pump, typically at the front bottom of the unit, connected to the drain hose and wiring harness. Use a flashlight if needed to get a clear view. I once struggled with this step on a tight kitchen floor, but patience and good lighting made it manageable.
Inspect the Pump for Debris and Damage
Carefully disconnect the wires and hoses attached to the pump. Check for trapped debris, such as small food particles or fabric fibers, which can cause grinding. If debris is present, remove it gently with tweezers or a brush. Examine the bearings and impeller—if they appear worn or damaged, replacement is necessary. In my case, cleaning the impeller shaft freed a stuck piece of plastic, resolving the grinding noise.
Replace or Clean the Bearings
If the bearings feel loose or look corroded, consider replacing them. Some pumps allow for bearing replacement, which can be more economical than a full pump swap. For detailed guidance, see how to diagnose dishwasher parts during warranty periods by visiting this resource. I learned the hard way that neglecting worn bearings leads to larger motor issues.
Test the Pump Without Reassembling
Reconnect the wires temporarily and run the dishwasher’s drain cycle to observe the pump’s sound. Listen for a smooth operation without grinding. If the noise persists, proceed to replace the entire pump assembly. Remember, matching the pump to your model is crucial; consult this guide for selecting the correct parts.
Reinstall and Verify Repair
Securely reattach the hoses and wires, then screw the panel back in place. Slide the dishwasher back into position and restore power. Run a short drain cycle to ensure the grinding noise is gone. When I replaced my pump, this final test confirmed my fix, preventing future surprises. Proper reinstallation also ensures warranty compliance, so double-check your work against warranty guidelines.
Many homeowners assume that installing a dishwasher or replacing its parts is straightforward, but overlooking critical nuances can cost both time and money. A common misconception is that following basic instructions suffices, when in fact, the devil is in the details—like ensuring proper hose loops or using manufacturer-approved parts to maintain warranty coverage. For example, reusing old drain hoses or neglecting to verify the correct water inlet valve can lead to leaks and void your warranty, as highlighted in expert analyses on appliance maintenance. Another trap is assuming all replacement parts are equal; choosing generic or mismatched components often results in subpar performance and warranty denial. To truly optimize your dishwasher’s lifespan and warranty protections, it’s essential to understand the importance of selecting the right parts and adhering to installation protocols, which are often more nuanced than they appear.
Why does choosing the wrong replacement part risk voiding your warranty even if it fits physically?
Experts emphasize that warranty coverage often hinges on compatibility and installation specifics, not just part dimensions. Using unapproved parts can lead to warranty rejection because manufacturers specify that only certain components meet quality and safety standards (see this guide). Moreover, improper installation—such as incorrect grounding or inadequate securing of mounting brackets—can cause damage not covered by warranty, even if the parts are correct. It’s worth noting that modern warranties increasingly involve digital logs and detailed documentation, underscoring the importance of meticulous adherence to manufacturer specifications (more details at this resource). So, next time you consider a DIY repair or part replacement, think twice—are you following the subtle but vital guidelines that protect your investment? Have you ever fallen into this trap? Let me know in the comments.
Top Tools for Long-Term Performance
Investing in the right tools is crucial for effective dishwasher maintenance. I personally swear by a high-quality multimeter like the Fluke 117, which allows me to quickly diagnose electrical problems and verify voltage levels across components, preventing unnecessary part replacements. For inspecting and cleaning pump assemblies, a set of precision screwdrivers, including Phillips and flat-head, makes disassembling delicate parts much easier without risking damage.
When it comes to cleaning, a soft-bristled brush, such as a toothbrush with stiff bristles, helps remove debris from impellers and filters without scratching fragile surfaces. I also recommend a digital inspection camera, like the Depstech endoscope, which enables me to peek into tight spaces behind panels or under the sink without dismantling the entire unit—saving time and reducing frustration. Having these tools accessible ensures you’re prepared to handle most issues that arise over the years, minimizing costly professional service calls.
Software Assistance and Record-Keeping
Modern maintenance extends beyond physical tools. I utilize diagnostic apps like Appliance Diagnostics, which connect with your smart appliances to provide instant error codes and troubleshooting guides. This not only speeds up the diagnosis process but also helps keep a detailed log of repairs and inspections. Maintaining organized records, such as digital copies of receipts for parts and maintenance dates, is invaluable when warranty issues emerge. According to experts, proper documentation can significantly influence warranty claims, especially with complex brands and models. Check out this article for comprehensive tips on recording your maintenance history effectively.
Routine Checks and Preventive Maintenance
Periodic inspection of critical parts like water inlet valves, filters, seals, and the drain hose loop can prevent sudden breakdowns. I recommend scheduling a thorough check every six months—especially if your dishwasher runs frequently. During these inspections, use your multimeter to verify electrical connections and test for continuity in switches and sensors, ensuring they function properly over time.
Clear out filters and clean spray arms to avoid clogging, which can lead to poor wash performance and leaks. Remember, this guide emphasizes that regular maintenance improves longevity and supports warranty compliance. In fact, neglecting such routine checks can void warranty coverage, so treat your dishwasher as a critical home investment.
How do I maintain dishwasher parts over time?
Long-term maintenance involves using the right tools—like a multimeter for electrical checks and specialized brushes for cleaning—and sticking to a schedule of inspections. Keep detailed records of parts replaced or repaired, ensuring you can present comprehensive documentation if warranty claims are necessary. Additionally, always use manufacturer-approved parts to avoid voiding warranty protections, which is critical for safeguarding your investment. For more details, explore this guide. Remember, proactive maintenance not only extends the life of your dishwasher but also provides peace of mind, knowing you’re covered if a complex issue arises.

Lessons That Changed My Approach to Dishwasher Maintenance
- Never underestimate the power of a thorough visual inspection—sometimes debris trapped in the pump is all that’s causing the grinding noise, and a simple clean can save you a costly replacement.
- Understanding the role of bearings and impellers has been eye-opening; recognizing early signs of wear can prevent complete pump failure, safeguarding your warranty.
- Proper reinstallation of hoses and securing components with manufacturer-approved parts isn’t just about fixing the issue—it’s about maintaining warranty integrity and long-term performance.
- The importance of detailed documentation cannot be overstated; keeping records of repairs, parts, and inspections can make warranty claims smoother and more successful.
My Must-Have Tools to Keep Your Dishwasher Running Smoothly
- High-Quality Multimeter (like Fluke 117): Essential for diagnosing electrical faults and verifying component functionality, preventing unnecessary part replacements.
- Precision Screwdriver Set: Delicate work with small screws and connectors demands reliable tools to avoid damaging delicate parts during inspections or reassembly.
- Digital Inspection Camera (such as Depstech): Helps peek into tight spaces behind panels or under the sink, making troubleshooting more efficient without dismantling everything.
- Soft-Bristled Brushes: Perfect for cleaning impellers and filters without causing damage, ensuring debris doesn’t cause future grinding noises.
Keep Your Dishwasher in Top Shape and Your Warranty Secure
Maintaining your dishwasher’s health requires proactive steps—regular inspections, using the right tools, and choosing the appropriate, manufacturer-approved parts. Remember, overlooking subtle signs or using incompatible components can jeopardize your warranty coverage, leaving you with unexpected expenses. By adopting a meticulous approach inspired by personal experience and expert advice, you not only extend your appliance’s lifespan but also preserve your peace of mind when warranty matters are involved. Empower yourself to tackle issues early and confidently—your dishwasher will thank you, and so will your wallet.
Related Posts
The Silent Leak: Why Your Base Pan Is Full of Water
I remember the first time I opened my dishwasher after…

How to Read Those Confusing Error Codes on Your Display
It happened to me just last month. I was in…
How to Spot a Micro-Leak Behind Your Kickplate
One morning, I noticed a small, silent puddle forming at…