
I stood there with a dish towel in one hand and a soaking wet ladle in the other, staring at my brand-new dishwasher like it had personally insulted me. I’d spent good money on a model with that fancy third rack, convinced it would be the end of my silverware nightmares. Instead, I was hand-drying every single piece of cutlery as if I didn’t have a high-end machine sitting right there in my kitchen. It was a classic lightbulb moment born out of sheer annoyance. I realized the problem wasn’t the machine; it was me. I was loading that top tray like I was playing a disorganized game of Tetris, and the water had nowhere to go.
Stop Cursing Your Third Rack and Start Using It Right
We’ve all been there. You want to maximize every square inch of space, so you cram those flat silicone spatulas and long steak knives into the top tier until it’s a solid wall of plastic and steel. But here is the thing: if water can’t get up there, and more importantly, if it can’t drain off, you’re going to end up with a swamp. When I first started using my machine, I made the amateur mistake of overlapping my measuring spoons. I thought I was being efficient, but I was actually creating little bowls that captured dirty water. Learning the correct way to load a dishwasher for maximum water flow changed everything for me. It’s not just about getting things clean; it’s about making sure the steam can actually escape the surface of your utensils.
Does this tray actually do anything useful?
You might be skeptical. I certainly was. You might think that third rack is just a marketing gimmick that takes away vertical space from your middle rack. However, once you understand the physics of evaporation, it becomes your best friend. Most modern machines rely on residual heat rather than a high-heat coil that melts your plasticware. If you’re struggling with why your silverware is still wet after the dry cycle, it usually comes down to the angle of the dangle. Even a slight tilt can be the difference between a dry fork and a spotted one. According to research from Consumer Reports, nearly 20% of users are dissatisfied with their dishwasher’s drying performance, yet a huge portion of those issues are solved simply by adjusting how items are positioned. If you are planning a new dishwasher installation in 2025, don’t let the fear of wet dishes steer you away from these models. They are incredibly efficient if you know the neighborly secrets to loading them. Have you ever felt like your third rack was more of a hindrance than a help? Trust me, I’ve been there, and I’m going to help you fix it right now.
Fix the Infamous Spoon Soup Disaster
The biggest mistake I ever made—and I did this for months—was nesting my spoons like they were cuddling for warmth. I’d pull them out and find a literal pool of murky water sitting in the bowl of the top spoon. It was gross. To fix this, you have to shingle your cutlery. Think of it like the roof of a house; each piece should overlap the next slightly but leave enough of a gap for water to hit the surface and then run off. If you notice your rack isn’t gliding smoothly while you do this, check the tiny plastic clip that stops your rack from falling out because a wobbly rack leads to mismatched items and poor cleaning. 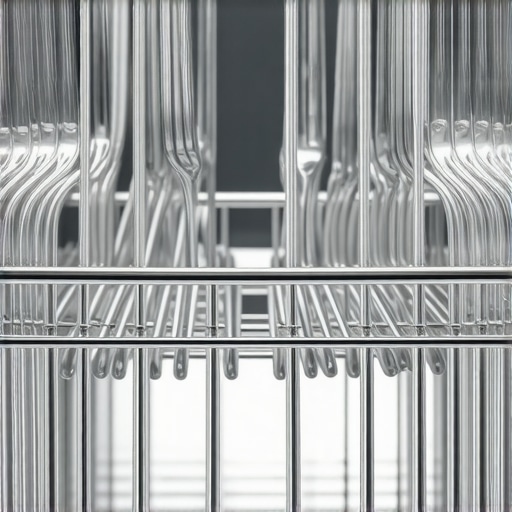
Give your spray arms some breathing room
A third rack is essentially a VIP lounge for small items, but it only works if the water can get past the velvet rope. Your dishwasher has spray arms that need to spin freely. I once spent an hour wondering why my top tray was still filthy, only to realize a tall baking sheet in the bottom rack was blocking the middle spray arm from spinning. It’s like trying to water a garden with a kinked hose. You need to ensure you are using common dishwasher parts and how to replace them effectively if they become clogged or brittle. Specifically, check the holes in the spray arm. If they are plugged with lime scale, no amount of clever loading will save your forks.
Verify the mechanical health of your unit
Sometimes the issue isn’t your loading technique; it’s the hardware. If you hear a faint, struggling hum, you might need to learn how to spot a failing wash motor before it siezes. A weak motor won’t push enough pressure to reach that high third rack. I remember my neighbor calling me over because her fancy machine was failing. We pulled out the filter and found a literal cherry pit wedged in the housing. After we cleaned it, the pressure returned. You should also be cautious about repairs; the truth about third-party replacement spray arms is that they often don’t have the same precision-angled jets as the originals, which can ruin the zone wash features many third-rack machines brag about.
Choose the right components during setup
If you are just getting started with a new machine, following top tips for selecting the right parts for dishwasher installation will save you a headache later. Using a generic, flimsy water inlet valve might save ten dollars today, but if it can’t handle the pressure required for a full-load cycle, your top rack will always be the victim of low water volume. I learned this the hard way when I tried to save money on a universal kit that ended up leaking behind my cabinets within a week. Always prioritize parts that match the manufacturer’s specs to ensure the internal hydraulics work as intended. Finally, don’t forget the basics: the best way to clean the hidden filter under the spray arm is a five-minute job that ensures your water is actually clean when it hits your dishes.You’d be surprised how many people think they’re beat-the-system geniuses by installing their own unit. Everyone says it’s just a plug-and-play situation, but in my experience, the ‘save $150’ DIY mentality often leads to a $1,500 replacement bill. The common myth is that if you follow the manual, you’re covered. The reality? Many manufacturers are incredibly strict. If you can’t produce a professional installation receipt, your high-end warranty might be worth less than the paper it’s printed on. I’ve seen homeowners get rejected because they used a generic hose from a big-box store instead of the OEM kit. It’s a trap I almost fell into myself.
The Installation Trap That Voids Your Peace of Mind
Most people think a leak is just a leak, but to a claims adjuster, a leak is often ‘user error’ if the hardware doesn’t match the specs. For instance, the risks of skipping the professional installation receipt are real. I once spoke with a tech who had to deny a claim simply because the homeowner didn’t have a high loop on the drain line. The manufacturer argued that the resulting backflow damaged the internal sensors, which isn’t a factory defect. Understanding dishwasher warranty policies for peace of mind is about more than just reading the ‘1-year limited’ sticker; it’s about knowing that why your installer insists on a high loop drain isn’t just a suggestion—it’s a requirement for the machine to function as designed.
Is your appliance insurance actually a warranty in disguise?
This is where things get murky. Many third-party plans are actually service contracts, not warranties. According to the Association of Home Appliance Manufacturers (AHAM), improper installation accounts for a significant portion of early-life failures that these plans won’t cover. If you didn’t check the parts to check when installing a dishwasher for long-term performance, you’re essentially gambling. I’ve seen people lose their minds when their warranty claim for a door gasket was denied because the unit wasn’t leveled properly, causing the tub to warp slightly over time. 
Don’t Reuse That Old Power Cord
The biggest ‘oops’ factor I see is the temptation to reuse the old power cord or drain hose from the 10-year-old machine you just hauled away. It looks fine, right? Wrong. Heat and detergent degrade plastic and rubber. Reusing parts is the fastest way to trigger a ‘non-manufacturer defect’ clause. You need to understand common dishwasher parts and their role in proper installation to realize that a degraded seal on an old hose can cause micro-leaks that ruin your subfloor before you even see a puddle. Always opt for quality; the difference between OEM and generic water inlet valves can be the difference between a dry kitchen and a moldy nightmare. Have you ever fallen into this trap by trying to save a few bucks on parts? Let me know in the comments.If you want to move beyond just loading the racks properly, you need to think like a technician. I keep a basic digital multimeter in my junk drawer specifically for this reason. It is the only way to know for sure if your machine is not starting because of a door latch or if you need to learn how to test your thermal fuse with a basic multimeter. Most people just start ordering random components, but that is an expensive way to troubleshoot. Instead, identifying essential parts every dishwasher owner should know about gives you the upper hand when talking to a repair service or filing a claim. As noted in the National Electrical Code (NEC) Section 422.16(B)(2), specific requirements for cord-and-plug connections must be met to ensure safety and code compliance—skipping these details can kill your insurance claim instantly.
Get Yourself a Multimeter and Stop Guessing
I cannot tell you how many times I have seen someone replace a whole control board when it was just a five-dollar fuse. My personal rule is to never buy a part until I have tested the old one for continuity. This is especially important during the initial year of ownership; knowing how to diagnose dishwasher parts during warranty periods can save you weeks of waiting for a tech who might just tell you nothing is wrong. It is about taking control of your kitchen’s health.
How do I keep my dishwasher running like new for a decade?
Maintenance is not a once-a-year event; it is a monthly habit. I set a calendar reminder to check the spray arms for clogs and to wipe down the door seals. If you live in an area with high mineral content, the impact of hard water on your warranty eligibility is something you cannot ignore. Scale builds up on the internal sensors and the heating rod, leading to poor drying and eventually a burnout. I have found that the easiest way to clean calcium from your heating element is a simple soak that prevents you from having to tear the whole machine apart later. 
Watch out for the silent killers of kitchen appliances
The most overlooked maintenance task is the gasket. A tiny bit of jelly or a stray coffee ground can break the seal, causing a slow drip that you will not notice until your hardwood floors start to buckle. Learning how to clean the gasket without damaging the seal is vital because abrasive cleaners will actually make the rubber brittle. Also, keep an eye on your cycle times. I am predicting that within the next few years, AI-driven diagnostics will be standard, but for now, we have to be the sensors. If you notice why your smart sensors are giving you dirty readings, it is usually because of a film of grease on the lens. Knowing when to replace dishwasher parts for optimal performance is the difference between a machine that lasts five years and one that lasts fifteen. I want you to go to your kitchen right now, pull out that bottom rack, and check for grit; it is the first step to reclaiming your machine’s efficiency.
The Expensive Lessons I Had to Learn the Hard Way
After years of troubleshooting kitchen appliances, I’ve realized that the ‘parts-only’ warranty is often a clever distraction designed to make you feel secure while your wallet takes the hit. Sure, the manufacturer might send you a free $20 sensor, but you will still be on the hook for a $200 service call fee. This is why maximizing your dishwasher’s warranty coverage today requires keeping every single scrap of paper from your installer. I also learned that ‘lifetime’ usually only applies to the stainless steel tub—not the computer brain or the heating element that actually does the heavy lifting. Finally, if you are tackling a diy dishwasher installation step-by-step guide, remember that your time has value; sometimes, paying for a pro just to get that official signature is the cheapest insurance policy you can buy.
My Personal Toolkit for a Perfect Kitchen
You do not need a truck full of specialized gear, but a few specific items will make you feel like a master technician. First, get a decent digital multimeter; understanding dishwasher parts a key to effective maintenance starts with knowing if a component is actually receiving power or if the circuit is dead. Second, I never perform a setup without the most durable braided steel hoses for long-term safety. Those standard rubber hoses are just ticking time bombs in your cabinetry. Third, bookmark the official Association of Home Appliance Manufacturers (AHAM) website—it is the gold standard for knowing what your machine should actually be capable of doing before you call a technician in a panic.
Go Ahead and Take the Plunge
Your kitchen is the heart of your home, and having a machine that actually dries your dishes shouldn’t feel like a luxury you are constantly fighting for. Whether you are troubleshooting an old unit or prepping for a new dishwasher installation in 2025, you now have the insider knowledge to keep things running smoothly. Don’t let the technical jargon or the complex racks intimidate you. You have the tools, the tips, and the right mindset to master your appliances and enjoy a spotted-glass-free life. Have you ever had a warranty claim denied for a reason that seemed totally unfair? Let me know in the comments below!
Related Posts

Why Modern Eco-Cycles Take Three Hours to Wash One Load
I remember the exact moment I realized my new dishwasher…

How to Read Your Unit’s Energy Guide Before You Buy
I remember the moment clearly. I was about to buy…

Why Your Energy Star Rating Might Not Be Saving You Money
I remember the moment vividly—standing in my kitchen, dishwasher humming,…