
I’ll never forget the sound. It wasn’t a drip; it was a roar. At 3:14 AM, I stepped off my carpet and onto my kitchen hardwood only to hear a sickening squelch. My dishwasher supply line had finally given up the ghost, and my kitchen was essentially a lake. [image_placeholder] If you’re reading this while standing in a wet sock, take a deep breath. We can fix this, but we have to move fast. Today, I’m going to walk you through exactly how to salvage your kitchen after a catastrophic supply line failure, based on the hard lessons I learned when my own ‘quick fix’ turned into a midnight renovation.
My Kitchen Became an Indoor Swimming Pool
The irony wasn’t lost on me. I had just finished what I thought was a successful diy dishwasher installation, but I made the one mistake I now warn everyone about: I reused the old, brittle plastic supply line just to save ten bucks and five minutes. I didn’t even check if I had the correct hose length, which put unnecessary tension on the joint. According to the Insurance Institute for Business & Home Safety, plumbing supply system failures are a leading source of water damage claims, often resulting in damages exceeding $10,000 per incident. I was lucky I caught mine when I did. The first thing you need to do—right now—is hit the main water shut-off. Once the water stops, the real work of preparing your kitchen for recovery begins. Have you ever walked into your kitchen and felt that heart-stopping chill of seeing water where it shouldn’t be?
Is my insurance going to laugh at this claim?
That was my first thought as I stood there in the dark. I was terrified that my ‘handyman’ attempt had voided everything. The truth is, understanding dishwasher warranty policies is half the battle, but your homeowner’s insurance is usually what handles the floors. However, they will look at the parts you used. If you had installed the most durable braided steel hoses, you’d be in a much better position than I was with my cracked plastic. We’re going to look at the essential parts for troubleshooting the aftermath and how to ensure your next setup is bulletproof.
Dry Your Floors Before the Boards Buckle
Hardwood floors and standing water are natural enemies. If you don’t get every drop out within the first few hours, the wood fibers will swell—a process called cupping—and you’ll be looking at a $5,000 sanding and refinishing job. I learned this the hard way when I thought a single box fan would be enough. By noon the next day, my kitchen floor felt like a skate park. You need a commercial-grade shop-vac and high-velocity air movers. Set them up so they are blowing air under the kickplate of your cabinets. This is where the moisture hides, and it’s the fastest way to rot your subfloor. While you’re at it, check the underside of your countertop. If you didn’t use the best way to tape your vapor barrier, the steam and humidity from the flood could cause your laminate or stone-adjacent wood to swell and crack.
Build a Leak-Proof Setup for the Future
Once the area is dry, it’s time to perform surgery on the unit. Start by identifying the culprit. Most of the time, it’s a failed water inlet valve or a cracked hose. You should never, under any circumstances, reuse an old supply line. When you are looking for parts to check when installing a dishwasher, the supply line is #1. Swap that brittle plastic for the most durable braided steel hoses you can find. These are the ‘seatbelts’ of your plumbing system; they have a stainless steel mesh that prevents the inner tube from expanding and bursting under pressure. I once saw a cheap rubber hose balloon to the size of a grapefruit before it popped—it’s not worth the risk.
Ditch the Generic Inlet Valves
If the leak came from the machine itself, check the inlet valve. It’s the gatekeeper that tells the water when to enter. Using cheap knock-offs is a gamble that rarely pays off. I’ve seen common dishwasher parts like these fail within months because the plastic housing wasn’t rated for the heat under the tub. Also, consider the pressure. If your home has high PSI, you need to know how to tell if your water pressure is too low or too high, as extreme pressure can blow out even a new valve. Stick to OEM (Original Equipment Manufacturer) parts to ensure the threads align perfectly with your new steel hose.
Keep the Sink Water Out of Your Clean Dishes
The flood isn’t always about the water coming in. Sometimes, it’s about the water going out. If your drain hose doesn’t have a ‘high loop,’ you are inviting disaster. Without this loop, dirty water from your sink or garbage disposal can backflow into your dishwasher. I once ignored this and found a pool of grey, smelly water at the bottom of my machine after doing the dishes in the sink. This is why your installer insists on a high loop drain; it uses gravity to create a natural one-way street for waste. 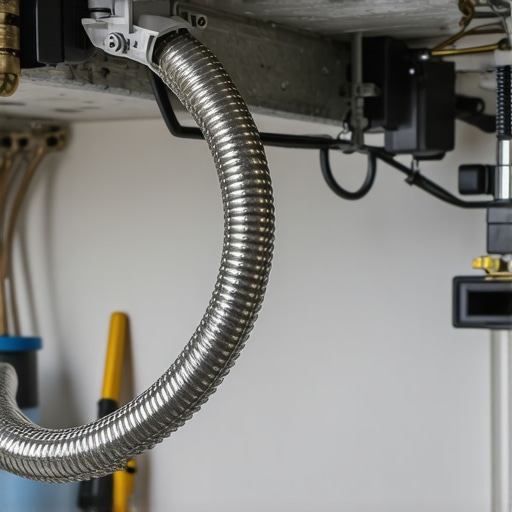
Protect Your Warranty During the Rebuild
Finally, as you put the pieces back together, keep your paperwork organized. If you end up needing a major repair later, your manufacturer will demand proof of proper maintenance. Maximizing your dishwashers warranty coverage today means documenting the parts you used. If you can show you used high-quality components and followed the how to get your warranty claim approved steps, you’ll save yourself a massive headache. I keep a dedicated folder in my kitchen drawer for every receipt; it’s saved me thousands when a control board fried just weeks before the coverage ended.Most people think that if they pay for ‘Professional Installation’ at the checkout counter, they are 100% protected. Here is the contrarian truth: many of those installers are third-party contractors paid by the job, not the hour. In my experience, they often prioritize speed over precision. I’ve seen ‘pros’ skip the vapor barrier entirely or reuse a drain hose because ‘it looked fine.’ This is one of the biggest risks of skipping the professional installation receipt and the detailed itemization of parts. If that reused hose leaks six months later, the manufacturer will blame the installation, and the installation company will blame the part. You’re left holding the bill for a kitchen floor. Let’s talk about the ‘Oops’ factor that catches even the smart DIYers: the power cord. You might be tempted to pull the cord off your old machine to save a few bucks, but this is exactly why your professional installer refused your old cord if they were actually doing their job correctly. Heat-cycling and moisture can degrade the insulation over time, and a legacy cord might not meet the amperage requirements of a modern motor. This is a classic example of what your dishwasher warranty doesn’t cover and how to avoid fees; they classify a reused cord as ‘improper installation’ immediately.
What Happens if I Use a Generic Part on a Name-Brand Machine?
It’s a fair question. The price difference is tempting. But there is a massive difference between OEM and generic water inlet valves. According to data from the Association of Home Appliance Manufacturers (AHAM), a significant percentage of service calls within the first year are related to installation errors or the use of non-certified components. Generic valves often have thinner plastic housings that can’t withstand the constant water hammer of a high-PSI home system. 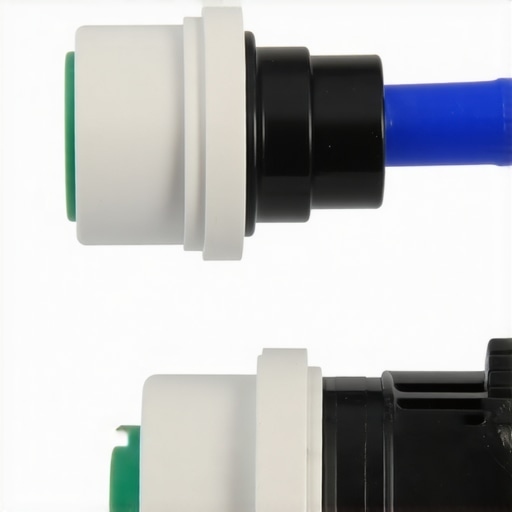 Investing in maximizing your dishwashers warranty through proper parts selection means choosing components designed for the specific thermal stresses of your machine.
The Truth Behind the 10-Year Motor Sticker
We’ve all seen those shiny stickers on the front of the door. They make you feel like the whole machine is invincible for a decade. But if you look at the truth about those 10-year motor stickers on the door, you’ll realize they usually only cover the part, not the labor. If your motor dies in year seven, you might get a free part, but you’ll pay hundreds for the technician to show up and swap it. This is why essential parts for troubleshooting dishwasher installation issues should always be high-quality from day one—preventing the failure is always cheaper than a ‘free’ replacement part. Have you ever fallen into this trap of trusting a generic part or a ‘pro’ installation that went sideways? Let me know in the comments.Instead of a massive toolbox, I keep three specific things in my utility drawer: a T20 Torx driver, a telescoping mirror, and a reliable digital multimeter. I use the multimeter religiously because guessing if a component has failed is a fool’s errand that wastes both time and money. I can’t tell you how many homeowners I’ve seen junk a perfectly good unit when they could have simply learned how to test your thermal fuse with a basic multimeter. It takes thirty seconds to check for continuity and can save you from an $800 replacement bill. The telescoping mirror is my personal secret weapon for identifying ‘ghost leaks’; I can slide it under the unit while it is running to see exactly where the first bead of water forms without having to wrestle the whole machine out of the cabinetry.
How do I maintain my dishwasher parts over time?
Consistency is the only way to avoid the ‘roaring lake’ scenario I mentioned earlier. I’ve found that understanding dishwasher parts a key to effective maintenance starts with the filtration system. Most people assume the machine is self-cleaning, but that is a myth. You need to know the best way to clean the hidden filter under the spray arm at least once a month. According to data from the Appliance Service Training Institute (ASTI), nearly 40% of circulation motor failures in the first five years are actually caused by debris bypass from uncleaned filters rather than actual mechanical defects. If you live in an area with high mineral content, you must also prioritize the easiest way to remove hard water buildup from the tub using a citric-acid-based cleaner. Calcium doesn’t just look ugly; it coats your heating element, forcing it to work twice as hard and shortening its lifespan significantly. 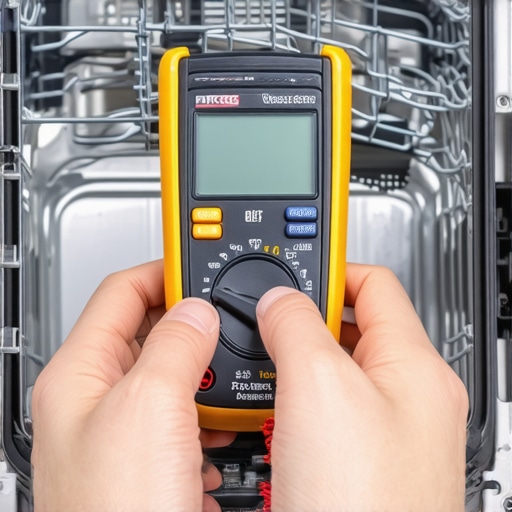
Sensors are Replacing the Guesswork
Looking ahead, the days of manually checking every hose are being replaced by smart diagnostics. I predict that within the next five years, every mid-range unit will feature integrated moisture sensors in the base pan that can cut off the main supply valve via Wi-Fi. We are already seeing this in high-end European models. For those of us with current-gen machines, you can stay ahead of the curve by learning how to recover data logs from your smart control board. These logs often record ‘soft errors’—small hiccups in water temperature or drain time—that don’t trigger a full alarm but tell you exactly when to replace dishwasher parts for optimal performance before they fail. Interestingly, I’ve noticed that machines used on longer cycles actually tend to stay cleaner. It’s counter-intuitive, but why the heavy cycle is actually better for your machine health comes down to internal temperature; the higher heat prevents fat and grease from solidifying in your drain lines. My challenge to you today: Pull out your bottom rack, reach into the very bottom of the sump, and find that mesh screen. If it feels slimy or has a ‘biofilm’ on it, you’re already behind. Clean it with a soft toothbrush and warm soapy water right now—it’s the single most effective five-minute task you can do to save your motor.
Hard Truths About Plumbing That Saved My Next Kitchen
I used to think that a leak was something you could always see immediately. My biggest lightbulb moment was realizing that the most dangerous failures are the slow ones happening behind the kickplate. I spent years thinking I could just eye-ball a connection, but now I know that if you don’t use a dry paper towel to check every joint after ten minutes of operation, you haven’t really checked it at all. Always prioritize top tips for selecting the right parts for dishwasher installation because the quality of the material—specifically moving from plastic to braided stainless steel—drastically reduces your margin for error. Another lesson? Never trust a ‘leak-proof’ claim on a generic part; those extra five dollars for an OEM valve are the cheapest insurance policy you will ever buy.
The Three Tools I Never Start a Job Without
To keep my kitchen bone-dry, I’ve moved beyond the basic wrench. I swear by a dedicated moisture alarm—a tiny $10 sensor that sits in the pan and screams if it touches water. I also keep a printed copy of the complete list of dishwasher parts covered by warranty taped to the back of my sink cabinet. When the water is rising, you don’t want to be scrolling through a phone with wet hands looking for coverage details. Finally, a simple telescoping mirror allows you to see the water inlet valve while the machine is pushed back into place, which is the only way to catch a ‘vibration leak.’ Familiarizing yourself with essential parts every dishwasher owner should know about turns these tools from gadgets into a professional-grade defense system.
Take Charge of Your Kitchen Safety Today
You now have the exact roadmap to turn a potential kitchen catastrophe into a manageable weekend project. Don’t let the anxiety of a previous leak stop you from maintaining your own appliances. By using the right components and seeking out expert advice on dishwasher installation troubleshooting, you can ensure your home stays protected. Investing in the most popular dishwasher parts and how they improve performance isn’t just about clean dishes; it’s about the peace of mind that comes with a secure, dry home. [image_placeholder] Have you ever discovered a leak that stayed hidden for weeks? Tell me your ‘nightmare’ story in the comments below!
Related Posts
The Risk of Using Industrial Degreasers in Home Machines
It was a typical Saturday morning when I decided to…
How to Spot a Failing Circulation Pump Before Your Kitchen Floods
It was a usual Sunday morning when I stepped into…
How to Swap Your Plastic Tub for Stainless Steel Durability
It was a frustrating Saturday morning when I finally realized…