
I remember standing in two inches of lukewarm, sudsy water at 3 AM on a Tuesday. The culprit wasn’t a broken pump; it was my own ego. I had just finished what I thought was a perfect DIY install, only to watch my kitchen transform into a miniature lake because I skipped one tiny, seemingly insignificant step. If you’ve ever felt that cold, damp sensation under your socks, you know the panic. Most professional installers will look you in the eye and quote an extra ‘custom plumbing’ fee for this specific task, but here is the secret: it takes five minutes and a single zip tie. Today, I am going to show you how to execute the ‘high loop’ and vapor barrier seal so you can keep your money in your pocket and your floors bone dry.
Your Drain Hose Needs to Defy Gravity
When I first started messing with appliances, I thought a hose was just a hose. I figured as long as the water went from point A to point B, the job was done. I was wrong. Professional installers often charge extra for a ‘high loop’ installation because it requires a bit of extra reaching and a few more fasteners. If you don’t do it, dirty sink water can actually backflow into your clean dishwasher. It’s gross, it’s smelly, and it eventually leads to a flood. If you are currently dealing with a mess, you might need to know how to salvage a flooded kitchen after a supply line failure before you even think about the next load. I learned the hard way that skipping this is the fastest way to void your peace of mind.
Is this high loop step actually worth the hassle?
Absolutely. You might think your garbage disposal connection is enough, but without that physical loop of hose tucked high against the underside of your counter, you’re playing Russian roulette with your cabinetry. According to the International Association of Certified Home Inspectors (InterNACHI), improper dishwasher drainage connections are among the top five most frequent plumbing defects found during home inspections. It isn’t just about the hose, though. You also need to consider the best way to tape your vapor barrier during installation to prevent steam from rotting your subfloor from the top down. Have you ever noticed a mysterious damp smell coming from under your sink even when everything looks dry? Let me know in the comments if you’ve faced that ‘hidden leak’ frustration. I once ignored a small drip for three months and ended up having to replace an entire section of subfloor. If you are just starting your setup, checking out a diy dishwasher installation step-by-step guide is the best way to ensure you don’t miss these critical details that pros use to pad their invoices. I’ll explain exactly why your installer insists on a high loop drain and how you can do it better for under ten dollars.
Make Gravity Work for Your Drainage
The high loop is not a suggestion; it is a fundamental rule of fluid dynamics. To execute this correctly, you need to pull your drain hose as high as possible under the sink cabinet before it connects to the disposal or the tailpiece. Think of it like a mountain pass: water from the sink has to climb an impossible hill to get back into your dishwasher. I learned this the hard way during a summer renovation where I thought a straight line was more efficient. Three days later, the bottom of my dishwasher looked like a swamp because every time I washed my hands, the sink drainage trickled back into the machine. This is exactly why your drain hose needs a high loop to stop the smell and prevent bacterial growth.
Secure the Loop with This Five-Minute Trick
Grab a heavy-duty zip tie and a single 3/4-inch screw with a plastic mounting base. Find the highest point on the side wall or the underside of the cabinet near the sink. Fasten the base, loop the zip tie through it, and cinch the hose tight. Do not over-tighten; you want to support the hose without pinching it. If you use flimsy tape or cheap brackets, the vibration of the machine will eventually shake it loose. Using the right materials is one of the top tips for selecting the right parts for dishwasher installation. I once used duct tape for a ‘quick fix’ on a rental unit, only to have it peel off six months later, resulting in a slow leak that warped the cabinetry.
Shield Your Countertops from Steam Damage
While the drain hose handles the liquid, the vapor barrier handles the gas. Modern dishwashers release a significant amount of hot steam when the door is opened at the end of a cycle. Without a barrier, that steam hits the underside of your countertop—whether it is laminate, wood, or even stone—and begins a slow process of delamination or mold growth. You need to apply a moisture-resistant foil tape or the plastic barrier provided by the manufacturer. If you are unsure which components are necessary for your specific model, checking common dishwasher parts and their role in proper installation can save you from a major headache.
Apply the Barrier for Maximum Coverage
Clean the underside of the counter with rubbing alcohol first. Any grease or dust will prevent the adhesive from bonding. Lay the strip down so it extends at least two inches past the front edge of the dishwasher. This creates a ‘drip edge’ for the steam to condense and roll off rather than soaking into the wood. Skipping this simple step is a classic example of what your dishwasher warranty doesn’t cover and how to avoid fees later on. Manufacturers consider steam damage to cabinets a ‘site issue,’ not a machine defect. I have seen beautiful custom cherry cabinets ruined in less than a year because someone forgot a five-dollar piece of foil tape. If you find your machine is already acting up during this process, you might need essential parts for troubleshooting dishwasher installation issues to get things back on track. Ensure your hose is routed through the cabinet wall correctly by following the correct way to route wiring through a kitchen cabinet to avoid any sharp edges that could puncture your lines over time.
Stop thinking generic parts are just a bargain
While it is tempting to save fifty bucks on a knock-off pump from a random marketplace, you are likely setting a countdown on your machine’s life. In my years of tinkering, I have seen ‘bargain’ parts fail in months, often taking the expensive control board with them. This is a classic case of how to spot a fake replacement part before it fries your control board. Most people do not realize that why oem pumps outlast cheap alternatives every time comes down to the precision of the seals and the specific heat tolerances of the motor windings. If you are currently swapping components, top tips for selecting the right parts for dishwasher installation suggest sticking to manufacturer-approved gear. Have you ever fallen into this trap and had a cheap part fail right after you installed it? Let me know in the comments.
Will your DIY job actually kill your warranty?
Here is the hard truth: your ‘cost-saving’ DIY project might be the reason your manufacturer denies a four hundred dollar repair later this year. According to the Association of Home Appliance Manufacturers (AHAM), improper installation and the use of uncertified components account for a significant percentage of early-life appliance failures. This is why your warranty claim fails without an authorized receipt in many instances, as manufacturers want to see that a professional verified the water pressure and electrical load. To protect yourself, focus on maximizing your dishwashers warranty through proper parts selection and keep every single scrap of paperwork. I have seen hundreds of claims rejected simply because the risks of skipping the professional installation receipt were not taken seriously during the initial setup.
The soft water paradox you haven’t considered
Everyone talks about hard water scale, but here is a contrarian take: excessively soft water can be just as damaging to your unit’s internal health. While most guides focus on the easiest way to clean calcium from your heating element, they often ignore the threat of ‘glass etching.’ Soft water is so chemically ‘hungry’ for minerals that it actually pulls them from your glassware and the machine’s own internal components. It sounds counterintuitive, but why soft water is ruining your dishwasher interior faster than hard water is a real phenomenon that leads to cloudy glasses and brittle plastic parts. Finally, avoid the most common mistakes professional installers see, like the ‘oops’ factor of reusing an old brass fitting. Even if it looks clean, why your installer refuses to reuse your old brass fittings is about preventing microscopic stress cracks that lead to catastrophic leaks after the kickplate is installed. If you are in the middle of a setup, follow top tips for seamless dishwasher installation in 2025 to ensure your kitchen stays dry and your warranty remains fully intact.
If you really want to graduate from a casual DIY-er to a household hero, you need to stop guessing and start measuring. I never touch a repair without my trusty digital multimeter. It is the only way to know if your heater has actually died or if you are just looking at a tripped safety. Learning how to test your thermal fuse with a basic multimeter is the single most valuable skill you can acquire. It has saved me at least three service calls where the technician would have charged me over a hundred dollars just to say, ‘Yep, it is the fuse.’ Professional service bulletins from major brands like Bosch and Whirlpool often emphasize that electrical continuity is the first thing a pro checks, yet it is the last thing homeowners think about.
Why You Need a Multimeter in Your Kitchen Junk Drawer
This kind of expert advice on dishwasher installation troubleshooting is what separates a machine that lasts five years from one that lasts fifteen. If your display is completely dead, check that fuse before you panic and buy a new control board. I have seen people scrap perfectly good machines because they didn’t want to spend ten minutes with a probe. Keeping your internal components healthy is also about parts to check when installing a dishwasher for long term performance. If you can verify the voltage yourself, you avoid the predatory ‘diagnostic fees’ that many repair companies rely on to pad their margins.
How do I maintain my machine’s efficiency over several years?
The secret isn’t some magic chemical; it is a physical habit of cleaning the components people usually ignore. You have to get intimate with your filters. Most people know about the main screen, but there is often a secondary mesh that collects fine silt and grease. If you ignore the hidden drain screen you probably forgot to clean, your pump has to work twice as hard to push water through. This extra strain is exactly how to diagnose dishwasher parts during warranty periods—if the motor sounds like it is grinding through gravel, it is probably a clogged secondary screen. Over time, understanding dishwasher parts a key to effective maintenance becomes second nature and saves your motor from an early grave.
Smart Sensors and the Future of Kitchen Safety
I predict that in the next few years, we will see a massive shift toward predictive diagnostics where your machine tells you a part is about to fail before it actually leaks. We are already seeing the beginning of this trend with tools like the $20 smart sensor that detects leaks before your kitchen floods. These tiny devices are becoming essential for anyone who wants to avoid how to salvage a flooded kitchen after a supply line failure scenarios. Imagine getting a notification on your phone that your water inlet valve is drawing too much current, allowing you to swap it out for ten bucks before it bursts and causes thousands in flooring damage.
To keep your peace of mind, don’t just set your machine and forget it. I challenge you to go under your sink today and check that high loop we talked about—if it is sagging or the zip tie is brittle, replace it immediately. This simple act of top tips for seamless dishwasher installation in 2025 keeps your kitchen dry and your insurance rates low. You should also take a moment to review understanding dishwasher warranty policies for peace of mind so you know exactly what is covered before a crisis hits. If you aren’t sure where to start, looking at common dishwasher parts and how to replace them effectively will give you the confidence to tackle the next small issue before it becomes a flood.
Hard Truths About Those ‘Cheap’ Five-Minute Shortcuts
Reflecting on a decade of appliance repair, I have realized that the most expensive part of any installation is the ego of the person holding the wrench. Many homeowners view the vapor barrier or high loop as ‘optional extras’ because the machine runs without them on day one. However, after seeing countless rotted subfloors, I’ve learned that common dishwasher parts and their role in proper installation are designed by engineers for a reason. Here are the lightbulb moments I wish I had sooner:
- Saving fifty dollars on a generic inlet valve is a gamble where the prize is a flooded kitchen; the precision of OEM seals is simply unmatched.
- A high loop isn’t just about drainage; it is a sanitary barrier that keeps sink bacteria out of your ‘clean’ dishes.
- If you skip the alcohol-prep step before applying your vapor barrier, you are essentially just leaving a piece of tape to fall off in six months.
- Documentation is your best friend. If you ever need to use your protection plan, having a log of your steps and part numbers is how you win.
The Small Gear I Use to Keep My Kitchen Dry
I don’t go into any project without a few specific items that have earned my trust over years of trial and error. First, I always keep a digital multimeter handy for expert advice on dishwasher installation troubleshooting when the power doesn’t kick on. Second, I’ve started installing the $20 smart sensor that detects leaks before your kitchen floods under every new unit. It is a tiny insurance policy that pays for itself a thousand times over if a fitting ever vibrates loose. Finally, I swear by heavy-duty, UV-rated zip ties for the high loop; standard interior ties can become brittle and snap due to the constant heat cycling under the sink. If you are feeling overwhelmed by the technical specs, don’t hesitate to reach out via the contact us page for more personalized guidance.
#IMAGE_PLACEHOLDER_E#
Take Pride in Your Own Handiwork
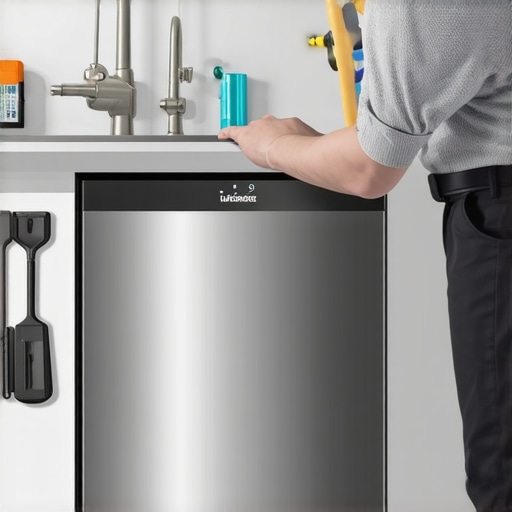
There is a unique kind of satisfaction that comes from hearing your dishwasher hum to life, knowing every seal is tight and every wire is secure. By taking the time to do things right—from the high loop to the moisture barrier—you aren’t just saving on labor costs; you are taking control of your home’s longevity. Follow these top tips for seamless dishwasher installation in 2025 and you will join the ranks of homeowners who never have to worry about a midnight flood. You have the tools, the knowledge, and the plan; now it’s time to get it done. Did you find the high loop or the vapor barrier more difficult to install in your kitchen layout? Let me know in the comments below!
Related Posts

Why You Need a Professional to Install Smart Features
It was late at night, and there I was, elbow-deep…
How to install a dishwasher when you have no existing plumbing
Ever swung open your dishwasher door after a cycle and…

How to Prove Pre-Existing Damage Before Your Installer Leaves
I remember it like it was yesterday: the gleam of…