
I will never forget the smell of damp drywall and the sound of my socks squelching against the hardwood at three in the morning. My kitchen had transformed into a shallow pond. Just hours earlier, I had patted myself on the back for saving a few hundred bucks by installing my new dishwasher alone. I thought I followed every diy dishwasher installation step-by-step guide on the internet. But one tiny, cross-threaded brass fitting changed everything. When the adjuster showed up two days later, he didn’t care about my hard work or my pride. He wanted to see a professional invoice. When I could not produce one, the realization hit me like a ton of bricks: my savings had just cost me thousands in floor repairs that my insurance company would not touch.
Your Weekend Project Could Be a Financial Trap
We live in a world where you can learn to fix almost anything on YouTube, and I am usually the first guy to tell you to grab a wrench. However, there is a massive difference between swapping out a frayed door cable and messing with the main water lines. Most homeowners assume their all-perils policy is a safety net for any disaster. Unfortunately, many policies contain a faulty workmanship clause. According to the Insurance Information Institute, standard policies often exclude damage resulting from poor maintenance or improper DIY repairs. If a leak happens because you skipped professional leveling or used an old, crusty hose, you are likely on the hook for every penny of the damage. In my early days, I made the classic blunder of thinking tight enough was good enough. I did not realize that checking specific parts like the water inlet valve was non-negotiable. Today, I am going to pull back the curtain on why your insurance company loves it when you DIY and how you can protect your home without losing your mind. We will look at the specific language that triggers a denial and how to document your work so it actually holds up.
Is professional installation really just a cash grab?
I get it. You are looking at a $150 installation fee and thinking about all the steak dinners that could buy. You might even have the essential parts sitting on your counter right now. But here is the kicker: that fee is not just for the labor; it is for the liability. When a pro signs that receipt, they take the blame away from you in the eyes of the insurance gods. Have you ever had a claim denied because of a project you did yourself? I would love to hear your story in the comments—it might just save someone else from a $5,000 mistake. The truth is, many of us ignore the risks of skipping the professional installation receipt until the water starts rising. We think we are being savvy, but we are actually gambling with the biggest investment we own. Before you even think about sliding that unit into the cabinet, you need to understand exactly where the line is drawn between a successful DIY and a negligent installation.
Stop the Flood Before You Even Plug It In
Before you even slide that unit into its new home, you need to know how to prepare your kitchen for dishwasher installation to avoid common plumbing bottlenecks. I learned the hard way that a successful install isn’t just about the machine turning on; it is about making sure it stays dry ten months from now. Look for the shut-off valve first and ensure it actually closes completely. If it drips, replace it now. It is much easier to swap a valve in an empty cabinet than it is when you are pinned under a 100-pound machine.
Throw Away Your Old Connectors
The biggest mistake I see—and the one that cost me a kitchen floor—is the “good enough” mentality with old hardware. There is a specific reason why your professional installer refuses to reuse your old brass fittings: metal fatigues over time and seals lose their elasticity. When I tried to reuse a perfectly good-looking elbow joint on my second DIY attempt, it leaked just enough to grow mold but not enough to trigger a floor sensor. Always buy a new installation kit with the most durable braided steel hoses for long-term safety. This isn’t just a suggestion; it is the cornerstone of common dishwasher parts and their role in proper installation.
Master the High-Loop or Face the Smell
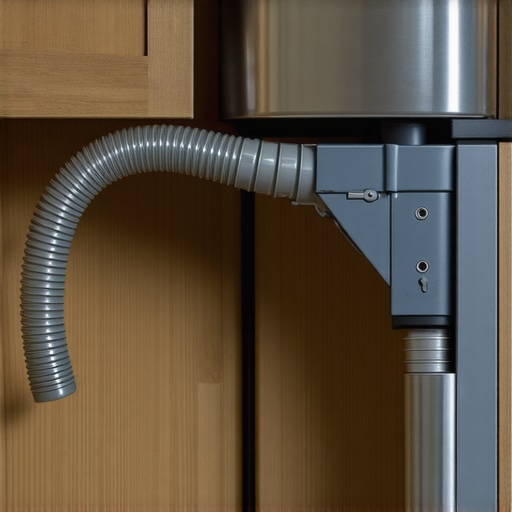
If your dishwasher smells like a swamp after three weeks, you probably skipped the “high loop.” I remember staring at a tangled drain hose and thinking, “Why does it need to go that high?” Well, without that physical barrier, dirty sink water siphons back into your clean machine during every sink use. It is why your installer insists on a high loop drain and why it is a critical leak prevention step most professional installers charge extra for. Use a zip tie or a bracket to secure the hose as high as possible under the counter before it connects to the garbage disposal. It is one of those top tips for seamless dishwasher installation in 2025 that separates the pros from the amateurs.
Level the Machine or Lose Your Warranty
Most people think a slight tilt doesn’t matter as long as the dishes get clean. They are wrong. A tilted machine puts uneven pressure on the door gasket, leading to micro-leaks that ruin your subfloor. I once spent two hours wondering why a brand-new unit was weeping from the bottom left corner; it turned out I was only 1/8th of an inch off-level. Learning why professional leveling prevents your door from leaking saved me from buying a new seal. Use a spirit level on the top edge and the side. Adjust the front feet until it is perfect. If you don’t, you might find that your warranty claim for a door gasket was denied because the installation was deemed improper.
Document Every Single Part You Use
If you are determined to go the DIY route, keep a dedicated folder. Inside that folder, you need the receipts for essential parts for troubleshooting dishwasher installation issues and any brand-name valves you replaced. When an insurance adjuster asks for proof of maintenance, showing them you knew when to replace dishwasher parts for optimal performance can be the difference between a full payout and a total denial. Review the complete list of dishwasher parts covered by warranty so you know exactly what is your responsibility and what the manufacturer must handle. Being organized isn’t just about being neat; it is about protecting your bank account from a “faulty workmanship” clause.
Most homeowners spend a fortune on water softeners to protect their plumbing, assuming that the softer the water, the better the appliance life. While I agree that the impact of hard water on your warranty eligibility is a major headache, there is a dangerous counter-myth that rarely gets discussed. In my years of repairing high-end units, I have seen that why soft water is ruining your dishwasher interior faster than hard water is a very real threat. When water is too soft, the detergent becomes hyper-aggressive. Without minerals to grab onto, the enzymes begin to etch your glassware and can even cause premature pitting in a stainless steel tub. It is a nuanced balance that most DIY guides completely ignore.
The Cheap Part Trap That Ends in Smoke
The biggest “oops” factor I encounter isn’t a lack of effort; it is a lack of quality control. We are all tempted by the $15 replacement valve on a major marketplace, but the risks are astronomical. I have walked into kitchens where a homeowner tried to save a few bucks by ignoring the difference between oem and generic water inlet valves, only to have the generic solenoid fail in the open position. That is a guaranteed flood. Beyond the leak risk, there is the electrical side. I constantly have to teach people how to spot a fake replacement part before it fries your control board. A slight variation in resistance in a knock-off sensor can send a surge back to the main CPU, turning a $20 repair into a $500 disaster. Have you ever fallen into this trap of buying the cheapest part available? Let me know in the comments—I want to know if you managed to get a refund or if you were stuck with the bill.
Does the detergent you choose impact your mechanical warranty?
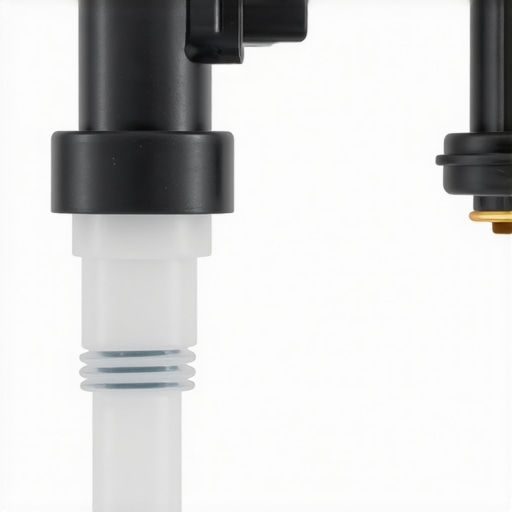
It sounds like a marketing ploy, but the chemistry inside your machine is precisely engineered. According to the Association of Home Appliance Manufacturers (AHAM), using excessive detergent or the wrong type can cause …over-sudsing, which eventually burns out the wash motor. I have seen this happen most often when people switch to eco-friendly pods without checking if their water is already soft. If you want to stay ahead of the curve, you need to start understanding dishwasher parts a key to effective maintenance. It is not just about the big pieces; it is about the tiny sensors that dictate the whole cycle.
The One Tool That Saves You From Guesswork
I will let you in on a secret: my most used tool is not a wrench. It is a digital multimeter. Most folks just start replacing boards when a unit will not start, but I have saved hundreds by learning how to test your thermal fuse with a basic multimeter. If that $10 fuse is blown, your $300 control board is likely perfectly fine. Being able to diagnose dishwasher parts during warranty periods gives you the leverage to talk to technicians without being brushed off.
How do I keep my dishwasher alive for twenty years?
The answer is simpler than most think: clean the things you cannot see. Every six months, I pull the bottom spray arm to find the best way to clean the hidden filter under the spray arm. If that filter is even 20% clogged, your motor works twice as hard. According to the Whirlpool Job Aid for Dishwasher Service, water pressure must be maintained between 20 and 120 psi for the inlet valve to seat properly. If your pressure is too high, you are stressing the seals every single night. 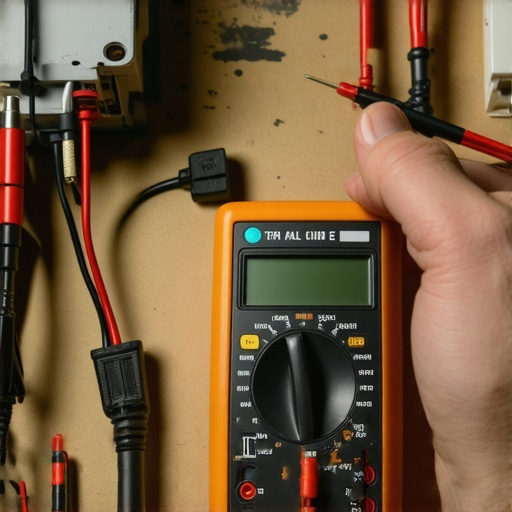
Look Behind the Kickplate Before the Floor Warps
I make it a habit to perform the best way to test for a slow leak behind the kickplate once a month. It takes two minutes to unscrew those panels and shine a flashlight at the motor housing. Finding a hidden leak under the motor housing early is the only way to prevent subfloor rot. Looking forward, I predict that within five years, we will not even need to do this manually. We are already seeing the $20 smart sensor that detects leaks before your kitchen floods becoming standard in high-end builds. These sensors will eventually link directly to your insurance provider to lower your premiums in real-time. Before you go, grab a multimeter and test your thermal fuse tonight—it is the best way to get familiar with the guts of your machine without breaking anything.
Lessons from a Squelchy Kitchen Floor
Looking back at my DIY disaster, I realized that the $150 I “saved” was actually a down payment on a $4,000 floor repair. The first hard truth is that insurance adjusters are looking for a reason to say no, and an unlicensed installation is their favorite excuse. Always prioritize understanding dishwasher warranty policies for peace of mind before you even open the box. Secondly, never underestimate the power of a single brass fitting. Using old hardware is like wearing a raincoat with holes in it; it might work for a minute, but eventually, you are getting wet. I’ve learned that keeping a small logbook of when I swap out essential parts every dishwasher owner should know about isn’t overkill—it’s smart homeownership. Finally, trust your gut. If a connection feels slightly off or a hose seems too tight, it is. The extra thirty minutes you spend re-threading a valve is much cheaper than the three months you’ll spend fighting with a contractor over water damage.
The Gear I Actually Use Every Six Months
To keep your machine running without surprises, you don’t need a truck full of tools, but you do need these three specific items. First, get a high-quality digital multimeter. It is the only way to avoid the guessing game when looking for expert advice on dishwasher installation troubleshooting. Second, I always keep a spare set of common dishwasher parts and how to replace them effectively like door gaskets in my pantry. If a seal fails at 9 PM on a Sunday, you’ll thank me. Third, I highly recommend checking out what your dishwasher warranty doesn’t cover and how to avoid fees so you aren’t blindsided by service trip costs.
#IMAGE_PLACEHOLDER_E#
Take Control of Your Kitchen’s Safety Today
Building a home you can trust starts with the small details behind the cabinetry. Whether you choose to tackle the job yourself or hire a professional to ensure your dishwasher installation is documented and safe, the goal is the same: a quiet, dry, and efficient kitchen. You have the knowledge now to avoid the pitfalls of “faulty workmanship” and the tools to keep your appliance humming for a decade or more. Don’t let the fear of a leak stop you from maintaining your investment; instead, let it drive you to be the most informed homeowner on the block. Have you ever had a DIY project result in an unexpected insurance headache, or did your professional installer save the day at the last minute? Let me know in the comments below!
Related Posts
The Best Way to Tape Your Vapor Barrier During Installation
I will never forget the sharp, sour smell of damp…
The Proper Tool for Tightening Your Water Supply Compression Fit
Never underestimate how a simple mistake with water supply connections…
The Proper Height for a Sink Air Gap Installation
It was a morning just like any other, until I…