
I remember the Tuesday night my dishwasher tried to attack me. I had just finished a big family dinner, and the bottom rack was loaded to the brim with heavy cast-iron pans and stoneware. As I pulled the rack out to its full extension, the entire machine lunged forward, tipping toward my toes like a 100-pound metal seesaw. It was a heart-stopping moment of pure panic where I had to choose between catching the machine or saving my kitchen floor. That was the day I realized that even a high-end appliance is only as good as its anchor. I had made the classic rookie mistake of thinking that because the unit fit snugly under the counter, it didn’t actually need to be bolted down. I was wrong, and if your machine is shimmying or leaning every time you reach for a clean plate, you are heading for a mess too. Today, I am going to show you exactly how to ground that runaway appliance for good using the right techniques and parts.
Your Machine Should Not Be a Seesaw
In my early days of DIY, I honestly thought I could outsmart the manual. I had just installed a beautiful new unit and was so worried about drilling into my brand-new quartz countertops that I simply skipped the mounting brackets altogether. I figured the weight of the machine would keep it in place. This is one of the most common mistakes professional installers see, and it’s a recipe for a warped door frame or a flooded kitchen. According to the Association of Home Appliance Manufacturers (AHAM), improper anchoring is a leading cause of mechanical stress on the door hinges, which can eventually lead to leaks. When that machine tilts, it puts immense pressure on your water lines and drain hoses. If you have been ignoring a slight wobble, you are essentially gambling with your flooring. We are going to fix that today by looking at how to stop your machine from tipping forward once and for all.
Will adding more screws actually ruin my expensive cabinets?
I hear this fear from neighbors all the time. They are terrified that securing the dishwasher means Swiss-cheating their beautiful cabinetry. The truth is, modern hardware is designed to be discrete and safe. If you cannot go upward into a stone counter, there is a specialized side-mounting bracket kit that secures the unit to the side cabinets instead. Have you ever felt that sickening ‘thud’ when you open your dishwasher door and the whole thing shifts? Tell me I’m not the only one who has had to use their knee to hold the machine up while unloading the bottom rack! It’s a common frustration, but it’s also a sign that your diy dishwasher installation might be missing a final, crucial step. In the next section, I’ll walk you through the leveling process and the specific brackets you need to make your kitchen feel solid again.
Get the Bubble Centered Before You Drill
Before you even think about grabbing a screwdriver, you have to get the unit level. Think of your dishwasher like a skyscraper; if the foundation is off by even a degree, everything at the top is going to be crooked. I start by adjusting the front legs—most of these can be turned by hand or with a basic wrench. You want the machine to sit perfectly flush against the underside of the counter. If there is a gap, the machine will vibrate like a percussion section every time the wash cycle kicks in. This is exactly why professional leveling prevents your door from leaking. When the frame is racked or twisted because the floor is uneven, the rubber gasket can’t create a watertight seal. I use a small spirit level on the top edge of the tub to ensure it is flat from left to right and front to back. Only when that bubble stays dead center should you move on to the actual anchoring.
Deciding Between Top and Side Mounts
The material of your countertop dictates your next move. If you have laminate or wood, you can usually screw the mounting brackets directly into the underside of the counter. But if you have granite, quartz, or marble, drilling upward is a one-way ticket to a very expensive crack. In those cases, you need to look at the easiest way to install a side-mounting bracket kit. These clever little pieces of hardware allow you to secure the machine to the cabinetry on either side instead of the stone above. It’s a vital part of selecting the right parts for dishwasher installation. I once saw a DIYer try to glue the brackets to the underside of a granite slab with construction adhesive. It held for about a week until the heat from the drying cycle softened the glue and the whole machine came crashing forward during a heavy load. Don’t be that person—use the hardware designed for the job.
Check These Guts Before You Close the Gap
While you have the machine pulled out far enough to access the mounting points, take five minutes to inspect the components that are usually hidden. This is the prime time for identifying parts to check when installing a dishwasher for long-term performance. Look at the water inlet valve for any crusty white residue, which is a telltale sign of a slow leak. If it looks suspect, it is much easier to learn how to replace a faulty water inlet valve in 15 minutes now than it is after you’ve bolted everything down. Also, keep your paperwork handy. Messing with the internal wiring or using non-standard brackets can sometimes complicate things later, so keep understanding dishwasher warranty policies for peace of mind at the forefront of your planning.
Don’t Let Your Mounting Screws Sabotage the Top Rack
I remember a job where I rushed the bracket installation on a high-end unit. I drove a screw just a fraction of an inch too deep. When I went to slide the top rack out to test it, I heard a sickening scrape. The screw head was literally shearing the plastic off the rack runner. It was a classic example of the mounting screw mistake that blocks your top rack from closing. I had to back it out, patch the hole, and start over. Precision matters more than power here. When you drive those screws into your cabinetry, make sure they are flush with the bracket and that they don’t protrude into the path of the dishwasher’s moving parts. A well-anchored machine shouldn’t just be stable; it should be silent and invisible in its operation.
Once you’ve successfully anchored your machine, it’s tempting to think the hard work is over. However, this is where many DIYers fall into the ‘good enough’ trap. While the basics get the machine running, the nuances are what keep it running for a decade instead of a season. One of the most common mistakes professional installers see is the assumption that if a part looks the same, it performs the same. I used to be a firm believer in ‘generic is fine,’ but experience has taught me otherwise. Everyone says you can save forty dollars by picking up a universal water valve, but in my experience, those generic components often lack the internal dampening needed to prevent water hammer, which eventually rattles your pipes loose.
Stop Reusing Your Old Brass Fittings
Here is a hard truth that many homeowners hate to hear: that old brass elbow from your previous unit is a ticking time bomb. I’ve seen people get frustrated when a professional installer refuses to reuse your old brass fittings, but there is a scientific reason for it. Over years of heat cycles and exposure to hard water, brass becomes brittle. Re-torquing an old fitting often creates microscopic stress fractures that won’t show up until three in the morning when you are fast asleep. Always start with fresh, high-quality hardware to ensure a tight seal that survives the test of time. 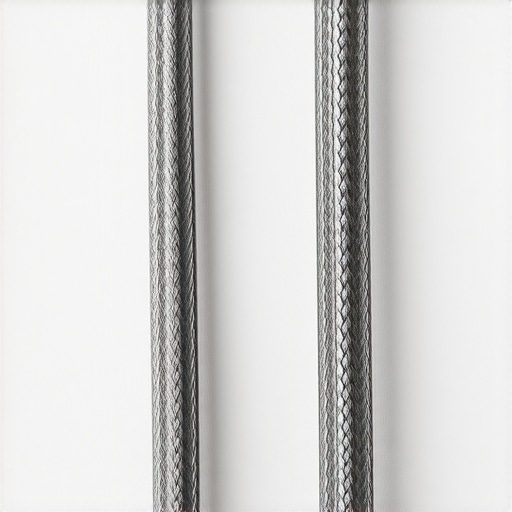
Why did my warranty claim get rejected even though I used a ‘certified’ part?
This is a question that breaks my heart every time I hear it. The nuance lies in the fine print of your coverage. Many homeowners don’t realize that the difference between OEM and generic water inlet valves can be the deciding factor in a claim. If a non-original part causes a flood, the manufacturer can—and will—deny the claim for the surrounding damage. To protect yourself, you need to know how to get your warranty claim approved on the first try by keeping every single receipt and ensuring every component matches the manufacturer’s specifications. According to a study by the National Kitchen & Bath Association (NKBA), improper installation and the use of non-spec parts remain the leading causes of early appliance failure in residential remodels.
The Soft Water Myth That Could Kill Your Tub
Here is a contrarian view for you: more soft water isn’t always better. While we are taught that hard water is the enemy of appliances, the reality is that soft water is ruining your dishwasher interior faster than hard water in some specific cases. Without minerals to react with, highly softened water can actually begin to leach ions directly from your glassware and the stainless steel tub itself, a process known as etching. It’s a delicate balance that impacts the impact of hard water on your warranty eligibility. If you have a whole-home softener, you might actually need to use less detergent than the box recommends to prevent chemical etching. Have you ever noticed a permanent cloudiness on your favorite glasses that just won’t wash off? You might be over-softening. Let me know in the comments if you’ve run into this!
Keep Your Drain Hose High or Face the Consequences
Finally, let’s talk about the ‘high loop.’ It’s the one step that looks optional but is absolutely mandatory. I once helped a friend troubleshoot a ‘smelly’ dishwasher only to find that every time they ran their sink disposal, dirty water was back-flowing into the dishwasher. This happens because they skipped the loop. This simple geometry is why your installer insists on a high loop drain. It creates a physical gravity barrier that prevents sink waste from siphoning back into your clean tub. It’s a five-minute fix that saves you from a lifetime of ‘stinky dishwasher’ syndrome. Have you ever fallen into the trap of thinking a part was ‘good enough’ only to have it fail a month later? Share your stories below so we can all learn from those DIY battle scars.
I used to think that once the machine was bolted in and the first cycle ran without a puddle forming, my job was done. I was wrong. The difference between a dishwasher that lasts five years and one that hits the fifteen-year mark often comes down to what you do six months after the installation. To keep everything running smoothly, you need to move beyond the ‘set it and forget it’ mindset and start thinking about the long-term health of your machine’s internals. This means paying attention to the sounds it makes and being proactive about swapping out small components before they cause a catastrophic failure. If you want to avoid a late-night emergency call to a plumber, you need to treat your appliance like a finely tuned engine.
Ditch the Adjustable Wrench for Good
When I first started doing my own repairs, I reached for a standard adjustable wrench for everything. It’s the ultimate DIY ‘rookie’ tool. The problem is that these wrenches often have just enough play in them to round off the edges of your brass fittings, making it impossible to get a perfect seal without over-torquing. Now, I never touch a water line without a set of dedicated flare nut wrenches. These wrap around more of the fitting’s surface area, providing the leverage you need without the risk of slipping. Knowing the proper tool to use when tightening your water supply line is the secret to a leak-free home. I also keep a digital multimeter in my kitchen junk drawer. Most people think these are only for electricians, but if your machine suddenly won’t start, it’s the only way to know for sure if a cheap fuse has blown or if you’re looking at a five-hundred-dollar control board replacement. You can easily learn how to test your thermal fuse with a basic multimeter in about three minutes, and it might save you from replacing the whole unit prematurely.
How do I keep my dishwasher running like day one for the next decade?
Maintenance isn’t just about cleaning the filter once a year. It’s about a scheduled audit of the parts that naturally wear down. I personally keep a small logbook (yes, I’m that guy) to track when to replace dishwasher parts for optimal performance. For example, the rubber in your door gasket and the braided coating on your hoses don’t last forever. Even if they look fine, the internal integrity of a hose degrades over time. I recommend upgrading to the most durable braided steel hoses for long-term safety every five to seven years, regardless of how they look on the outside. According to technical documentation from the International Association of Plumbing and Mechanical Officials (IAPMO), over 60% of household floods originating from appliances could be prevented by regular hose replacement. It’s a small price to pay for the peace of mind that comes with knowing your kitchen won’t turn into a swimming pool while you’re at work.
The Inevitable Rise of AI Diagnostics
Looking ahead, the days of guessing why your machine is ‘acting weird’ are numbered. We are already seeing a massive shift toward appliances with integrated AI sensors that can detect the specific vibration frequency of a failing bearing before you can even hear the noise. In the next few years, I predict that ‘predictive maintenance’ will become the standard. Your machine won’t just tell you it’s broken; it will send an alert to your phone saying that the circulation pump is operating at 85% efficiency and suggest an OEM replacement before it seizes entirely. This is why I always emphasize that why OEM pumps outlast cheap alternatives every time is more relevant than ever—smart sensors are calibrated for specific tolerances, and a generic part can throw off the entire diagnostic system. If you want to be ahead of the curve, I highly recommend grabbing your multimeter today and testing your thermal fuse just to get comfortable with the ‘guts’ of your machine. It’s the best way to demystify the appliance and take control of your kitchen’s longevity.
Why the Cheapest Part Often Costs the Most Over Time
If there is one thing I’ve learned from years of crawling under kitchen sinks, it’s that your appliance is only as strong as its weakest link. I’ve seen homeowners save ten dollars on a generic drain hose only to spend thousands on new hardwood flooring when that hose split after a few dozen cycles. Realizing the common dishwasher parts and their role in proper installation is the first step toward true home maintenance mastery. You also have to be vigilant about paperwork; I’ve seen first-hand the risks of skipping the professional installation receipt when homeowners try to claim a motor failure under warranty later on. Finally, never ignore the ‘settling’ period. After about twenty cycles, check your mounting screws again. The heat and vibration can sometimes loosen things just enough to cause a brand-new rattle.
The Four Essentials in My Appliance Survival Kit
I don’t go into any repair or install job without a specific set of tools. First, a set of flare nut wrenches is non-negotiable for water lines to avoid stripping those soft brass fittings. Second, I always keep a high-quality digital multimeter handy; it’s the most reliable way to test a thermal fuse or a heating element without expensive guesswork. Third, I recommend every homeowner knows exactly how to find your units hidden model number for replacement parts, as using the wrong version of a pump or seal is a recipe for a leak. Lastly, I keep a physical copy of expert advice on dishwasher installation troubleshooting taped to the back of the sink cabinet—it’s a lifesaver when you need to remember the high-loop height or a torque spec. #IMAGE_PLACEHOLDER_E#
Your Path to a Quiet and Reliable Kitchen
Taking the leap to handle your own appliance care can feel daunting, but the reward is a kitchen that works for you, not against you. By following a diy dishwasher installation step-by-step guide and paying attention to the small details like leveling and anchoring, you have already done more than most. You’ve turned a potential hazard into a reliable tool that will serve your family for years. Don’t be afraid to listen to your machine; it will tell you when it needs a new gasket or a filter cleaning. Have you ever discovered a ‘hidden’ leak during a routine check, or did a mounting screw ever give you a headache during your last install? Let me know your stories in the comments below!
Related Posts

The Critical Reason to Flush Your Water Lines Before Hooking Up a New Machine
I remember the smell of that "new appliance" scent like…
How to Level a Machine When Your Floor is Drastically Slanted
Ever had that sinking feeling when you open your dishwasher…
The Proper Tool for Tightening Compression Fittings
It was a Friday afternoon, and I was staring at…