
I remember standing in my kitchen at 2:00 AM, my feet slightly cold against the floor, listening to a sound that shouldn’t have been there. It wasn’t a loud bang or a gurgle—it was the soft, persistent hiss of water flowing through my dishwasher’s drain line, even though the cycle had ended an hour ago. I had just finished what I thought was a clever repair using a generic part I found online. Little did I know, I was about to watch my water bill skyrocket because of one tiny, stuck solenoid. If you’ve ever opened your machine only to find it bone-dry but heard the ghost of a running tap, you know exactly the frustration I’m talking about. I’ve been there. I remember one humid July evening when I tried to save fifty bucks by forcing a generic drain valve into my five-year-old machine. I ignored the proper installation tips and figured ‘close enough’ was good enough. It wasn’t. Within two hours, I had a slow drain that wouldn’t stop, and I was terrified I’d just voided my dishwasher warranty by messing with things I didn’t fully understand. That ‘cheap’ part ended up costing me a whole weekend and a lot of unnecessary stress. Today, we are going to fix that. We will diagnose exactly why that valve stays open and how you can restore your machine’s efficiency without a frantic call to a plumber.
Stop Watching Your Money Flow Down the Sewer
We’re tackling the drain valve today—that unsung hero that’s supposed to keep water in when you need it and let it out when you don’t. When it stays open, you aren’t just wasting water; you’re putting your entire kitchen at risk of a backup. My big mistake early on? I assumed all valves were created equal. I skipped the fundamental maintenance checks and went straight for the cheapest fix. Big mistake. According to the EPA’s WaterSense program, a single leaky faucet or valve can waste more than 3,000 gallons of water a year—and a dishwasher valve stuck open is much worse than a dripping tap. Often, the culprit is just a bit of debris or a worn-out spring. You might need to look at common dishwasher parts to see what actually controls that flow. If your solenoid is burnt out or the return spring has snapped, no amount of cleaning will help. You have to know when to replace parts rather than just scrubbing them. Have you ever noticed your water meter spinning like a top even when everything in the house is supposed to be off?
Is it actually worth the effort to repair an old unit?
I hear this all the time from my neighbors. They worry that once the drain valve goes, the motor is next. But here is the truth: a drain valve is a relatively simple component. In many cases, the quick fix for a dishwasher that won’t stop draining is much cheaper than a new unit. Don’t let the fear of a complex machine stop you. I used to think I needed a degree in engineering to touch the pump assembly, but once you realize why OEM parts outlast cheap alternatives, the repair becomes much more predictable. The goal isn’t just to stop the leak; it’s to ensure your machine actually performs its job without costing you a fortune in utilities. Let’s look at the specific steps to get that valve behaving again.
Clear Out the Gunk That Jammed the Gate
Accessing the drain valve usually requires removing the kickplate—that thin metal or plastic panel at the bottom of your machine. I remember the first time I did this; I was so focused on the screws that I didn’t notice the layer of dust bunny ‘insulation’ that had migrated under there. Once that panel is off, you’re looking for a small plastic assembly, often with a metal rod attached to a solenoid. This is the gatekeeper. Before you go buying anything, look for physical obstructions. One time, I spent twenty minutes wrestling with a ‘broken’ valve only to find a single, tiny piece of a broken glass jar wedged perfectly in the hinge. If you’ve had a recent ‘event’ in the kitchen, you might even need to know how to safely remove a stuck glass fragment from the pump because debris often travels. Think of the drain valve like a door; if there is a pebble in the frame, it won’t shut. You’ll want to look at the common dishwasher parts and how to replace them effectively to identify the specific clip holding your valve in place.
Test the Solenoid With a Simple Multimeter
If the valve is clear but still won’t close, the problem is likely electrical. The solenoid is basically an electromagnet that pulls the valve open. When the power cuts, a spring should snap it shut. I’ve seen cases where the coil inside burns out, leaving the valve dangling in limbo. You can actually use the same logic you’d use to test your thermal fuse with a basic multimeter. Set your meter to ohms and touch the leads to the solenoid terminals. If you get an ‘OL’ or infinite reading, the part is dead. It’s much better to find this out now than to guess and waste money. This is the quick fix for a dishwasher that won’t stop draining—diagnosing the electrical failure before it leads to a flood.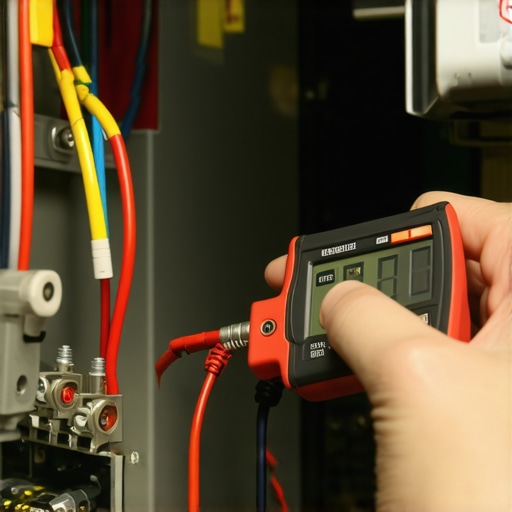
Swap the Valve Without Breaking Your Back
If you’ve determined the part is bad, don’t panic. Replacing it is often a ‘one-screw’ job. However, you need to be careful with the tension springs. I once let a spring fly across the kitchen and spent an hour hunting for it behind the fridge. When you install the new one, make sure you are using top tips for selecting the right parts for dishwasher installation to ensure compatibility. A generic spring might feel the same, but if the tension is off, the valve won’t seal under water pressure. This is also a good time to check your guide to dishwasher parts warranty because if your machine is less than a year old, that part might be free.
Why Proper Alignment Prevents Future Leaks
Just getting the part in isn’t the finish line. If the valve is slightly tilted, the plunger will bind. I’ve learned the hard way that why professional leveling prevents your door from leaking also applies to internal components. If the machine isn’t level, gravity works against those tiny plastic hinges. Make sure everything clicks into place smoothly. If you’re struggling, it might be worth looking into expert advice on dishwasher installation troubleshooting to see if your specific model has a known alignment quirk. Once the new valve is seated, give the plunger a manual flick—it should snap back like a mousetrap. If it feels sluggish, check for any wiring harness interference that might be dragging against the rod.Most DIYers believe that if a replacement part fits the socket, it is safe to use. I used to think the same until I realized that modern high-efficiency machines are essentially computers with plumbing. I have seen homeowners try to save twenty dollars with an off-brand solenoid, only to realize that learning how to spot a fake replacement part before it fries your control board is a skill you never want to use in a crisis. If the electrical resistance is even slightly off, the control board senses an over-current and may shut down permanently. You aren’t just buying a piece of plastic; you’re buying compatibility with your machine’s delicate brain.#IMAGE_PLACE_HOLDER_C#
Can a $15 generic part really fry a $300 control board?
Yes, and it happens more often than most homeowners realize. Experts at the Association of Home Appliance Manufacturers (AHAM) emphasize that modern appliance sensors are calibrated to hyper-specific electrical tolerances, often within a 5-10% margin of error. When you swap in a generic pump or valve, the feedback loop to the main processor can get garbled, leading to ‘ghost errors’ where the machine thinks it is leaking when it isn’t. This is precisely why OEM pumps outlast cheap alternatives every time; they are engineered to speak the exact software language of your specific model.
Avoid the Paperwork Trap That Voids Your Protection
The second trap is the ‘good enough’ installation mindset. I have seen people reuse old components because they look fine to the naked eye. However, there is a technical reason why your professional installer refuses to reuse your old brass fittings. Brass is a relatively soft metal that deforms to create a watertight seal exactly once. Attempting to reseat it is gambling with a slow, hidden leak that could rot your subfloor over months. Finally, do not overlook the administrative side of the repair. If you do not have a licensed technician’s signature or an authorized part number on your ledger, you face the risks of skipping the professional installation receipt. Without that documentation, manufacturers often default to ‘improper installation’ and deny your claim. You must know how to get your warranty claim approved on the first try by meticulously recording the repair steps and part origins. Have you ever fallen into this trap? Let me know in the comments.The one wrench that stops your water line from leaking. I used to reach for whatever pliers were closest in my junk drawer, but I quickly learned that an adjustable wrench with a wide, smooth jaw is the only way to go. Using the proper tool to use when tightening your water supply line prevents you from stripping the soft metal threads on the water inlet valve. I’ve seen too many DIYers use needle-nose pliers and end up with a slow drip that destroys their cabinetry. It is a five-dollar tool that saves a thousand-dollar floor.
How do I keep my dishwasher running like new for a decade?
Maintenance isn’t just about reacting when things break; it is about preventing the slow buildup that kills efficiency. According to the International Association of Certified Home Inspectors (InterNACHI), the average dishwasher lasts about nine years, but with the right care, you can push that to twelve or fifteen. One of the biggest killers is hard water scale. I have found that using the trick to removing hard water scale without chemical descalers is essential for keeping your spray arms and heating elements clean. You also need to realize that essential parts every dishwasher owner should know about aren’t just motors and pumps—they are the tiny filters and screens. If you ignore the hidden drain screen you probably forgot to clean, your pump has to work twice as hard, which leads to early burnout. Think of it like a vacuum cleaner; if the bag is full, the motor starts to scream. 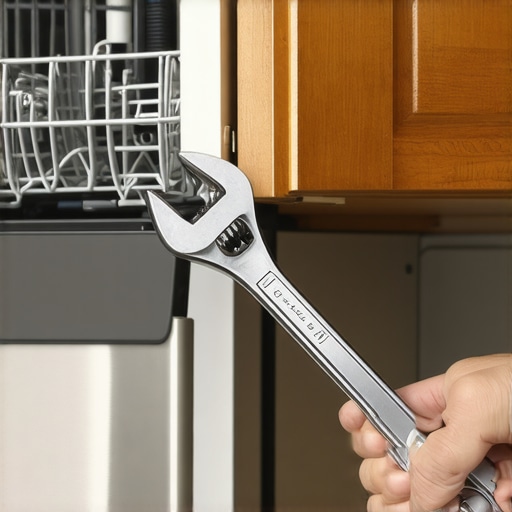
Smart sensors and the death of the mystery leak
We are entering an era where your machine will likely tell you it is failing before you see a drop of water. I am already seeing a shift toward predictive maintenance in high-end models. Knowing how to update the firmware on your kitchen wi-fi module is becoming just as important as knowing how to use a screwdriver. These updates often calibrate the sensitivity of the $20 smart sensor that detects leaks before your kitchen floods. In the next five years, I expect AI-driven diagnostics to be the standard, potentially saving us from the why your warranty covers parts but not the 150-dollar service trip fee just to have a technician tell you a sensor was dusty. If you want to get ahead of the curve, I recommend checking your drain screen today. It is a three-minute job that could literally double the life of your motor.
What I Learned While Hunting for a Tiny Spring
After years of tinkering, I’ve realized that the most expensive part is often the one you have to buy twice. When I first started, I thought a solenoid was just a magnet and some wire, but modern units are far more sensitive than the old mechanical workhorses. I now know how to spot a fake replacement part before it fries your control board because those generic alternatives often lack the precise electrical resistance required by high-end sensors. Another hard-earned lesson? Always keep your paperwork. I learned the hard way that why your warranty claim fails without an authorized receipt is usually the first thing a manufacturer looks for during a dispute. It is not just about the physical repair; it is about the documentation that proves you did it right.
My Go-To Toolbox for Appliance Maintenance
You don’t need a truck full of gear to keep your machine running, but you do need specific, high-quality gear. First, a reliable digital multimeter is non-negotiable for testing electrical components like solenoids and thermal fuses. Second, never underestimate the value of the proper tool to use when tightening your water supply line—a smooth-jawed adjustable wrench prevents the thread damage that leads to slow, hidden leaks. Finally, I always recommend keeping a physical copy of your unit’s wiring diagram, often found in a plastic pouch behind the kickplate. These simple additions to your workflow turn a guessing game into a targeted, professional-grade mission.
Reclaim Your Kitchen Today
Fixing a dishwasher is about more than just stopping a leak; it is about taking control of your home’s efficiency and utility costs. By choosing the right components and following the correct steps, you are maximizing your dishwashers warranty coverage today while ensuring your appliance lasts for another decade of service. Don’t let a small mechanical hiccup or a confusing error code intimidate you. You have the knowledge and the tools to get the job done right the first time. Have you ever tried to save money with a generic part only to have it backfire on you? Let me know in the comments below!
Related Posts
The Cold Water Pre-Rinse Myth That Wastes Energy
I remember standing over my kitchen sink for twenty minutes…
Why Your Energy Bill Spikes When You Use Heated Dry
I remember the moment I realized my energy bills were…
Why Modern Dishwashers Take Longer to Wash Than Older Models
One evening, I stared at my newly installed dishwasher, puzzled.…