
I’ll never forget the sound my Bosch made after I moved it across town in the back of a borrowed pickup. It wasn’t a hum; it was a rhythmic, soul-crushing ‘thump-grind’ that told me I’d made a massive mistake before the first cycle even finished. I had assumed, like many DIYers, that as long as the stainless steel door didn’t get scratched, I was winning. Little did I know, the residual water sitting in the sump had migrated into the motor housing during the bumpy ride, turning my ‘good deal’ into a pile of scrap metal. Today, I want to make sure you don’t repeat my expensive rookie error. We’re going to walk through exactly how to move these machines so they actually work when you plug them back in.
The Hidden Danger of Tipping Your Machine
Moving a dishwasher isn’t like moving a dresser. Inside that chassis is a complex network of hoses and a precision-engineered pump that really hates being upside down. If you’ve ever wondered why your machine makes a thumping sound, it often traces back to physical trauma during a move. When you tilt the unit, you risk dislodging the float switch or, worse, allowing stagnant water to bypass the seals and fry the electrical components. This is why expert advice on dishwasher installation always emphasizes keeping the unit upright. According to the Association of Home Appliance Manufacturers (AHAM), improper handling during relocation is a leading cause of premature pump failure in major appliances.
Is upright transport really that necessary?
You might be thinking, ‘It’s just for twenty minutes, surely it can lay flat?’ I thought the same thing. But the reality is that the pump assembly is often the most vulnerable component. If you aren’t careful, you’ll find yourself needing essential parts every dishwasher owner should know about much sooner than you planned. Have you ever tried to save space by laying an appliance down, only to regret it the moment you hit a pothole? Let me know in the comments because I’ve been there, and the cleanup isn’t pretty. Before you even think about lifting, you need to look at parts to check when installing a dishwasher to ensure nothing was shaken loose. Protecting that pump starts with proper drainage and stabilization, which we’ll dive into next. [image_placeholder_1]
Empty the Sump or Risk a Flood
Most people think a simple drain cycle is enough to prepare for a move. It’s not. Think of the dishwasher sump like a straw—even when you’ve finished your drink, there’s always a half-inch of liquid hanging around the bottom. If you tilt the machine, that ‘stagnant’ water flows directly into the electrical harness. During my 2018 move, I skipped the manual drain and ended up spending three hours drying out a control board with a hairdryer because the unit wouldn’t even power on. Use a shop-vac on the drain hose to suck out every drop. If you don’t have a vac, lower the drain hose into a shallow pan at floor level to let gravity do the work. This is the quick fix for a dishwasher that wont stop draining issues later on, as it ensures no debris settles in the pump during transit.
Disconnect Lines Without Stripping Threads
When you’re under the sink, don’t just grab any pair of pliers. Use the proper tool to use when tightening your water supply line or loosening it to avoid ruining the brass fittings. If you see green corrosion on the valves, it’s a sign that your common dishwasher parts and their role in proper installation are reaching their end of life. Replacing a $15 valve now is much cheaper than dealing with a high-pressure spray in your new kitchen.
Lock the Racks Before They Become Projectiles
Imagine your dishwasher is a glass box filled with heavy, sliding metal weights. If those racks are free to roll, they will slam into the inner tub liner or the door glass the second you hit a speed bump. I use heavy-duty zip ties to anchor the racks directly to the side tracks. It sounds like overkill, but it prevents the the spray arm alignment error that leaves the top rack dirty which often happens when racks are jostled out of place. 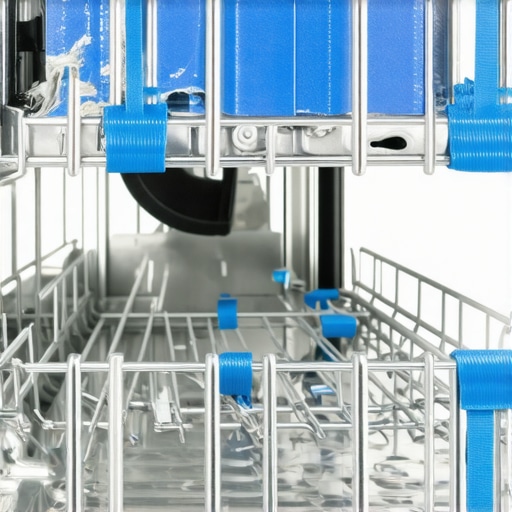
Don’t Snap Your Door Cables
Dishwasher doors are surprisingly heavy. Without the cabinet holding the chassis down, the door can fly open and pull the whole unit onto your toes. More importantly, that sudden drop can snap the tension wires. Learning how to replace a frayed door cable without a specialist is a great skill, but preventing the break is better. Wrap the entire unit in moving blankets and use high-quality painters’ tape to keep the door shut. Avoid duct tape unless you want to spend your afternoon scrubbing adhesive off the stainless steel finish.
Keep the Unit Vertical to Save the Motor
You wouldn’t transport a wedding cake on its side, and your dishwasher deserves the same respect. The motor and pump assembly sit on rubber mounts designed to handle vertical vibrations, not lateral shearing. Keeping the unit upright protects the essential parts for troubleshooting dishwasher installation issues from being knocked out of alignment. If your move is long-distance, the vibration of the road can loosen the internal seals if the machine isn’t properly oriented.
Check the Leveling Legs Immediately
Once the unit is in the new house, don’t just slide it in and plug it in. Check the legs. A machine that isn’t level is a machine that leaks. Why professional leveling prevents your door from leaking is all about ensuring the water pools correctly over the drain and the door gasket seals evenly. Use a spirit level on the open door to ensure the chassis hasn’t been tweaked during the move. Before you commit to the final install, take a moment to how to diagnose dishwasher parts during warranty periods to ensure no internal components were damaged by the bumpy ride.Let’s dig deeper into the actual hookup, because this is where the ‘fine print’ of your warranty can either save you or leave you with a massive bill. Most DIYers think the hard part is over once the unit is off the truck, but the installation phase is where the most expensive ‘hidden’ mistakes happen. One common myth I hear is that if the machine was working perfectly at the old house, the old parts are still good. That is a dangerous assumption. For instance, many people try to save a few dollars by using their old electrical line, but why your professional installer refused your old cord is actually about fire safety and resistance changes in aged copper.
Stop Reusing Your Old Power Cord
There is a massive ‘Oops’ factor when it comes to the water inlet. Everyone says to tighten it until it won’t budge, but in my experience, that’s how you crack the plastic housing on a $200 valve. The International Association of Plumbing and Mechanical Officials (IAPMO) states that over-tightening is a leading cause of ‘silent’ leaks that rot subfloors. If you don’t use the proper tool to use when tightening your water supply line, you’re just guessing.
Why does my machine think it’s leaking when it’s dry?
This is the ultimate nuance of modern appliance moving. Modern smart machines have sensitive moisture sensors in the base pan. If you tilted the machine during the move and a single tablespoon of water hit that sensor, the unit will stay in ’emergency drain mode’ forever. Knowing how to get your warranty claim approved on the first try is crucial here, because a technician will charge you a hefty fee just to tell you the sensor was tripped by residual water.
The One Paperwork Error That Kills Your Coverage
Furthermore, let’s talk about the ‘Warranty Trap.’ Most homeowners believe a manufacturer’s warranty is an iron-clad promise. It isn’t. Why your warranty claim fails without an authorized receipt is the hard lesson many learn too late. If you can’t prove a code-compliant process did the work, they will blame the ‘user installation’ for any future motor failure. This is often the mistake that voids your lifetime tub warranty before you’ve even run the first load. 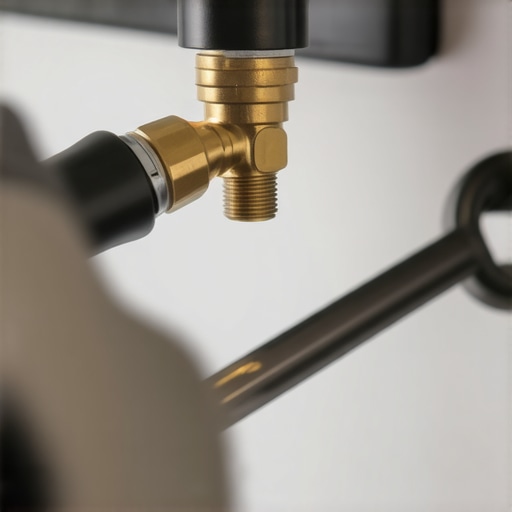 When choosing between the difference between OEM and generic water inlet valves, always go original for the first two years. Using third-party parts is a giant red flag for auditors. Have you ever fallen into this trap where a ‘simple’ DIY job cost you your warranty coverage? Let me know in the comments. To ensure you’re doing it right, follow a diy dishwasher installation step-by-step guide that actually prioritizes these warranty-saving nuances. Also, take a moment to understand when to replace dishwasher parts for optimal performance before you just throw old components back into a new kitchen layout.
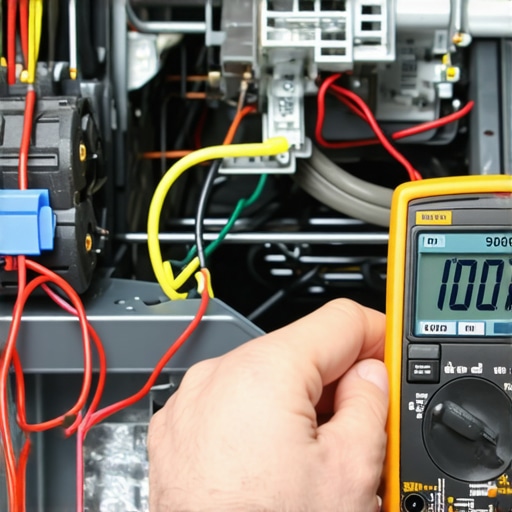
Beyond the paperwork, there is a specific kit of tools I swear by that separates a ‘weekend warrior’ install from a professional-grade setup. If you aren’t using a digital multimeter during your installation, you are basically flying blind. I personally use one to verify that the power coming from the wall hasn’t been degraded by age, which is a leading cause of fried control boards in older homes. This is also the most reliable way to test a thermal fuse before you finish the cabinet mounting and realize the machine won’t even start. Taking five minutes to learn how to test your thermal fuse with a basic multimeter can save you an entire afternoon of disassembly later on.
My Essential Toolkit for a Leak-Free First Run
I also recommend keeping a dedicated small shop-vac with a tapered nozzle in your moving kit. This isn’t just for cleaning up spills; it is the best tool for clearing out the old sink drain line. According to the Uniform Plumbing Code (UPC) Section 807.3, domestic dishwashing machines must have an approved air gap or high loop to prevent backflow, and I’ve seen countless new machines ruined because the owner didn’t realize their existing sink plumbing was half-clogged with years of grease. This is why your professional installer checks your sink drain for clogs first before even unboxing the unit. If you skip this, the back-pressure can blow out your new drain pump in weeks.
How do I keep my dishwasher running like new for a decade?
Maintenance isn’t a once-a-year event; it is a habit. I tell everyone to set a calendar reminder every ninety days to check the hidden drain screen you probably forgot to clean. This is usually located deep under the spray arm and acts as the last line of defense for your pump. When this screen gets gunked up, the motor has to work twice as hard, leading to that dreaded ‘humming’ sound that precedes a total failure. If you start seeing grit on your glasses, don’t blame the detergent yet; it’s likely a sign of understanding dishwasher parts a key to effective maintenance and knowing when a simple cleaning is better than a replacement. Additionally, take the time to understand when to replace dishwasher parts for optimal performance, especially the rubber gaskets which tend to dry out and crack if the machine sits unused for more than a month.
The Future of Smart Leak Mitigation
Looking ahead, I predict we are moving toward a world where ‘manual’ maintenance will be a thing of the past. We are already seeing the rise of smart sensors that can detect a single drop of moisture and shut off the home’s main water valve via Wi-Fi. In the next few years, I expect manufacturers to integrate AI that analyzes the electrical draw of the wash motor to predict a failure before it actually happens. For now, however, the best defense is a good offense. I challenge you to try this one advanced tip: before you hook up your next machine, perform the critical reason to flush your water lines before hooking up a new machine into a five-gallon bucket. You would be shocked at the amount of construction debris or sediment that can come out of a line that’s been sitting stagnant. It’s a simple move that ensures your internal valves stay pristine from day one.
Hard-Won Truths from My Trail of Broken Appliances
After years of tinkering with kitchen setups, I’ve realized that gravity is a dishwasher’s worst enemy during a move. Even if you think the unit is bone-dry, residual water likes to hide in the side-mounted heat exchangers. One tiny tilt can send that water straight onto the delicate control board. I’ve also learned that your smartphone is your best witness; always take photos of the electrical connections and the water line before you disconnect anything. It serves as a visual map for the re-installation and helps you how to prove pre-existing-damage before your installer leaves if you hired professionals to help with the heavy lifting. Lastly, never assume a ‘standard’ hose will fit your new sink; variations in cabinet depth often require a longer line than you’d expect.
The Toolkit That Saves My Floors and My Sanity
If you are serious about protecting your kitchen, there are three items you simply cannot skip. First, a high-quality water leak alarm. For a small investment, the $20 smart sensor that detects leaks before your kitchen floods can save you thousands in subfloor repairs. Second, I always keep a small telescoping mirror in my pocket. It allows you to peek under the unit while it’s running to spot ‘weeping’ leaks that aren’t yet visible on the floor. Finally, keep your model number written on a piece of masking tape on the front of the machine. You’ll need how to find your units hidden model number for replacement parts quickly if a plastic clip snaps during the transition, and searching for it while the machine is already pushed into the cabinetry is a nightmare.
Your Path to a Stress-Free First Load
Taking the lead on your own appliance relocation is empowering, but it requires a mix of patience and precision. By focusing on vertical transport and verified drainage, you are ensuring your installation stands the test of time. Don’t rush the process; the extra thirty minutes you spend leveling the legs and verifying the warranty paperwork is what separates a DIY win from a service call. If you hit a snag or need a professional eye to verify your work, don’t hesitate to contact us for expert guidance. Your dishwasher is an investment in your home’s efficiency—treat it with the care it deserves and it will return the favor for years to come. Have you ever found a mysterious puddle under your machine after a move, or did you manage a perfectly dry install? Let me know your experiences in the comments below!
Related Posts
The Water Sensor Mistake That Leads to Frequent Repairs
I remember the sinking feeling I got when my brand-new…
Why Your Dishwasher Interior Is Turning Orange
It was a morning just like any other, until I…

Why Your Top Rack Glassware Keeps Breaking During Cycles
Ever had that sinking feeling when you hear that dreaded…