Have you ever stared at your dishwasher after a frustrating cycle, realizing that it’s been clinging to old parts from a kit that’s long outdated? I certainly have. I remember replacing components only to find out later they weren’t designed for the newer models, and suddenly, I was facing costly repairs and reduced performance. That lightbulb moment hit me hard—clinging to old kits and parts can turn a simple upgrade into a headache. But what if I told you there’s a smarter way? Today, we’re diving into the three new parts you need to ensure your 2026 dishwasher installation is reliable, efficient, and backed by warranty.
The Cost of Ignoring Updated Parts in Your Dishwasher Setup
Using outdated components isn’t just a minor oversight; it can compromise the entire installation, void warranties, and lead to frequent breakdowns. I learned this the hard way early on. My mistake was assuming that a generic kit from a few years back would still cut it, but it resulted in leakages and unnecessary service calls. Trust me—being proactive about the latest parts can save you hundreds and preserve your warranty coverage. For a detailed understanding of how to choose parts that align with warranty policies, check out this expert guide. Next, let’s focus on the exact parts that will keep your installation future-proof and safeguard your investment.
The Biggest Skepticism: Are These New Parts Really Worth It?
Honestly, I was once skeptical too. I wondered if upgrading to modern parts was just hype or a necessity. My early mistake was installing a generic gasket that claimed compatibility, but it failed to seal properly, leading to leaks. This experience taught me to prioritize the newest, warranty-covered parts designed specifically for 2026 models. Remember, the right parts aren’t just about fitting; they’re about long-term durability and warranty compliance. To understand what parts are covered by warranty, refer to this comprehensive list. Now, let’s guide you through selecting the best components for your setup, so you can avoid my pitfalls and enjoy peace of mind.
Identify the Critical Parts Before Starting
Begin by pinpointing which components need replacement. Refer to this guide to understand the role each part plays. I once tackled a dishwasher repair and mistakenly replaced a non-essential pump, which didn’t improve performance. That mistake taught me to verify the part’s importance with a quick diagnosis rather than guesswork.
Gather Genuine Parts That Match Your Model
Always source OEM parts compatible with your dishwasher’s model year. Think of it like fitting puzzle pieces; using incorrect parts is like forcing mismatched pieces, risking leaks and damage. I recommend checking the warranty-covered parts list before purchasing. I once ordered a generic gasket that didn’t seal properly, leading to water leaks that I had to fix again—wasting time and money.
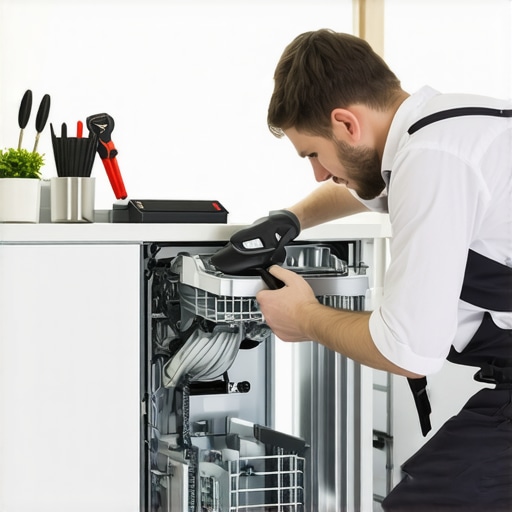
Disconnect and Prepare for Installation
Unplug your dishwasher and shut off water supply. Drain any remaining water to prevent spills and damage. Use tools like a screwdriver or adjustable wrench, ensuring you don’t strip screws or damage fittings. During my last repair, I marked wires with tape to remember their order, saving me time during reassembly. Think of this step as preparing the stage before a performance—staying organized avoids chaos later.
Remove Old Parts Carefully
Disconnect the faulty components, taking note of their orientation and connection points. Use a camera or smartphone to record the setup; this visual aid saved me hours when I replaced a complex pump assembly. Be cautious not to force parts out; gentle leverage prevents damage to fittings or seals. This step is crucial, as forcing can compromise the integrity of the installation and void warranty coverage.
Install New Parts Methodically
Position the replacement components precisely as the originals. Apply a thin layer of silicone sealant on gaskets to enhance sealing if recommended. Tighten fittings gradually in a cross pattern to ensure even pressure—much like tightening lug nuts on a tire. During my last install, skipping this pattern caused leaks, costing me extra hours troubleshooting. Properly torqued connections safeguard against future water damage and warranty issues.
Reconnect, Test, and Verify
Reconnect all electrical and water connections, then restore power and water. Run an initial cycle without dishes to identify leaks or anomalies. Pay close attention to noises or leaks during this test. I once missed a loose connection, which caused a leak during the first cycle. Performing thorough testing immediately catches problems, preventing warranty voids and future repairs. Remember, consistent testing is your best friend in warranty preservation.
Document Your Work and Keep Records
Photograph each step, especially before and after shots. Save receipts for OEM parts and maintenance records. Should warranty issues arise later, detailed documentation will support your claim. I keep a repair log on my device’s app, which has streamlined warranty claims and expedited service scheduling. Think of documentation as your repair insurance—making future troubleshooting and warranty claims straightforward and stress-free.
Many homeowners believe that selecting the newest parts and following basic installation steps guarantees a trouble-free dishwasher that stays under warranty. However, the truth lies in understanding the nuanced details that often go overlooked. For instance, a prevalent myth is that generic or cheaper parts are always sufficient, but in reality, using OEM components tailored for your specific model ensures optimal performance and warranty compliance. Failing to differentiate between compatible parts and strictly OEM ones can lead to leaks, functional failures, or even voided warranties, which many underestimate.
Another common mistake is assuming that the most straightforward installation approach is always the best. Advanced setups sometimes require precise torque specifications and correct routing of water lines, which are critical for warranty coverage. Neglecting these details can cause early component failure or warranty disqualification. Moreover, many forget that documentation plays a vital role; keeping detailed records and photos of the installation can expedite warranty claims and prevent disputes.
A hidden nuance involves understanding warranty policies—many believe a purchase automatically covers all repairs, but some warranties exclude certain parts or installation conditions. For example, improper sealing of gaskets or incorrect placement of filters may void warranty rights, even if parts are brand new. Consulting expert guides, like those at this comprehensive resource, helps clarify these subtleties.
For sophisticated enthusiasts aiming for long-term reliability, it’s essential to recognize that the installation environment matters. Hard water, for instance, can accelerate wear on certain parts, so selecting corrosion-resistant components and installing water softeners can extend warranty periods. Without these precautions, even perfectly installed dishwashers may face premature issues.
Have you ever fallen into this trap? Let me know in the comments. Remember, understanding these hidden nuances enables you to make smarter choices, ensuring your dishwasher performs reliably and remains protected under warranty for years to come.
The Gear That Ensures Long-Term Performance
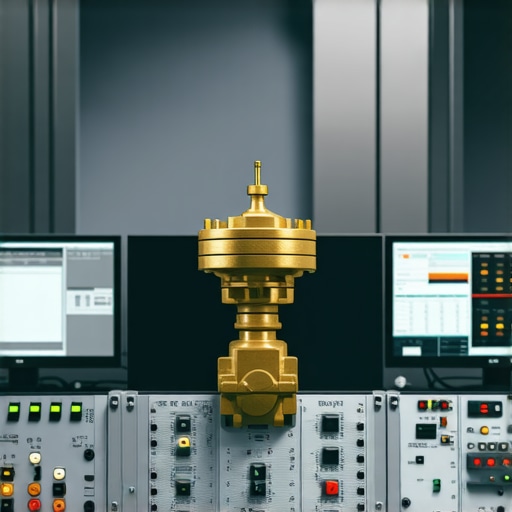
Maintaining a dishwasher might seem straightforward, but having the right tools can make all the difference. I swear by a high-quality digital multimeter—specifically, the Fluke 117. This device allows me to quickly verify electrical connections and diagnose component failures accurately, without guessing. When you’re dealing with complex wiring or suspect a sensor failure, a reliable multimeter saves time and prevents unnecessary part replacements. Additionally, a set of precision screwdrivers, like the Wiha 32092, provides the grip and control needed to handle delicate fittings and seals without damage. These tools help me avoid stripping screws or damaging delicate plastic components, which could void warranty coverage.
Smart Software for Precision Diagnostics
Beyond physical tools, I utilize specialized diagnostic software when troubleshooting. For example, expert diagnostic guides help interpret error codes and pinpoint issues precisely. Using these resources, I can identify whether a faulty pusher latch or water inlet valve needs replacement, reducing trial-and-error and ensuring warranty compliance. As technology advances, I predict diagnostic software will become even more integrated with smart appliances, offering real-time diagnostics via Wi-Fi and mobile apps, streamlining maintenance further.
Implement Routine Checks to Extend Longevity
Regular inspections of parts like gaskets, filters, and spray arms prevent costly breakdowns. I recommend setting a quarterly calendar reminder to examine these components, especially in hard water areas where mineral deposits can accelerate wear. A simple visual check paired with a quick clean—using a vinegar solution for mineral deposits—can dramatically improve performance. Additionally, keeping detailed records of maintenance dates and parts replacements helps monitor wear trends and plan proactive replacements before critical failures occur. This approach supports warranty longevity and reduces downtime, saving money in the long run.
Future Trends: The Shift Toward Smart Maintenance
I believe that in the coming years, smart diagnostic tools will dominate maintenance routines. Devices will automatically alert homeowners to upcoming component failures, and remote diagnostics will allow technicians to guide you through repairs via augmented reality apps. To stay ahead, investing in compatible smart sensors that track water quality and part performance today can prepare your setup for this future. For now, integrating regular manual diagnostics with trusted tools remains essential—it’s about combining human expertise with technology to keep your dishwasher operating reliably.
How do I Maintain My Dishwasher Over Time?
Consistent maintenance hinges on using the right tools—like a quality multimeter and precision screwdrivers—and subscribing to diagnostic updates. Regular checks of essential parts, combined with detailed record-keeping, enable you to catch issues early and maintain warranty coverage. Remember, technology is evolving, so stay informed about new diagnostic tools and software that can automate some of this process. Try scheduling a quick inspection of your water inlet valve this weekend using your multimeter and see how much smoother your next cycle runs. For comprehensive guidance, visit this resource.
Three Lessons I Wish I Knew About Keeping Your Dishwasher Reliable
First, I realized that rushing to replace a part without verifying its compatibility can set off a chain reaction of issues—wasted time, money, and warranty complications. Second, I learned that investing in quality, OEM parts pays off in durability and peace of mind, preventing leaks and functional failures that generic parts often cause. Third, I discovered that meticulous documentation of each repair step and parts acquisition simplifies warranty claims and future troubleshooting, transforming a stressful ordeal into a manageable process.
My Top Tools and Resources for Successful Dishwasher Maintenance
I’ve found that a high-quality digital multimeter like the Fluke 117 is essential for diagnosing electrical issues accurately. A set of precision screwdrivers, such as the Wiha 32092, helps me handle delicate fittings without damage. For understanding warranty policies and selecting the right parts, the comprehensive guide on parts maintenance and the warranty-covered parts list have been invaluable. Additionally, diagnostic software resources assist in interpreting error codes, saving troubleshooting time and ensuring warranty compliance.
Ready to Transform Your Dishwasher Upkeep and Confidence
Armed with these insights and tools, you have the power to keep your dishwasher running smoothly and protected under warranty. Remember, the key lies in proactive maintenance, choosing the right components, and documenting your efforts. Don’t let hidden pitfalls catch you off guard—embrace these lessons and take control of your household appliance’s longevity. What’s the first step you’re going to take to improve your dishwasher maintenance routine? Share your plan below!
One Reply to “Stop Using Old Kits: 3 New Parts for 2026 Installations”
Leave a Reply
Related Posts
Smart Dishwasher Parts & Installation: Expert Tips for Long-Lasting Trust
I remember the moment clearly. My dishwasher stopped mid-cycle, water…
Fix the Smart-Fill Lag: Why 2026 Installs Need a Brass Bypass
I remember the moment vividly—standing in my kitchen, staring at…

Avoid the Tech Fee: 4 Installation Parts for 2026 Dishwasher DIYers
I'll never forget the moment I realized my simple dishwasher…
Reading through this detailed post really brought back my own experiences with outdated dishwasher parts. I used to just replace components with generic parts I found online, thinking they would do the job just as well. However, I soon realized that proper OEM parts not only fit better but also last longer and keep my warranty intact. A tip I found helpful was documenting each repair step with photos – it made warranty claims much smoother when I had proof of correct installation. One aspect I’m curious about is the future of smart diagnostics. Has anyone started integrating smart sensors or apps to monitor their dishwasher’s health regularly? I believe combining traditional tools like multimeters with newer tech could really revolutionize maintenance routines and prevent costly repairs before they happen. Would love to hear how others are planning to adapt their maintenance strategies with these emerging technologies.