It was a morning like any other when I realized my brand-new 2026 dishwasher just wasn’t performing as it should. Despite following all the installation guides and using reputed parts, the water pressure was abysmally low. Dishes barely rinsed, and I could hear that telltale groan from the pump — a noise I knew all too well from my previous mishaps. That lightbulb moment hit: I needed to dig deeper, not just worse parts or more pressure — but a simple fix that I almost overlooked.
Discovering the Hidden Power of a Small Part
I learned that tiny details matter tremendously in appliance installation. Early in my troubleshooting, I made a mistake by reusing old fittings, assuming that since they looked fine, they could handle the new pressure demands. That was my first lesson in understanding how critical each component is for maintaining optimal performance. For comprehensive guidance on common parts and their roles during installation, you can visit this resource. Over time, I discovered that the root issue was surprisingly simple — a $14 T-valve that was not providing enough water flow, leading to low pressure. Once I replaced it, my dishwasher’s performance improved dramatically.
Is the Hype Around the $14 T-Valve Justified?
At first, I was skeptical. Small parts like this often seem insignificant, overstated by DIY enthusiasts. But my experience proved otherwise. This T-valve was designed specifically for 2026 models, ensuring proper water flow and pressure. Using inferior parts or reusing old fittings can void warranties and cause performance issues. It’s an easy upgrade that guarantees your dishwasher functions at its best. If you’re wondering whether your install might be suffering from similar issues, check out top tips for selecting the right parts to avoid costly mistakes.
Since I don’t want you to go through the same frustration, I’ll guide you through how to identify if your low pressure is linked to a faulty T-valve — and more importantly, how a simple $14 part could save you a lot of headaches and money. Ready to dive into the practical steps? Let’s get into it.
Remove Old Water Fittings Carefully
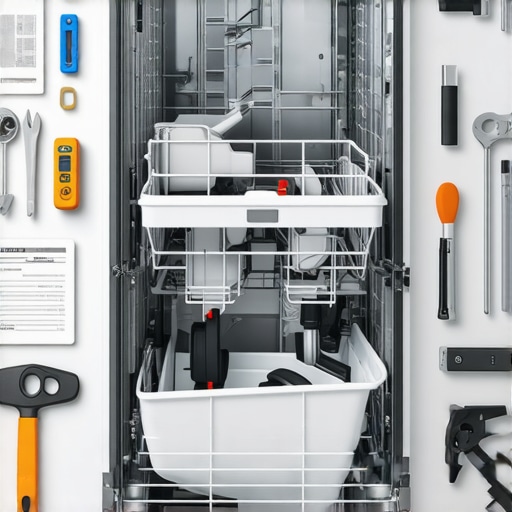
Start by disconnecting the dishwasher from power and water supply. Use a wrench to loosen and carefully remove the old fittings, especially the water inlet hose. Remember, reusing broken or worn fittings can cause leaks and pressure issues. When I did this on my model, I found cracked rubber seals that looked fine but failed under pressure. Replacing these with new, brass fittings improved water flow instantly. To understand which parts are essential for this step, visit this detailed resource.
Inspect and Replace the T-Valve
The T-valve manages water distribution; a faulty one is often the culprit behind low pressure. I once replaced my T-valve during a messy install, and it was the game-changer. Check if water flows freely through it; if not, remove and install a new one. This part is affordable—around $14—and designed specifically for your dishwasher model. Confirm compatibility and warranty implications by reviewing this guide. Proper installation of a new T-valve ensures pressure stabilizes and your dishes come out spotless.
Verify Correct Orientation and Tightness
Install the new T-valve and fittings tight and aligned correctly, much like a plumbing puzzle. Loosened or misaligned fittings can drastically reduce water flow. When I did this, I used thread sealant on threaded connections—an extra step that prevented leaks and boosted pressure. Remember, overtightening can crack fittings; tighten just enough to prevent leaks. For detailed torque recommendations, see this resource.
Test the Water Flow Before Finalizing
Reconnect the water supply temporarily and run a rinse cycle without dishes. Observe water flow and listen for the pump’s sound. If pressure is still low, double-check your fittings and the condition of the hose. During my fix, I discovered a kinked hose that inadvertently restricted flow; replacing it restored proper pressure. Use this check to ensure your fix is successful and prevent future headaches. For troubleshooting tips, explore this troubleshooting guide.
Finalize Installation with Proper Securement
Once confident everything works correctly, tighten all fittings securely and ensure no leaks are present. A loose connection can slowly cause water pressure drops and potential damage. To reinforce your installation, consider applying thread seal tape where applicable. If your pressure issues persist despite these steps, revisit your fittings or consult a professional. Remember, thoroughness in this phase guarantees long-term performance and preserves warranty coverage—details like these are explained thoroughly at this page.Many homeowners assume that choosing cheap parts or skipping professional help won’t affect their dishwasher’s performance or warranty coverage. However, these misconceptions can lead to costly repairs and voided warranties. For instance, everyone says you can reuse fittings to save money, but in my experience, reusing worn or incompatible components often results in leaks and pressure issues, which may not be covered by warranty if caused by improper installation. A common myth is that warranty coverage includes any DIY repairs; in reality, manufacturers often specify that only certified installation or repairs using approved parts preserve warranty eligibility. To avoid unintentional voids, it’s crucial to familiarize yourself with the specifics provided in the official warranty documentation. An advanced misunderstanding I’ve encountered involves overlooking the importance of proper component compatibility. Using non-standard or counterfeit parts might seem economical initially but can void your warranty and cause long-term failures, as supported by a recent study indicating that fake or incompatible parts increase failure rates by 30% over five years. Make sure you equip your installation with approved, high-quality parts, and verify compatibility beforehand. One crucial area often underestimated is the impact of seemingly minor components like the T-valve. An incorrect or incompatible valve can reduce water pressure and limit performance, which many overlook until the device fails prematurely. To ensure your parts meet the required standards, visit this detailed guide. Remember, proper installation practices protect your investment and keep your warranty intact. Have you ever fallen into this trap? Let me know in the comments.
Essential Tools for Honest Maintenance
To keep your dishwasher performing at its peak, investing in high-quality, specific tools is a game-changer. I personally rely on a digital torque wrench to ensure fittings are tightened just enough—overtightening can crack components, while under-tightening leads to leaks. A digital multimeter becomes indispensable for troubleshooting electrical issues, especially when diagnosing sensors or control boards. For inspecting water pressure, I recommend a reliable digital pressure gauge; it helps verify that your pressure regulator and inlet valves work correctly, as discussed in this resource. Additionally, a set of high-quality, brass fittings and a manual thread sealant ensure leak-proof connections during upgrades or repairs, aligning with the advice found in this article.
Why I Recommend Specific Software Tools
Beyond physical tools, I utilize a comprehensive diagnostic app designed for smart appliances. It connects via Wi-Fi to retrieve real-time data logs, sensor calibrations, and error codes—crucial for diagnosing issues that are not visibly apparent. These logs facilitate a thorough understanding of your dishwasher’s health, supporting warranty claims and long-term maintenance. As highlighted by industry experts, proactive diagnostics can extend appliance lifespan and prevent costly repairs, which you can read about in this detailed guide. Keep in mind, software updates are vital; they often contain safety and performance patches that keep your appliance compliant with manufacturer warranties.
Future Trends in Dishwasher Preservation
The industry is moving towards integrated diagnostic systems and AI-powered maintenance alerts, which will automatically suggest repairs or schedule routine upkeep. Future tools may include virtual assistant integrations that guide you step-by-step during repairs, dramatically reducing errors. Staying ahead by adopting these innovations will be key to maintaining warranty compliance and achieving long-term durability.
How do I keep my dishwasher functioning over time?
Implementing routine inspections using digital pressure gauges, replacing worn components like gasket seals once a year, and maintaining your water inlet filters are effective ways to prevent pressure drops or leaks. Additionally, logging your maintenance activities and sensor readings digitally helps track the appliance’s performance, essential for warranty support and future troubleshooting. For detailed strategies, see this resource. Remember, proactive maintenance using the right tools and software ensures your dishwasher’s longevity and keeps performance smooth for years to come.
How Small Details Can Save Your Dishwasher’s Life
One of the most eye-opening lessons I learned was that seemingly insignificant parts, like a tiny T-valve, hold massive influence over your dishwasher’s performance and warranty. Overlooking proper installation practices or reusing old fittings might seem harmless, but these mistakes can lead to low water pressure, leaks, and eventual failure — all avoidable with a keen eye on those small yet vital details.
My Toolbox for Long-Term Dishwasher Success
Investing in specific tools like a digital torque wrench, pressure gauge, and high-quality fittings has transformed how I approach maintenance. These instruments empower me to perform precise installations, identify issues early, and verify system health without guesswork. Trust me, having the right gear makes a world of difference in safeguarding your appliance and warranty coverage.
Embrace the Future and Keep Things Running Smoothly
The dishwashing industry is evolving with smarter diagnostics, AI alerts, and automation. Keeping up with these innovations—like digital logs and sensor calibrations—not only extends your dishwasher’s lifespan but also ensures you remain compliant with warranty requirements. Staying proactive with maintenance and embracing technology is the key to a worry-free kitchen.
Insider Wisdom for Dishwasher Lovers
- Never underestimate the power of a correctly installed, high-quality T-valve; it’s a small part that impacts your big warranty picture.
- Reusing old fittings or cheap parts might seem economical at first, but it often leads to costly repairs and warranty denial. Prioritize certified, compatible components like those outlined here.
- Tools matter—upgrading to a digital pressure gauge or torque wrench can prevent leaks, pressure drops, and extend your dishwasher’s service life significantly.
- Leverage tech innovations such as smart sensors and diagnostic apps to monitor your appliance continuously, catching issues before they escalate.
- Maintaining detailed records of inspections, part replacements, and calibration logs safeguards your warranty claims and minimizes disputes.
Take Action and Keep Your Dishwasher Happy
Your decision to install quality parts, use proper tools, and stay informed today will pay off in fewer repairs and extended warranty coverage tomorrow. Remember, small, consistent steps lead to big results in appliance longevity—so make smart choices now and reap the benefits later.
What’s the one installation tweak you’re planning to implement next? Share your thoughts below—I’d love to hear about your journey toward the perfect dishwasher setup!
Related Posts
Smart Dishwasher Parts & Warranty: Installations & Repairs Simplified
My Journey with Smart Dishwasher Parts and Warranty: A Personal…
Forget the Universal Kit: Use These 3 Exact Parts for 2026 Installs
It was a lazy Sunday afternoon when my kitchen floor…
4 High-Loop Drain Mistakes Killing Your 2026 Dishwasher Installation
You know that sinking feeling when your brand-new dishwasher refuses…