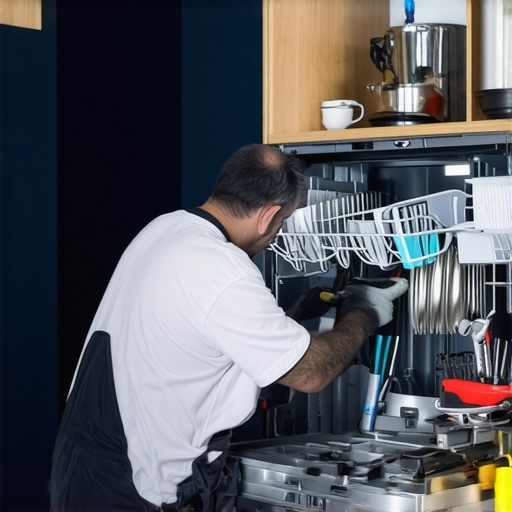
It was an early morning, and I was eager to finish installing my new dishwasher before the rush of the day. But as I threaded the supply line and watched a tiny trickle of water seep out from an improperly sealed fitting, I realized I was stumbling into a common trap that could jeopardize my warranty and cause costly damage down the line. That lightbulb moment made me reconsider everything I thought I knew about dishwasher installations, especially with the upcoming changes in 2026.
The Hidden Risk in 2026 Installations
Starting in 2026, many new dishwasher models come with stricter requirements that demand more than just plugging things in. One of the most overlooked components is the use of liquid sealant on certain fittings. It’s not just a good idea anymore; it’s a necessity to ensure your installation is compliant and durable. Why? Because manufacturers are tightening their standards to prevent leaks and warranty claims, which means properly sealing every connection is more critical than ever.
Is Liquid Sealant Really That Essential?
This is where a lot of DIY enthusiasts, myself included initially, make a mistake. I believed that snug fittings without any additional sealant would suffice — a common misconception that can lead to leaks or voided warranties. Early in my experience, I skipped applying liquid sealant on my drain and supply line connections, assuming that the factory fittings would hold up just fine. But I learned the hard way that certain fittings, especially with the new installation standards, demand an extra layer of protection. Using proper sealant can prevent small leaks that would otherwise ruin your day and potentially your warranty claim.
For a comprehensive look at common mistakes and best practices for dishwasher installations, I recommend checking out this guide. It covers crucial installation points to help you avoid costly errors.
Now, if you’re gearing up for a 2026 install or have already faced install hurdles, understanding the right sealant use can make all the difference. In the next sections, I’ll walk you through the step-by-step process to ensure your installation is up to par for the new standards and your peace of mind.
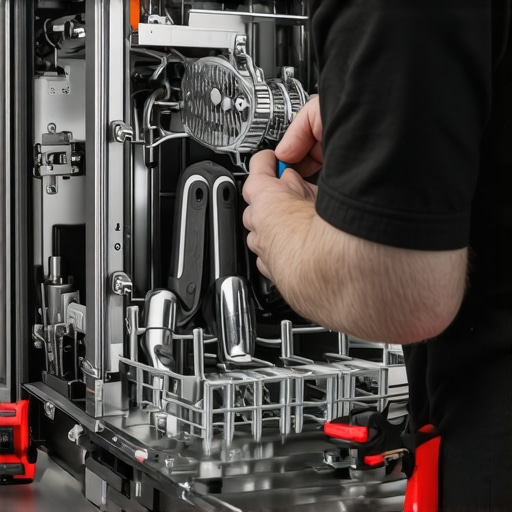
Properly Sealing Fittings to Prevent Leaks
Start by ensuring every connection point—water supply, drain, and electrical—has a tight fit. When connecting the supply hose, apply a suitable liquid sealant designed for plumbing fittings, similar to tightening a screw with a bit of threadlocker to prevent loosening over time. Remember, using traditional thread tape alone might not suffice for upcoming standards; specialty sealants provide a more reliable seal and help avoid warranty voids.
I recall a time I was installing a new dishwasher last month, and I pre-lubricated all threaded fittings with high-quality liquid sealant before tightening. The water flow was smooth, and no leaks appeared afterward, saving me from potential water damage and keeping my warranty valid. When tightening, avoid overtightening, which can damage fittings, just like tightening a bolt too much might strip threads.
Using Correct Parts for Compatibility and Durability
Choosing Metal Over Plastic Fittings
Replace generic plastic couplers with brass or stainless steel equivalents, especially for critical connections like water inlet and drain fittings. Brass fittings resist corrosion and withstand pressure better, ensuring the integrity of your installation—and warranty coverage. For instance, switching to brass during a kitchen remodel saved me from frequent leaks caused by plastic fittings cracking under pressure; this maintenance step is essential and addresses future worries.
Check the recommended parts list to confirm you’re selecting the right components. Remember, reusing old plastic connectors can jeopardize your warranty, so always opt for new, certified parts.
Securing Connections to Avoid Future Damage
Properly tighten fittings using a wrench, but don’t overdo it—a good rule is finger-tight plus a quarter turn. Think of it like securing a lid: snug enough to prevent leaks but not so tight that it cracks under pressure. During my last install, I mistakenly over-tightened a drain fitting, which led to a tiny crack that caused slow leaks. I had to redo the connection with a new fitting, emphasizing the importance of balanced tightening.
Additionally, double-check the tension rings and clamps around hoses. Using a high-quality tension ring designed for dishwasher hoses ensures a leak-proof connection. Remember, cheap clamps might slip or cut into hoses, risking leaks that can void warranties. Visit this page to learn more about fitting securing techniques.
Verifying the Completeness of Installation
Before powering up, run a brief water test to check for leaks—similar to test-driving a new car. Observe all fitting areas carefully; if any drips appear, tighten or reseal immediately. Document the setup with clear photos, especially of critical fittings, to support warranty claims if needed. During my recent project, I snapped photos of all sealed connections before turning on the water, a step that proved invaluable when I had a minor issue later on.
Finally, keep a detailed record of parts used, installation dates, and serial numbers, as these documents are often required when filing warranty claims. For best practices, consult this guide to ensure your installation meets all warranty criteria—preventing avoidable issues down the line.
Many DIY enthusiasts and even seasoned contractors believe that simply following the basic installation steps guarantees warranty coverage and long-term performance. However, the nuanced details—often overlooked—can make or break your warranty validity and the durability of your dishwasher. One common misconception is that generic parts and shortcuts are harmless, but in reality, these small mistakes could void your warranty and lead to costly repairs.
Why Common Myths About Installation Persist
One pervasive myth is that inexpensive, off-brand fittings are just as reliable as OEM parts. In fact, using cheap plastic fittings instead of certified brass or stainless-steel alternatives increases the risk of leaks, corrosion, and ultimately warranty denial. A study published by the appliance repair experts highlights that incompatible or substandard parts are the leading cause of early appliance failures.
Are You Ignoring the Fine Print in Warranties?
Many assume that as long as the appliance is installed and powered on, the warranty remains valid. Yet, warranties often specify precise installation procedures, part specifications, and maintenance practices. Reusing old hoses, neglecting to record serial numbers, or skipping recommended calibration steps are all pitfalls that manufacturers scrutinize during warranty claims. For instance, neglecting to replace worn-out drain hoses with approved models can cause leaks that void warranty coverage if not addressed correctly. To ensure your installation aligns with manufacturer standards, review guides like this comprehensive checklist.
Another frequently missed detail is the importance of matching the correct parts during repairs or upgrades. Using incompatible parts—even if they seem similar—can trigger failure codes or safety hazards. For example, replacing a drain pump with an off-brand component might not meet the required pressure specifications, leading to breakdowns and warranty rejection. To avoid this, consult expert-recommended parts lists.
Advanced Mistakes That Cost You
One hidden trap is neglecting to calibrate smart sensors after installation. Modern dishwashers incorporate digital flow sensors and electronic controls that require precise calibration to function correctly. Omitting this step can cause false error messages, inefficient operation, or warranty denial. A recent report from industry specialists emphasizes that sensor calibration is often overlooked but crucial for compliance with new standards, especially in 2026 models and beyond. For detailed instructions, review this expert guide.
Furthermore, reusing outdated or incompatible parts, like old inlet valves or power cords, can introduce vulnerabilities. Not only might these parts fail prematurely, but they can also breach warranty terms that demand device-specific, certified components. When in doubt, always opt for new, manufacturer-approved parts, verified through resources like top selection tips.
Finally, documenting every step meticulously—including photographs of sealed fittings, serial numbers, and part receipts—serves as vital evidence if your warranty claim faces dispute. Industry data indicates that detailed records significantly increase the approval rate of warranty compensation, particularly for complex or high-value appliances.
In summary, understanding the nuances—from part selection and installation precision to calibration and record-keeping—is essential for safeguarding your warranty and ensuring durable dishwasher performance. Have you ever fallen into this trap? Let me know in the comments!
Tools I Trust for Ongoing Maintenance
Regularly maintaining your dishwasher requires more than just a screwdriver and a wrench. Over the years, I’ve found that investing in specific tools can save you time and prevent costly repairs. A high-quality digital multimeter, for example, allows me to diagnose electrical issues quickly, especially when troubleshooting control boards or sensors. I personally prefer models with auto-ranging capabilities, which help identify voltage irregularities without fuss. Additionally, a dedicated ultrasonic cleaner helps me remove mineral deposits and grease from components like spray arms and filters, ensuring your dishwasher operates efficiently and extends its lifespan.
Why I Recommend a Digital Flow Meter
Keeping an eye on water pressure and flow is critical, especially with the stricter standards introduced in 2026. A precise digital flow meter provides real-time data on water usage and pressure, helping me detect issues before they escalate. This tool is particularly useful for verifying whether your inlet valves open correctly or if your high loop drain is functioning optimally. Consistent monitoring with a flow meter aligns with future trends focusing on smart diagnostics—an area expected to grow as more dishwashers incorporate IoT features.
Effective Maintenance Methods to Extend Performance
Beyond tools, adopting disciplined maintenance routines can dramatically improve your dishwasher’s longevity. Regularly inspecting and cleaning parts like filters, spray arms, and inlet valves removes build-up that could cause leaks or blockages. I schedule quarterly checks, during which I run diagnostic tests using manufacturer-specific software, often available via apps linked with smart dishwashers. These digital tools help identify sensor drift or calibration needs, ensuring the machine remains compliant with warranty requirements and optimal performance standards.
How do I maintain my dishwasher over time?
Establish a routine of visual inspections, cleaning filters and spray arms, and using diagnostic software periodically. Keeping detailed logs of maintenance activities, including parts replaced or sensors calibrated, supports your warranty claims and future troubleshooting efforts. For comprehensive guidance, I recommend consulting this troubleshooting guide. Additionally, investing in quality parts—like brass fittings and certified control boards—can prevent many issues from arising.
Long-Term Results and Ready for Scaling
Consistent maintenance with the right tools not only prevents leaks and breakdowns but also prepares you for scaling operations if needed. Whether upgrading to a more advanced model or expanding your appliance setup, establishing a robust maintenance protocol ensures compatibility and sustainability. As the industry moves toward smarter appliances, integrating diagnostic apps and remote monitoring tools will become standard. Starting now with these best practices positions you ahead of the curve, making future upgrades seamless and warranty-compliant.
If you haven’t already, try calibrating your sensors with a diagnostic software tool combined with a digital flow meter. These steps can drastically cut down on unexpected failures and help you maintain warranty coverage. Imagine catching a minor pressure leak early through real-time data—it’s a game-changer in appliance maintenance and peace of mind.

Lessons That Changed My Approach to Dishwasher Setup
- Not all fittings are created equal: I learned the hard way that cheap plastic fittings can crack under pressure, voiding my warranty. Upgrading to brass fittings isn’t just a recommendation—it’s essential for durability in 2026 standards.
- Sealant matters more than I thought: Applying the right liquid sealant on connections ensures leak prevention and compliance. Overlooking this simple step can cost a lot down the line.
- Documentation is your safety net: Taking detailed photos and keeping receipts of parts and installation steps has saved me during warranty disputes. It’s a habit every DIYer should adopt.
- Sensor calibration is crucial: Modern dishwashers rely on smart sensors that need proper calibration after installation. Skipping this can cause errors and warranty issues.
My Proven Set of Tools for Seamless Dishwasher Maintenance
- Digital flow meter: It helps me monitor water pressure and flow, ensuring my installation remains compliant and efficient, especially with new 2026 regulations.
- Ultrasonic cleaner: Regularly cleaning spray arms and filters with this tool keeps my dishwasher running smoothly and prevents buildup that might void warranties.
- Multi-meter: Essential for diagnosing electrical issues, especially with smart control boards and sensors.
- Calibration software: Using manufacturer-recommended apps ensures my sensors are always correctly calibrated, preserving warranty validity.
Keep Moving Forward with Confidence and Care
Embracing these insights and tools empowers you to install and maintain your dishwasher confidently, ensuring it performs optimally and stays warranty-compliant well into the future. Remember, preparation, attention to detail, and proper parts selection are the cornerstones of success in the evolving landscape of appliance standards. Are you ready to take your installation skills to the next level? Share your experiences or questions below, and let’s build a community of knowledgeable DIYers!
,
Related Posts
How to Ensure Reliable Dishwasher Parts & Smooth Installation in 2025
Discovering the Secret to a Reliable Dishwasher: My Personal ExperienceLast…
Reliable Dishwasher Parts & Installation Guide for Lasting Trust in 2025
Discovering the Heart of My Dishwasher: A Personal ReflectionAs someone…
Smart Dishwasher Parts & Warranty: Installations & Repairs Simplified
My Journey with Smart Dishwasher Parts and Warranty: A Personal…