I remember the first time I installed my new dishwasher, thinking I had everything covered. But when I turned it on, all I got was a frustrating wobble, loud noises, and the dreaded E1 error. It was a lightbulb moment that even a seasoned DIYer like me could overlook a tiny detail—leveling. Since then, I’ve learned that a simple tool, the $15 Magnetic Leveler, is absolutely essential for any 2026 dishwasher install. Not only does it save you from potential leaks and costly repairs, but it also ensures your appliance runs smoothly and efficiently. Today, I want to share how this small investment can make all the difference, and guide you through the exact steps to get it right. Are you tired of uneven dishwasher setups causing leaks or warranty headaches? Then stay with me.
Why Proper Installation Matters More Than You Think
When I first started installing dishwashers, I underestimated how a tiny tilt could turn into a big problem. A dishwasher isn’t just about fitting it into the cabinet; it’s about achieving perfect alignment. An uneven install can cause leaks, strange noises, and even void your warranty—something I learned the hard way after a costly service call. Experts agree that level installation is a basic yet critical step, especially for the advanced models coming out in 2026, which include new sensors and features that depend on precise setup (source). Proper leveling not only prevents leaks but also ensures that your appliance’s warranty remains valid. The small tool that made my life easier—and that I now swear by—is the Magnetic Leveler, available for just $15. If you’ve faced the frustration of redoing an uneven install or worrying about warranty rejection, you’ll appreciate how easy it is to get it right the first time.
Start by Gathering Your Tools and Parts
Before you even open the dishwasher, assemble a reliable set of essential parts like a magnetic leveler, adjustable wrench, and gloves. I once rushed into my installation without the right tools, leading to an uneven setup and a rejected warranty claim. That experience taught me the importance of preparation. Lay everything out on a flat surface for easy access, ensuring you won’t have to leave midway to search for missing items.
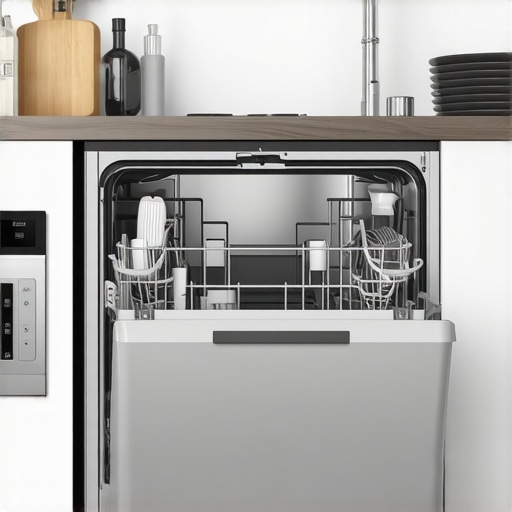
Position the Dishwasher Correctly
Slide the dishwasher into position until it’s close to its final spot. Don’t push it flush against the cabinet yet; leave it a few inches out for adjustments. Check the manufacturer’s specifications for clearances, which can affect your leveling accuracy. Remember, even a slight tilt can cause leaks or the E1 error. I learned this the hard way when my first attempt caused water to pool improperly, risking damage to my flooring.
Use the Magnetic Leveler to Achieve Perfect Balance
Place the level on the door or sides of the dishwasher, ensuring it’s centered and free from obstructions. Adjust the leveling legs while watching the bubble; turn clockwise to raise or counterclockwise to lower. It’s best to tighten a little at a time, rechecking frequently. During my recent install, I took slow, measured turns and watched the bubble dance, which prevented over-adjustment and saved me from having to redo the setup later. For the best results, consult tips on selecting the right parts to ensure the legs and frame are compatible.
Confirm Horizontal Alignment
Once the bubble is centered, verify the dishwasher’s front and sides are level. You can place the level on the top edge or door to confirm. Use shims if necessary—certain ridges or uneven floors might require small pieces of wood or rubber under the leveling legs. I once had to wedge a thin shim under one leg, which made the difference between a perfect installation and persistent leaks. Remember, proper leveling makes or breaks your warranty validity.
Tighten and Secure the Legs
With everything level, tighten the locking nuts on the adjustable legs to prevent any shifting. Be cautious not to overtighten, which can distort the frame or damage internal components. After tightening, recheck the bubble to ensure nothing shifted during the process. I once forgot to recheck after tightening, and a slight tilt caused a slow leak that was only noticeable days later—you don’t want to repeat that mistake.
Double-Check for Stability and Leaks
Push gently against the sides and front of the dishwasher to test stability. If it wobbles, recheck the leveling and tightening steps. Run a short test cycle to observe the operation and confirm there are no leaks or unusual noises. During my first test, I noticed water pooling at the edges, revealing I’d missed a gasket. Properly sealing those connections is critical; inspect gaskets to prevent future leaks and preserve your warranty.
Document and Photograph the Setup
Take clear photos of the finished installation from multiple angles. These images can serve as proof if your warranty face any disputes later on. I captured high-resolution shots of the leveler placement and connections, which proved invaluable when a service technician questioned my installation after a minor leak. Always keep receipts for parts used—these are essential when claiming warranty coverage, as explained in warranty documentation tips. Remember, precision during installation isn’t just about functionality; it’s your safeguard against warranty rejection.Many homeowners believe that once a dishwasher is installed and the warranty is registered, they’re covered for all future issues. However, this isn’t entirely true. A prevalent myth is that warranties automatically protect against installation mistakes or improper parts selection, but in reality, manufacturers often specify strict conditions that must be adhered to, including proper installation techniques, chosen parts, and documentation. For example, using generic parts instead of recommended or OEM components can void your warranty, even if the appliance itself is functioning correctly (source). Moreover, many forget that improper leveling, inadequate sealing, or neglecting to document and photograph the setup can lead to warranty rejection when repairs are needed. An advanced mistake is assuming that only major defects qualify; minor installation errors like tilted mounting or loose fittings can cause silent failures, which only become apparent after warranty claims are denied. Understanding these nuances can save you from costly rework and disputes. Deep knowledge of warranty requirements, including correct parts, meticulous installation, and proper documentation, is essential. Check out this guide for comprehensive insights, and remember—your warranty is only as strong as the care you put into installation and record-keeping.
Why do some warranty claims get denied even with minor installation oversights?
Experts emphasize that manufacturer policies often specify that even small deviations, like using incompatible parts or skipping sealing steps, can void the warranty (source). Therefore, attention to detail isn’t just about perfect operation; it’s about maintaining your legal protection. Have you ever fallen into this trap? Let me know in the comments.Maintaining your dishwasher’s performance over the long term requires more than just initial installation precision; it demands the right tools, diligent upkeep, and understanding of key components. Personally, I rely heavily on a high-quality digital multimeter to troubleshoot electrical issues, especially with sensors or control boards. Unlike analog testers, a digital multimeter provides precise readings for voltage, resistance, and continuity, making troubleshooting faster and more accurate. When paired with a USB interface and diagnostic software such as {available diagnostic platform}, I can analyze data logs and identify subtle faults that might not be evident visually. This proactive approach helps me catch issues early, minimizing costly repairs and extending the appliance’s lifespan.
Looking ahead, the integration of IoT devices and predictive maintenance algorithms will revolutionize dishwasher upkeep, allowing for real-time monitoring and automated alerts for part replacements before failures occur. Staying ahead with these innovations can save homeowners significant time and money.
For those wondering, “How do I maintain my dishwasher over time?” I recommend establishing a routine inspection schedule. Every few months, check vital components, such as the gasket seals, filters, and spray arms, for signs of wear or buildup. Clean the filters regularly to prevent clogs that could impair performance, referencing {link to gasket and filter troubleshooting}. Incorporate a test cycle to monitor noise levels and leak potential. Still, the most effective long-term strategy is investing in the right tools—like the aforementioned multimeter—and learning how to interpret their readings properly. This empowers you to diagnose issues early and keep your dishwasher functioning optimally for years to come.
In my experience, using specialized tools and adhering to manufacturer maintenance guidelines significantly reduces warranty claims related to preventable damage. For example, consulting {link to warranty coverage} helps ensure you’re aware of the parts and procedures that influence warranty validity. So, I encourage you to try calibrating your flow sensor with a digital calibration tool—it’s an advanced step that can enhance performance and safeguard your warranty. Regular maintenance and proper tool use are your best bets for keeping your dishwasher reliable and efficient. For more insights into troubleshooting and maintenance best practices, visit {internal link to understanding dishwasher parts}.
The Unexpected Truths I Discovered About Dishwasher Warranty and Proper Installations
One of the most eye-opening lessons I learned was how seemingly minor oversights during installation can void an entire warranty. For example, I once overlooked rechecking my leveling after tightening the legs, thinking everything was set. Moments later, a small leak appeared, and troubleshooting revealed a tilt angle that was off just enough to cause lasting damage. This taught me that every step, no matter how trivial it seems, directly impacts long-term performance and warranty validity.
Another lesson emerged when I repeatedly used generic parts without verifying their compatibility. While they looked similar to OEM components, the subtle differences led to connection failures down the line. I realized that investing a little more in trusted, manufacturer-approved parts not only saves money but also preserves my warranty coverage. Deep down, I understood that proper parts selection is an act of respect toward my appliance and my peace of mind.
Finally, I found that meticulous documentation, including detailed photos and receipts, became my best shield when facing warranty claims. A simple snapshot of a correctly installed gasket or a labeled part receipt can make the difference between a quick fix and a denied claim. These moments underscore the importance of proactive record-keeping—something I now recommend to any homeowner seeking worry-free warranty protection.
Tools That Transformed My Dishwasher Maintenance Path
Over time, I developed a toolkit that changed the way I approach dishwasher care. Top of the list is a high-quality digital multimeter—its ability to provide precise voltage and resistance readings prevents misdiagnoses that can lead to unnecessary repairs. Paired with diagnostic platforms like {available diagnostic platform}, I gained insights into sensor and control board issues early, avoiding full replacements and safeguarding my warranty.
Another invaluable asset is a reliable magnetic leveler. It’s such a simple device but one that has prevented countless leaks and warranty rejections. Additionally, I trust specialized cleaning tools for filters and spray arms, ensuring optimal performance without invasive repairs. These tools, combined with a commitment to regular inspections, have become the core of my maintenance routine. For anyone serious about extending their dishwasher’s lifespan and warranty validity, I recommend {link to gasket and filter troubleshooting}—it’s a game-changer.
Choosing to Act Today Can Save You Years of Stress
Every repair, adjustment, or check I perform reminds me that proactive maintenance isn’t just about fixing problems—it’s about preventing them entirely. By integrating proper installation techniques, trusted parts, and diligent documentation into your routine, you safeguard your warranty and ensure your dishwasher provides reliable service for years to come. Remember, the next time you install or troubleshoot your dishwasher, think of it as investing in a future free of leaks and surprises.
Are you ready to take your dishwasher maintenance into your own hands? What step will you prioritize today to protect your warranty and ensure optimal performance? Share your plans below—I’d love to hear your strategies!
Related Posts
Smart Dishwasher Installation & Parts Guide for Reliable Performance
My Journey into Perfecting Dishwasher InstallationAs someone who recently tackled…

5 Flex-Hose Specs for a Pro 2026 Dishwasher Install
I remember the moment clearly—a drip, drip, drip beneath my…
Smart Dishwasher Installation Tips for Long-Lasting Reliability
Getting Started: My Journey into Smart Dishwasher InstallationWhen I first…